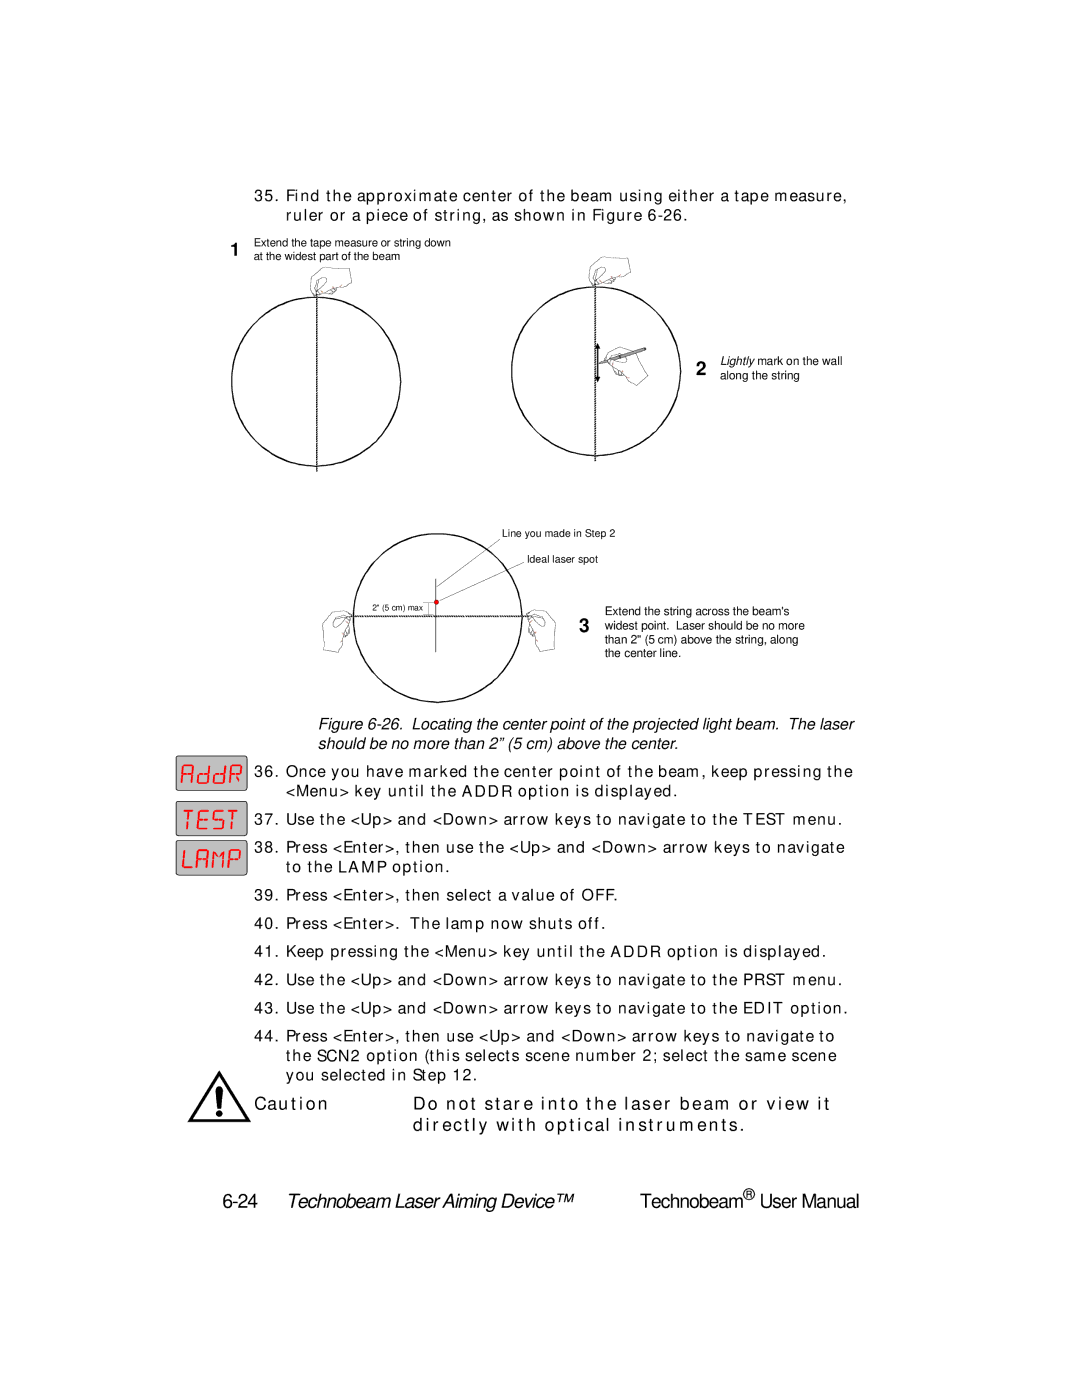
| 35. Find the approximate center of the beam using either a tape measure, |
| ruler or a piece of string, as shown in Figure |
1 | Extend the tape measure or string down |
at the widest part of the beam |
2 | Lightly mark on the wall |
along the string |
Line you made in Step 2
Ideal laser spot
2" (5 cm) max |
Extend the string across the beam's
3 widest point. Laser should be no more than 2" (5 cm) above the string, along the center line.
Figure 6-26. Locating the center point of the projected light beam. The laser should be no more than 2” (5 cm) above the center.
36. Once you have marked the center point of the beam, keep pressing the <Menu> key until the ADDR option is displayed.
![]() 37. Use the <Up> and <Down> arrow keys to navigate to the TEST menu.
37. Use the <Up> and <Down> arrow keys to navigate to the TEST menu.
38. Press <Enter>, then use the <Up> and <Down> arrow keys to navigate to the LAMP option.
39.Press <Enter>, then select a value of OFF.
40.Press <Enter>. The lamp now shuts off.
41.Keep pressing the <Menu> key until the ADDR option is displayed.
42.Use the <Up> and <Down> arrow keys to navigate to the PRST menu.
43.Use the <Up> and <Down> arrow keys to navigate to the EDIT option.
44.Press <Enter>, then use <Up> and <Down> arrow keys to navigate to the SCN2 option (this selects scene number 2; select the same scene you selected in Step 12.
Caution | Do not stare into the laser beam or view it |
| directly with optical instruments. |
| Technobeam® User Manual |