Chapter 6 Reprogramming The Security Key
A
A
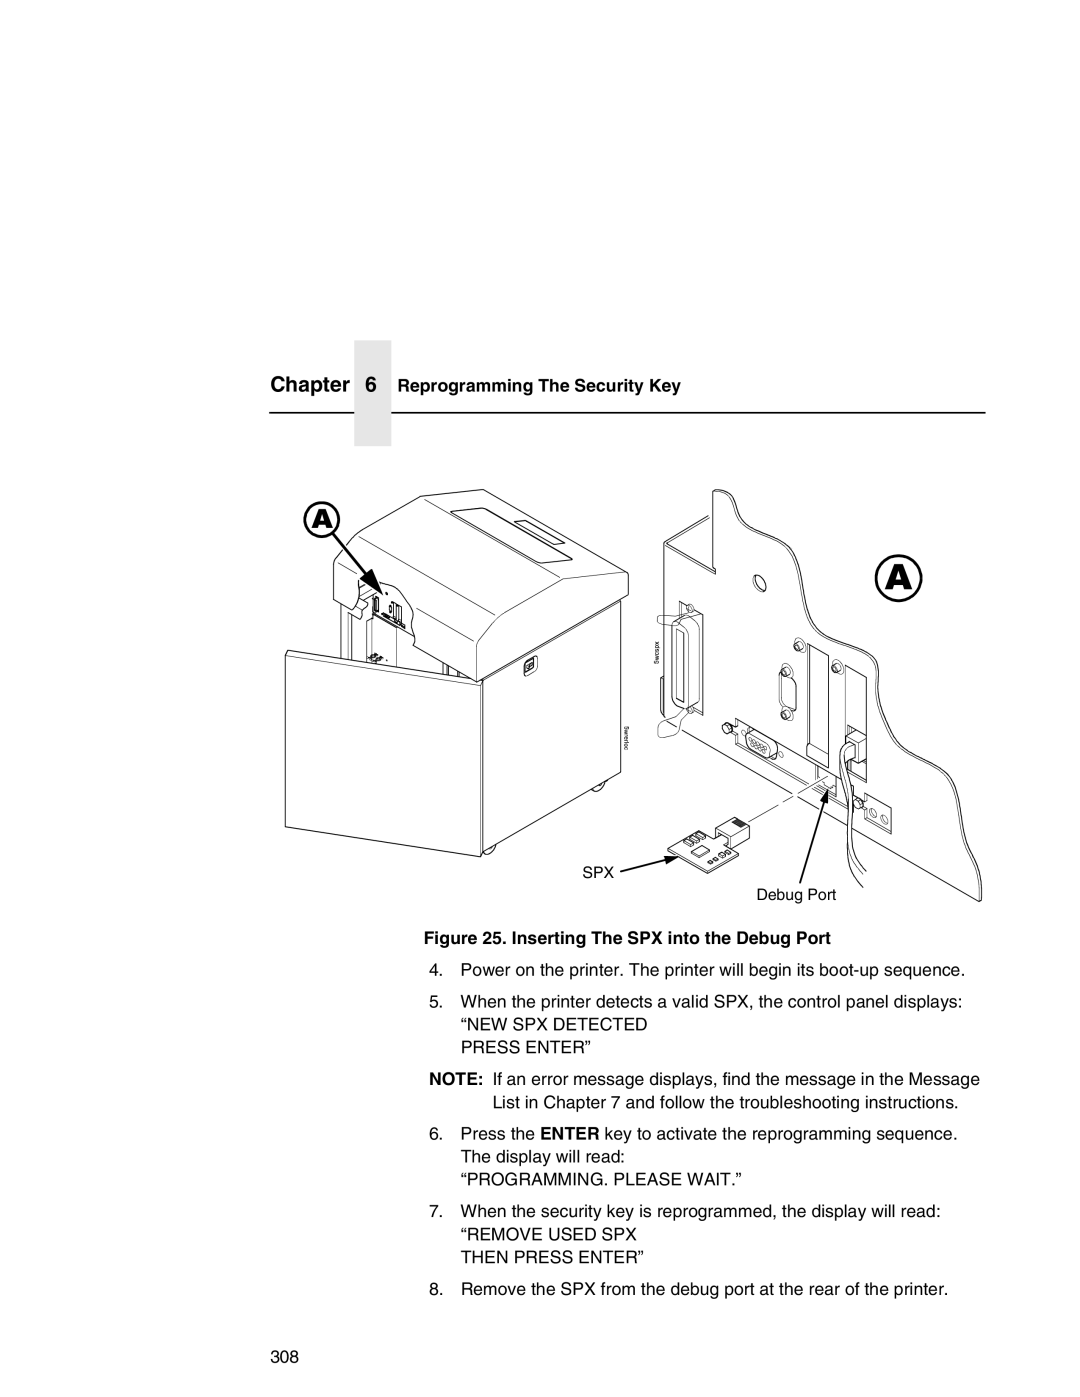
SPX ![]()
![]()
Debug Port
Figure 25. Inserting The SPX into the Debug Port
4.Power on the printer. The printer will begin its
5.When the printer detects a valid SPX, the control panel displays:
“NEW SPX DETECTED PRESS ENTER”
NOTE: If an error message displays, find the message in the Message List in Chapter 7 and follow the troubleshooting instructions.
6.Press the ENTER key to activate the reprogramming sequence. The display will read:
“PROGRAMMING. PLEASE WAIT.”
7.When the security key is reprogrammed, the display will read:
“REMOVE USED SPX THEN PRESS ENTER”
8.Remove the SPX from the debug port at the rear of the printer.
308