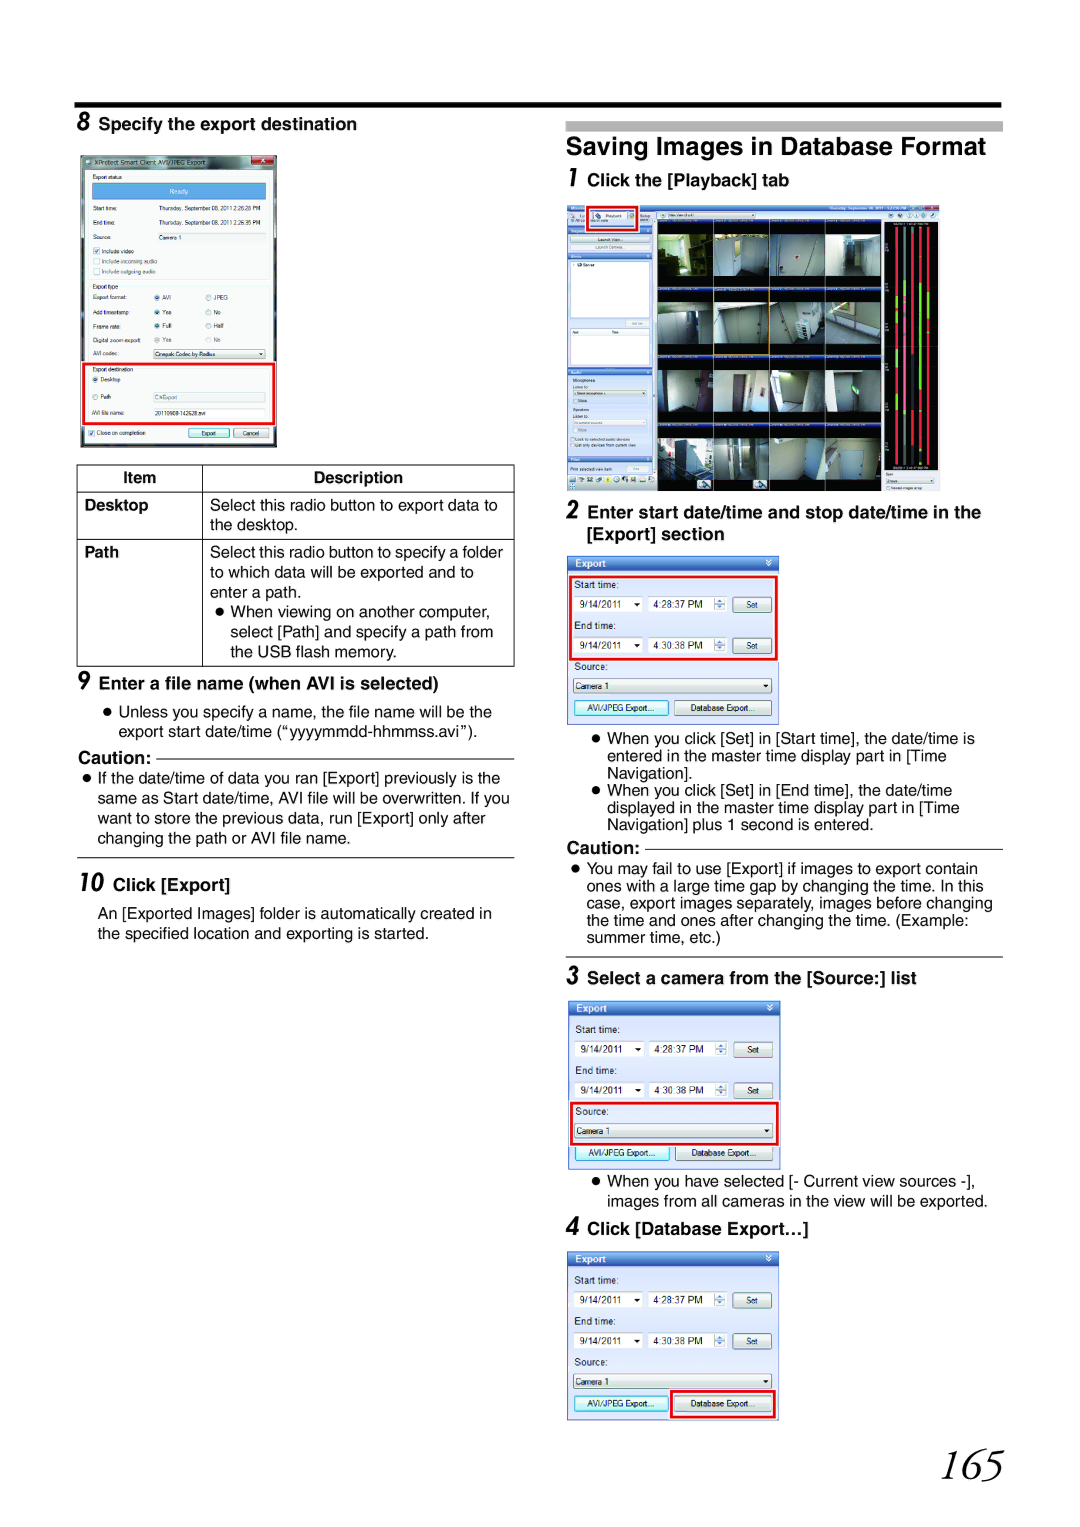
8 Specify the export destination
Item | Description |
Desktop | Select this radio button to export data to |
| the desktop. |
|
|
Path | Select this radio button to specify a folder |
| to which data will be exported and to |
| enter a path. |
| ● When viewing on another computer, |
| select [Path] and specify a path from |
| the USB flash memory. |
9 Enter a file name (when AVI is selected)
●Unless you specify a name, the file name will be the export start date/time
Caution:
●If the date/time of data you ran [Export] previously is the same as Start date/time, AVI file will be overwritten. If you want to store the previous data, run [Export] only after changing the path or AVI file name.
10 Click [Export]
An [Exported Images] folder is automatically created in the specified location and exporting is started.
Saving Images in Database Format 1
2
●When you click [Set] in [Start time], the date/time is entered in the master time display part in [Time Navigation].
●When you click [Set] in [End time], the date/time displayed in the master time display part in [Time Navigation] plus 1 second is entered.
Caution:
●You may fail to use [Export] if images to export contain ones with a large time gap by changing the time. In this case, export images separately, images before changing the time and ones after changing the time. (Example: summer time, etc.)
3 Select a camera from the [Source:] list
●When you have selected [- Current view sources
4 Click [Database Export…]