[WARNING:HDD(E) Deleted] appears and the WARNING indicator lights up.
10 Click [OK] to close the window
11 Right-click [Unallocated], and select [New Simple Volume]
The [New Simple Volume Wizard] window appears.
74
Click [Yes]
9
<Recorder Part> Applications
Adding an HDD (continued)
Building a RAID Configuration (continued)
5 Confirm that the [Disk 0] check box is selected, and click [OK]
The [Disks to Convert] window appears.
6 Click [Convert], and click [Yes] on the confirmation screen
7 Right-click [(E:)], and select [Change Drive Letter and Paths...]
The [Change Drive Letter and Paths for E: ()] window appears.
8 Confirm that [(E:)] is selected, and click [Remove]
The confirmation screen appears.
12 Click [Next]
On the [Specify Volume Size] window, click [Next] to proceed to the next.
On the [Assign Drive Letter or Path] window, click [Next] to proceed to the next.
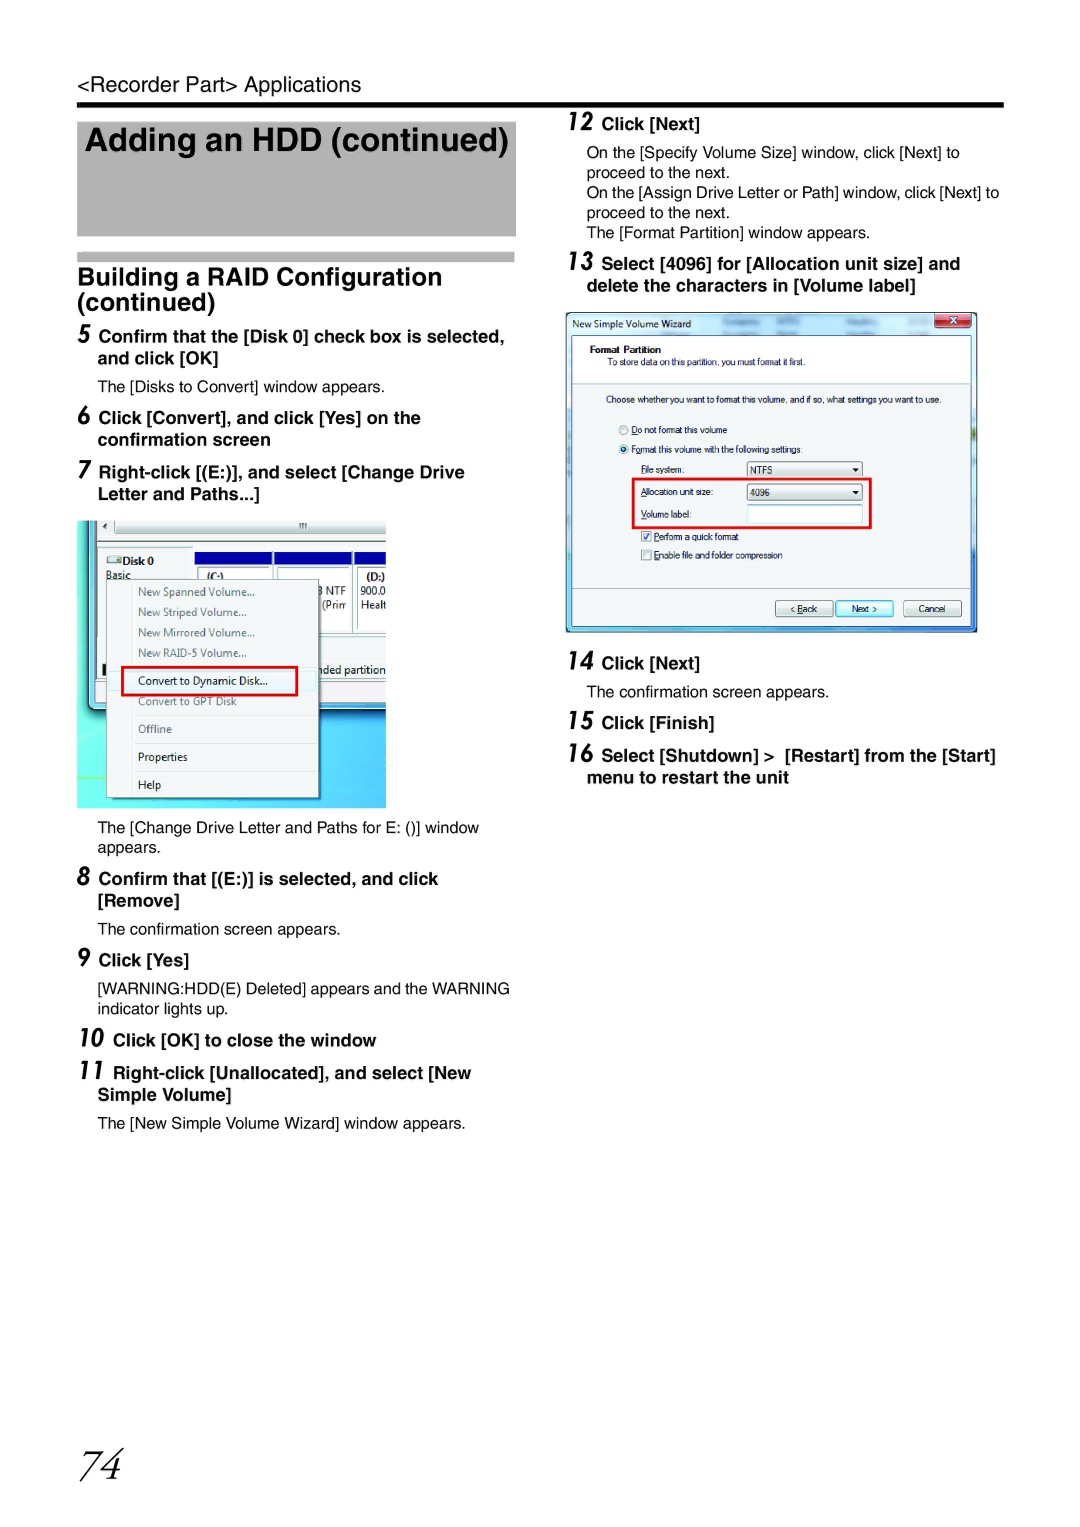
The [Format Partition] window appears.
13 Select [4096] for [Allocation unit size] and delete the characters in [Volume label]
14 Click [Next]
The confirmation screen appears.
15 Click [Finish]
16 Select [Shutdown] > [Restart] from the [Start] menu to restart the unit