Viewing Recorded Images
Notes:
●The recording frame rate may decrease during operations in the playback screen.
●When there is frequent access to the HDD, i.e. recorded images are played back at the same time with recording, playback images or audio sounds may be interrupted. (This does not affect recording to this unit of additional HDD.)
●When returning to the playback screen from the setting screen, the microphone selection for the [Audio] section may return to [None]. Reselect the microphone.
●Use the same time zone for the computer and this unit. When you play back recorded images on a computer with different time zone, the time of recorded images of this unit will be converted to the computer’s time zone.
●If you want to change the time zone from date and time settings, click the [×] button to exit the Smart Client and restart.
Displaying the Playback Screen
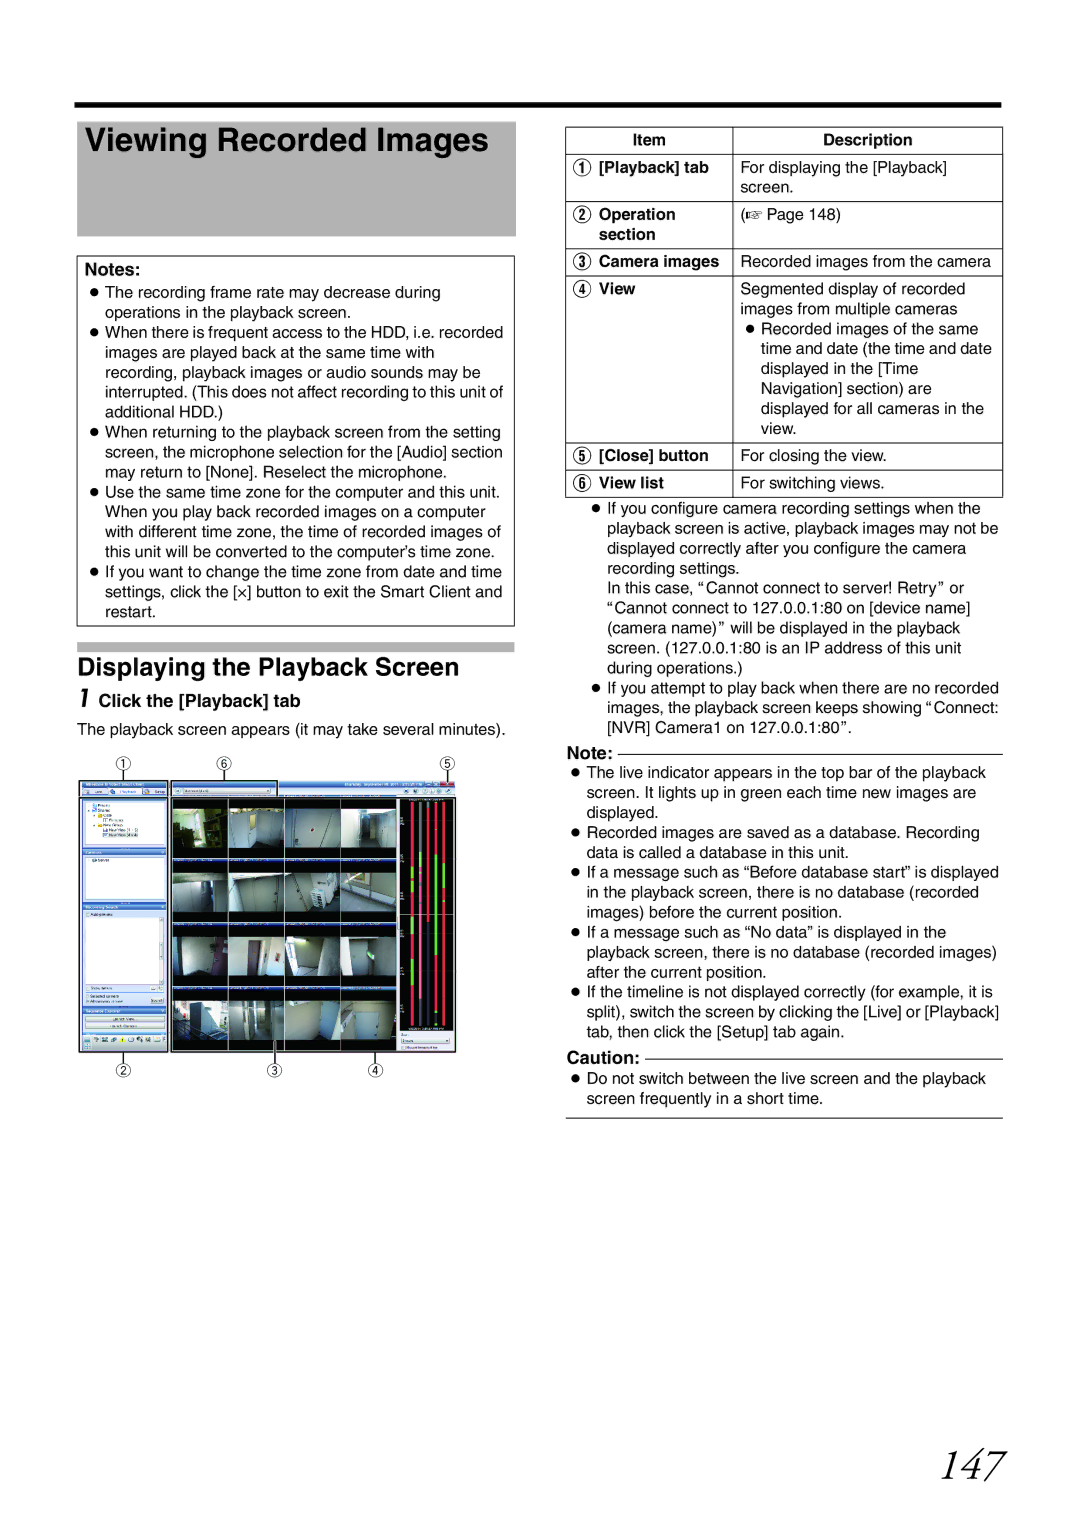
1 Click the [Playback] tab
The playback screen appears (it may take several minutes).
1 | 6 | 5 | ||
|
|
|
|
|
|
|
|
|
|
|
|
|
|
|
|
|
|
|
|
2 | 3 | 4 |
Item | Description |
|
|
A [Playback] tab | For displaying the [Playback] |
| screen. |
|
|
B Operation | (A Page 148) |
section |
|
|
|
C Camera images | Recorded images from the camera |
|
|
D View | Segmented display of recorded |
| images from multiple cameras |
| ● Recorded images of the same |
| time and date (the time and date |
| displayed in the [Time |
| Navigation] section) are |
| displayed for all cameras in the |
| view. |
|
|
E [Close] button | For closing the view. |
|
|
F View list | For switching views. |
|
|
●If you configure camera recording settings when the playback screen is active, playback images may not be displayed correctly after you configure the camera recording settings.
In this case, ACannot connect to server! RetryB or ACannot connect to 127.0.0.1:80 on [device name] (camera name)B will be displayed in the playback screen. (127.0.0.1:80 is an IP address of this unit during operations.)
●If you attempt to play back when there are no recorded images, the playback screen keeps showing AConnect: [NVR] Camera1 on 127.0.0.1:80B.
Note:
●The live indicator appears in the top bar of the playback screen. It lights up in green each time new images are displayed.
●Recorded images are saved as a database. Recording data is called a database in this unit.
●If a message such as “Before database start” is displayed in the playback screen, there is no database (recorded images) before the current position.
●If a message such as “No data” is displayed in the playback screen, there is no database (recorded images) after the current position.
●If the timeline is not displayed correctly (for example, it is split), switch the screen by clicking the [Live] or [Playback] tab, then click the [Setup] tab again.
Caution:
●Do not switch between the live screen and the playback screen frequently in a short time.