Tuner Configuration
Select Satellites
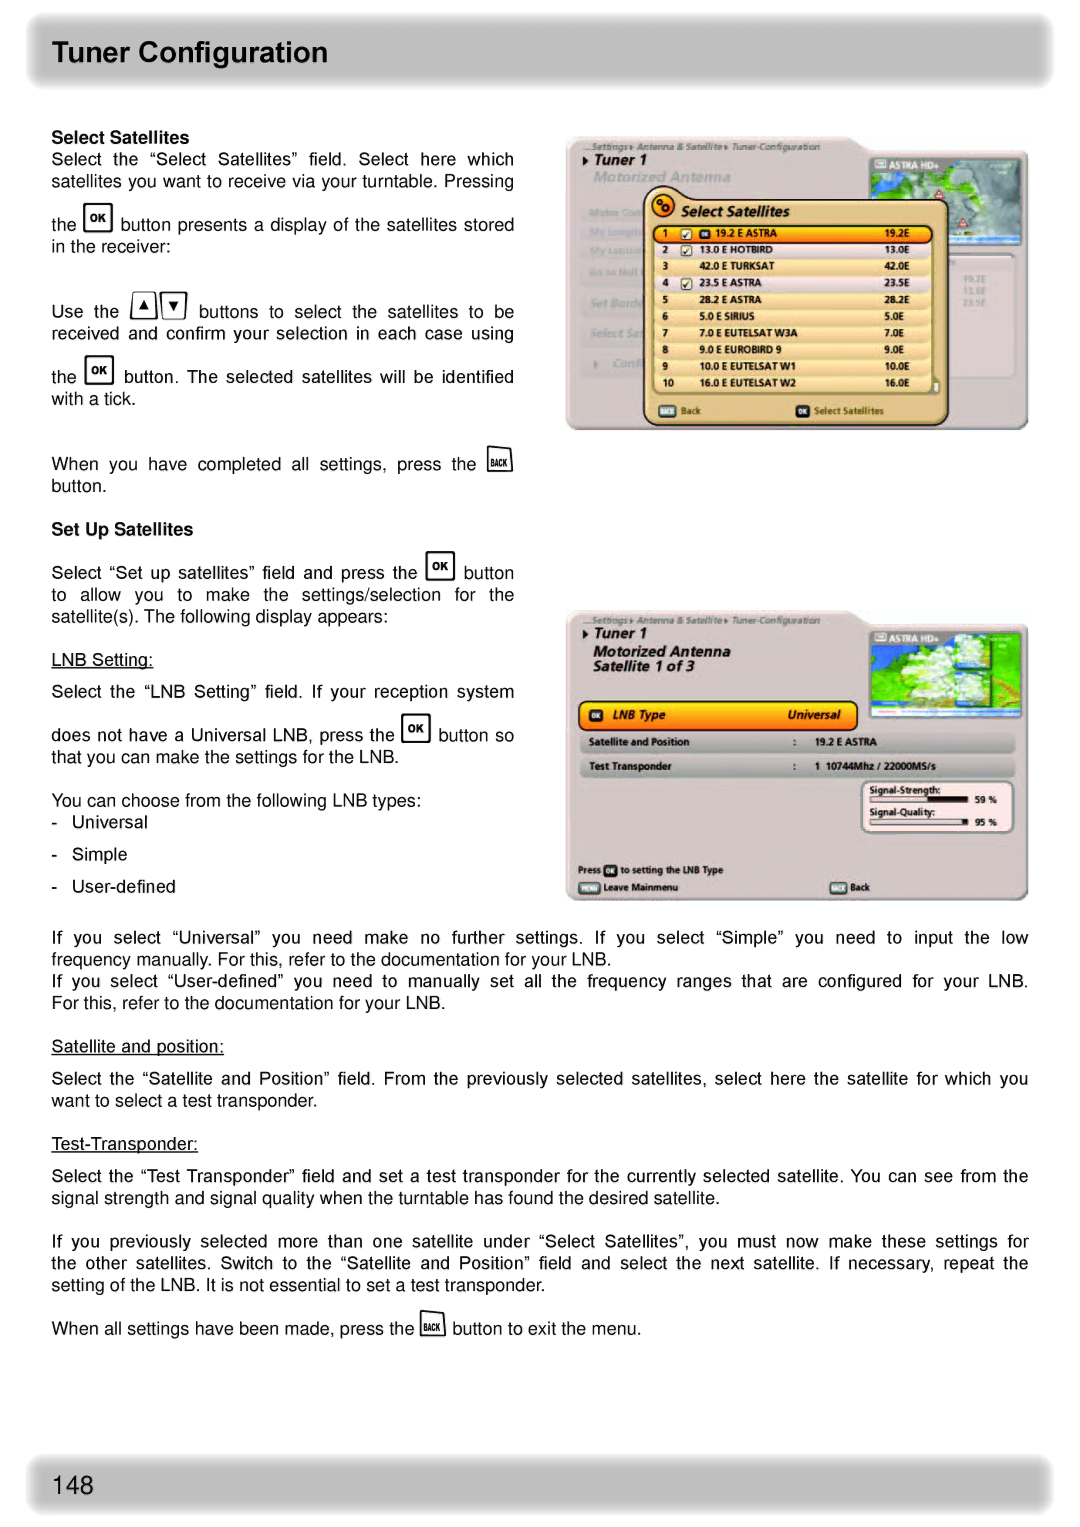
Select the “Select Satellites” field. Select here which satellites you want to receive via your turntable. Pressing
the button presents a display of the satellites stored in the receiver:
Use the buttons to select the satellites to be received and confirm your selection in each case using
the button. The selected satellites will be identified with a tick.
When you have completed all settings, press the button.
Set Up Satellites
Select “Set up satellites” field and press the button to allow you to make the settings/selection for the satellite(s). The following display appears:
LNB Setting:
Select the “LNB Setting” field. If your reception system
does not have a Universal LNB, press the button so that you can make the settings for the LNB.
You can choose from the following LNB types:
-Universal
-Simple
-
If you select “Universal” you need make no further settings. If you select “Simple” you need to input the low frequency manually. For this, refer to the documentation for your LNB.
If you select
Satellite and position:
Select the “Satellite and Position” field. From the previously selected satellites, select here the satellite for which you want to select a test transponder.
Select the “Test Transponder” field and set a test transponder for the currently selected satellite. You can see from the signal strength and signal quality when the turntable has found the desired satellite.
If you previously selected more than one satellite under “Select Satellites”, you must now make these settings for the other satellites. Switch to the “Satellite and Position” field and select the next satellite. If necessary, repeat the setting of the LNB. It is not essential to set a test transponder.
When all settings have been made, press the button to exit the menu.
