Installing the AN/DC
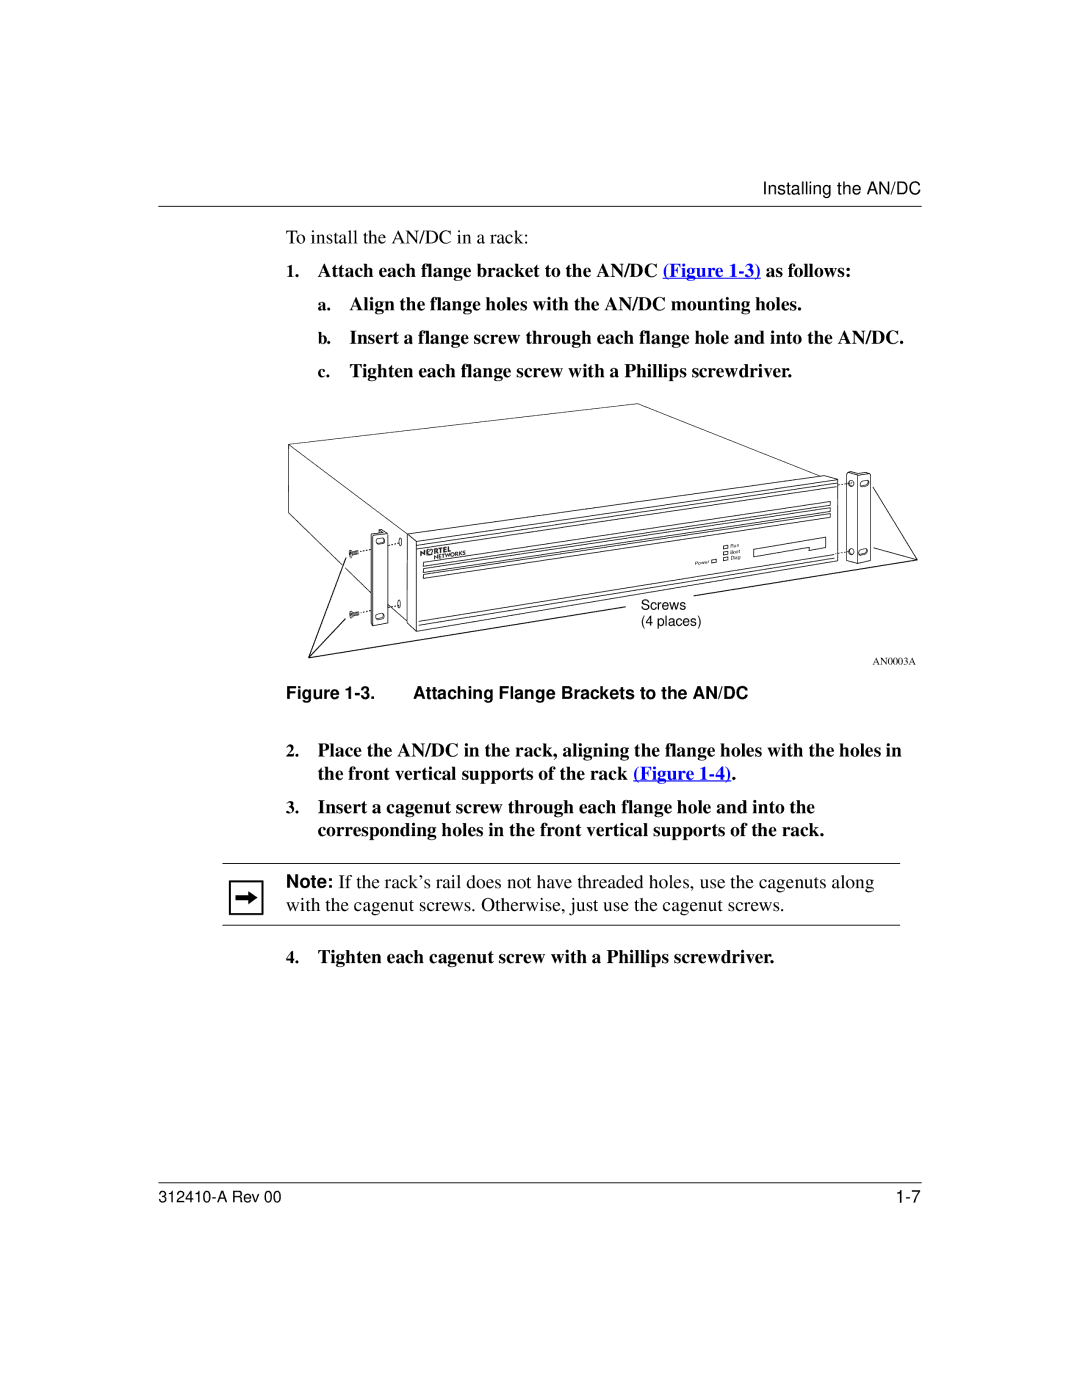
To install the AN/DC in a rack:
1.Attach each flange bracket to the AN/DC (Figure
a.Align the flange holes with the AN/DC mounting holes.
b.Insert a flange screw through each flange hole and into the AN/DC.
c.Tighten each flange screw with a Phillips screwdriver.
Run
Boot
Diag
Power
Screws (4 places)
AN0003A
Figure 1-3. Attaching Flange Brackets to the AN/DC
2.Place the AN/DC in the rack, aligning the flange holes with the holes in the front vertical supports of the rack (Figure
3.Insert a cagenut screw through each flange hole and into the corresponding holes in the front vertical supports of the rack.
Note: If the rack’s rail does not have threaded holes, use the cagenuts along with the cagenut screws. Otherwise, just use the cagenut screws.