Nortel Networks AN/DC manual Mounting the ANH-8/DC on a Wall

Models: AN/DC

1 150
Download 150 pages 33.07 Kb
Page 52
Image 52

Installing and Operating AN/DC and ANH-8/DC Systems

Mounting the ANH-8/DC on a Wall

For this procedure, you need

Two flange brackets and four #6 roundhead screws (shipped with the ANH-8/DC)

Four to eight wall anchor screws (not shipped with the ANH-8/DC)

A Phillips screwdriver

Complete the following steps:

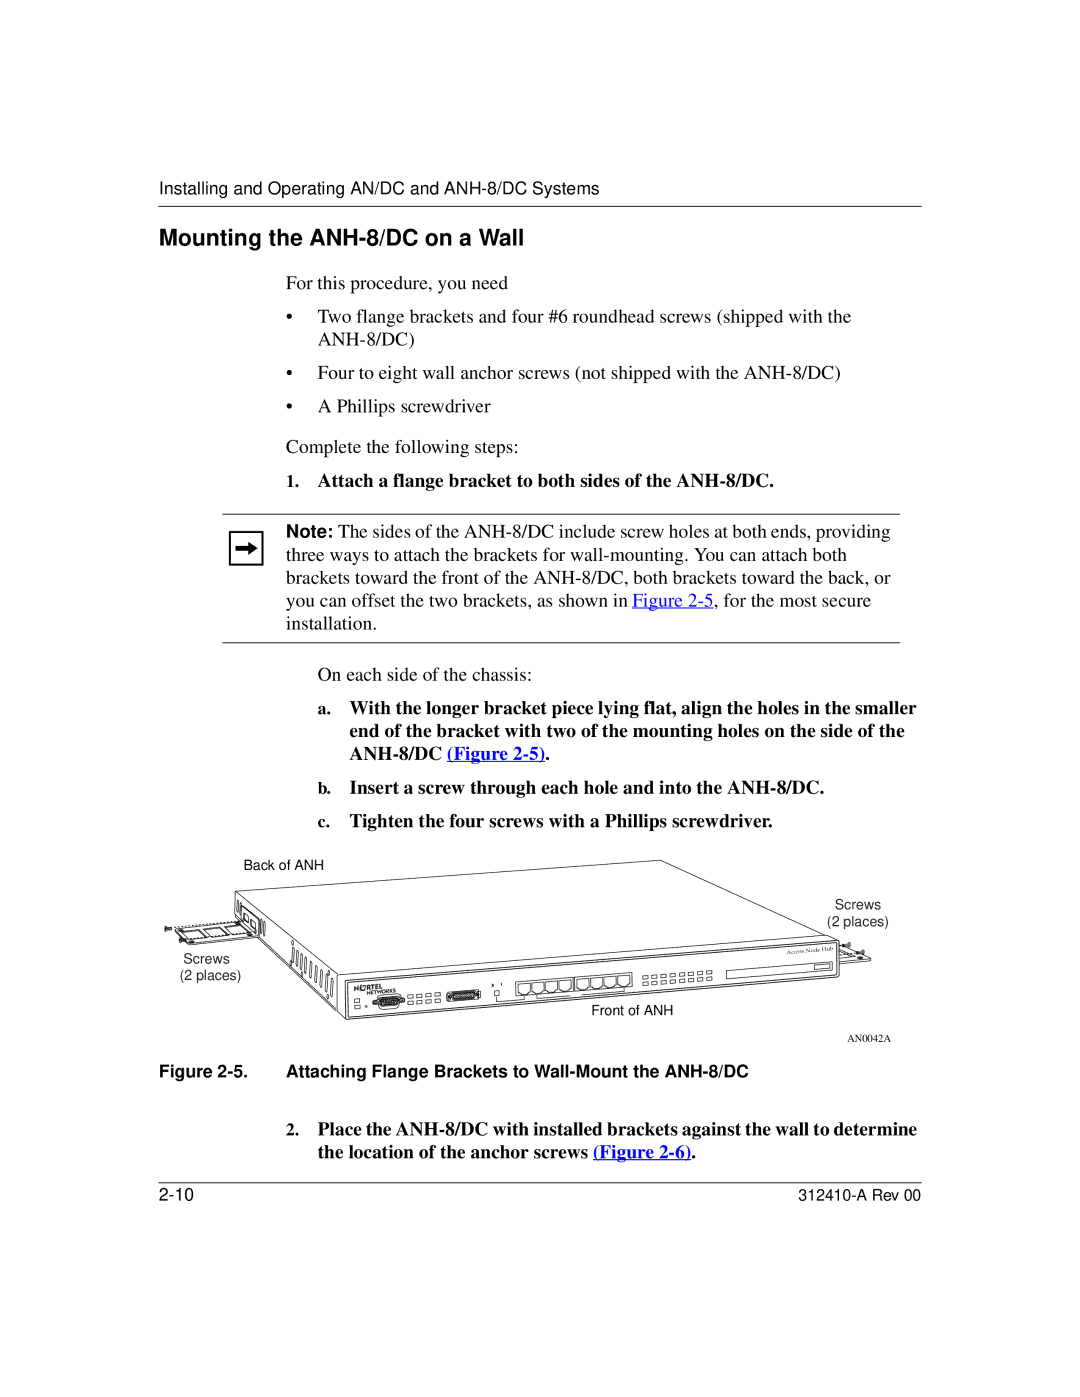
1.Attach a flange bracket to both sides of the ANH-8/DC.

Note: The sides of the ANH-8/DC include screw holes at both ends, providing three ways to attach the brackets for wall-mounting. You can attach both brackets toward the front of the ANH-8/DC, both brackets toward the back, or you can offset the two brackets, as shown in Figure 2-5, for the most secure installation.

On each side of the chassis:

a.With the longer bracket piece lying flat, align the holes in the smaller end of the bracket with two of the mounting holes on the side of the ANH-8/DC (Figure 2-5).

b.Insert a screw through each hole and into the ANH-8/DC.

c.Tighten the four screws with a Phillips screwdriver.

Back of ANH

Screws

(2 places)

Screws (2 places)

Front of ANH

AN0042A

Figure 2-5. Attaching Flange Brackets to Wall-Mount the ANH-8/DC

2.Place the ANH-8/DC with installed brackets against the wall to determine the location of the anchor screws (Figure 2-6).

2-10

312410-A Rev 00

Page 52
Image 52
Nortel Networks AN/DC manual Mounting the ANH-8/DC on a Wall, Attaching Flange Brackets to Wall-Mount the ANH-8/DC