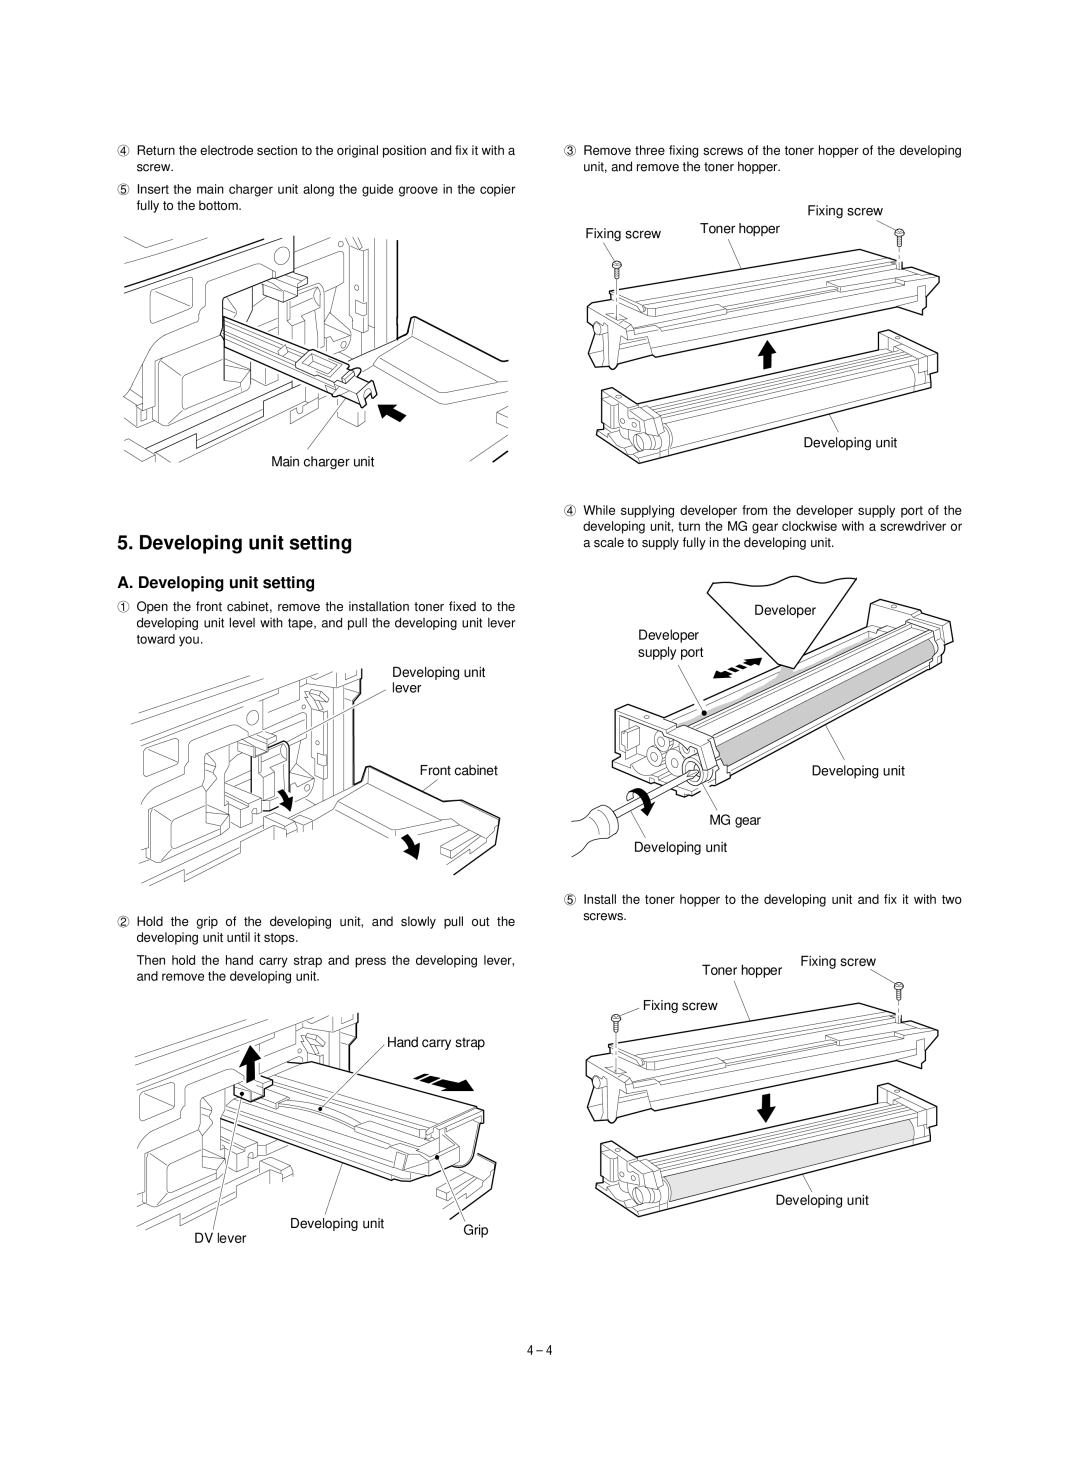
4Return the electrode section to the original position and fix it with a screw.
5Insert the main charger unit along the guide groove in the copier fully to the bottom.
Main charger unit
5. Developing unit setting
A. Developing unit setting
1Open the front cabinet, remove the installation toner fixed to the developing unit level with tape, and pull the developing unit lever toward you.
Developing unit lever
Front cabinet
3Remove three fixing screws of the toner hopper of the developing unit, and remove the toner hopper.
Fixing screw
Fixing screw | Toner hopper |
|
Developing unit
4While supplying developer from the developer supply port of the developing unit, turn the MG gear clockwise with a screwdriver or a scale to supply fully in the developing unit.
Developer
Developer supply port
Developing unit
MG gear
Developing unit
2 Hold the grip of the developing unit, and slowly pull out the |
developing unit until it stops. |
5Install the toner hopper to the developing unit and fix it with two screws.
Then hold the hand carry strap and press the developing lever, |
and remove the developing unit. |
Hand carry strap
Toner hopper
Fixing screw
Fixing screw
DV lever | Developing unit | Grip |
| ||
|
|
Developing unit
4 – 4
