Chapter 4 Control Panel Functions
4.18 DISK Menu
Note: This menu selection will only appear if an optional hard disk drive or compact flash has been installed. See “User Flash, Compact Flash and Hard Disk Options” for more details.
The Disk Menu provides access to the printer settings that are related to the optional Hard Disk. Use the following procedure to enter the Disk Menu:
1.Press the MENU button on the control panel.
2.Press the NEXT button until the text “Disk Menu” is shown on the sec- ond line of the display.
3.Press the SELECT button to enter the DISK menu.
4.Press the NEXT button to move through the submenus: Print, Delete, Format Disk and Disk Summary.
5.Press the SELECT button to enter a submenu.
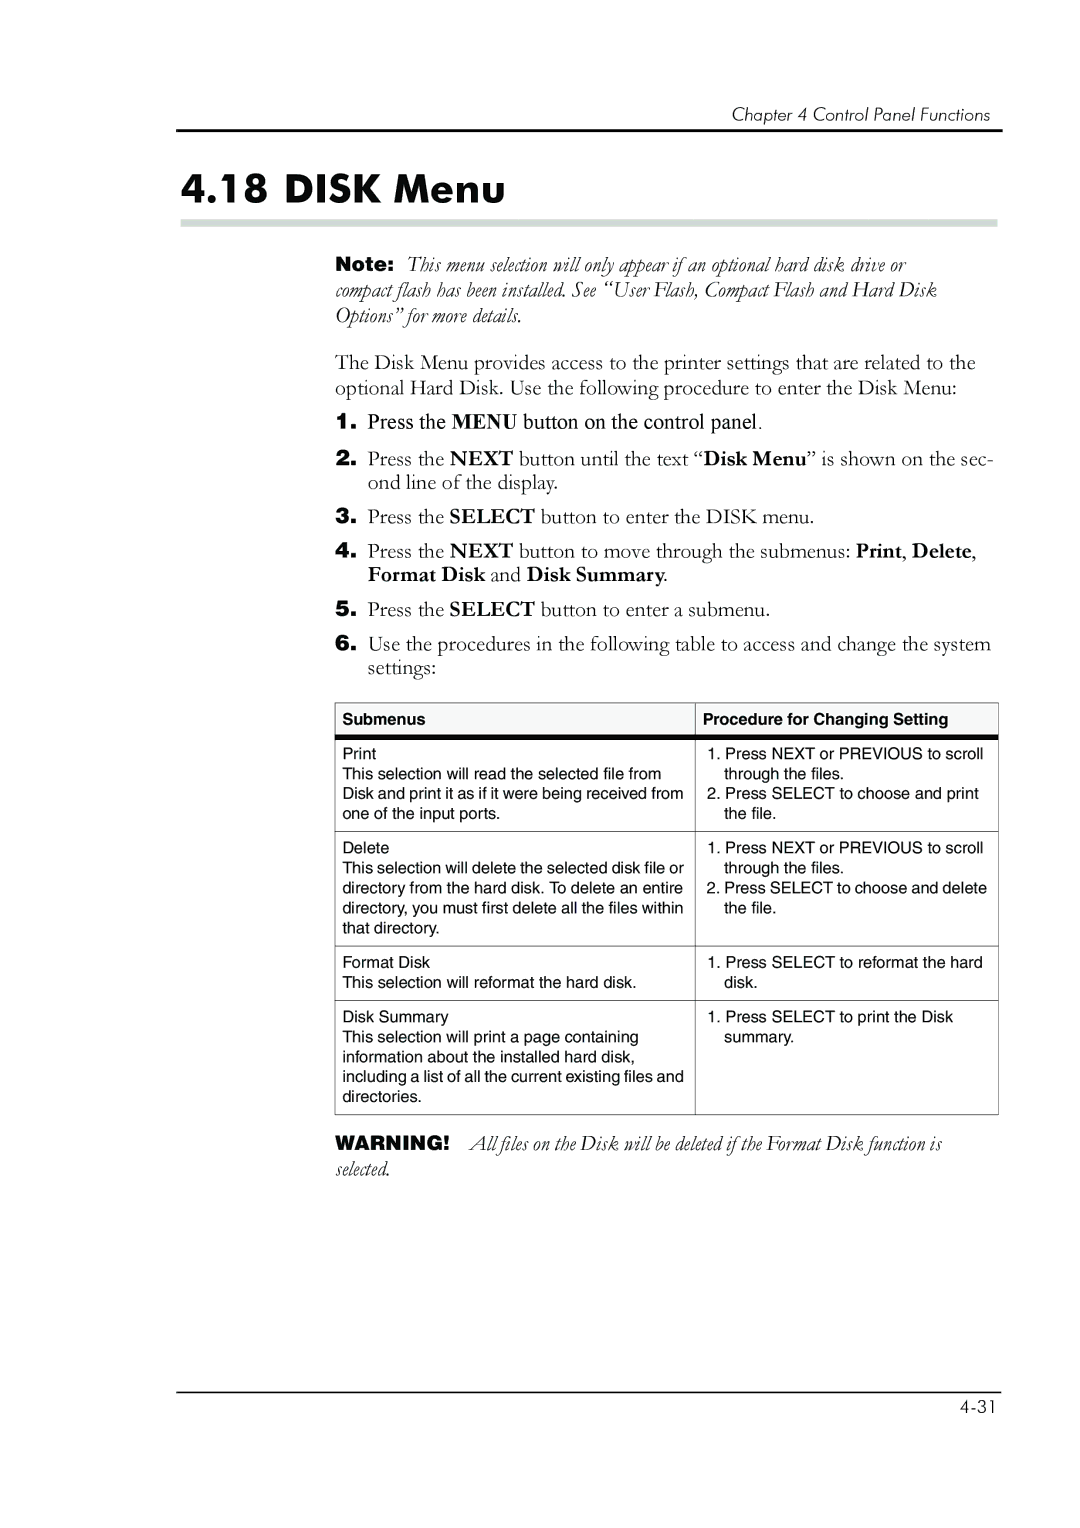
6.Use the procedures in the following table to access and change the system settings:
Submenus | Procedure for Changing Setting | |
|
|
|
1. | Press NEXT or PREVIOUS to scroll | |
This selection will read the selected file from |
| through the files. |
Disk and print it as if it were being received from | 2. | Press SELECT to choose and print |
one of the input ports. |
| the file. |
|
|
|
Delete | 1. | Press NEXT or PREVIOUS to scroll |
This selection will delete the selected disk file or |
| through the files. |
directory from the hard disk. To delete an entire | 2. Press SELECT to choose and delete | |
directory, you must first delete all the files within |
| the file. |
that directory. |
|
|
|
|
|
Format Disk | 1. | Press SELECT to reformat the hard |
This selection will reformat the hard disk. |
| disk. |
|
|
|
Disk Summary | 1. | Press SELECT to print the Disk |
This selection will print a page containing |
| summary. |
information about the installed hard disk, |
|
|
including a list of all the current existing files and |
|
|
directories. |
|
|
|
|
|
WARNING! All files on the Disk will be deleted if the Format Disk function is selected.