Using the OfficeJet Setup Menu
When you choose OfficeJet Setup from the main HP OfficeJet LX Manager menu bar, a
Note: Before changing settings, you may want to print the Menu Settings Report or the Self Test Report to review your
Using Send Fax Setup
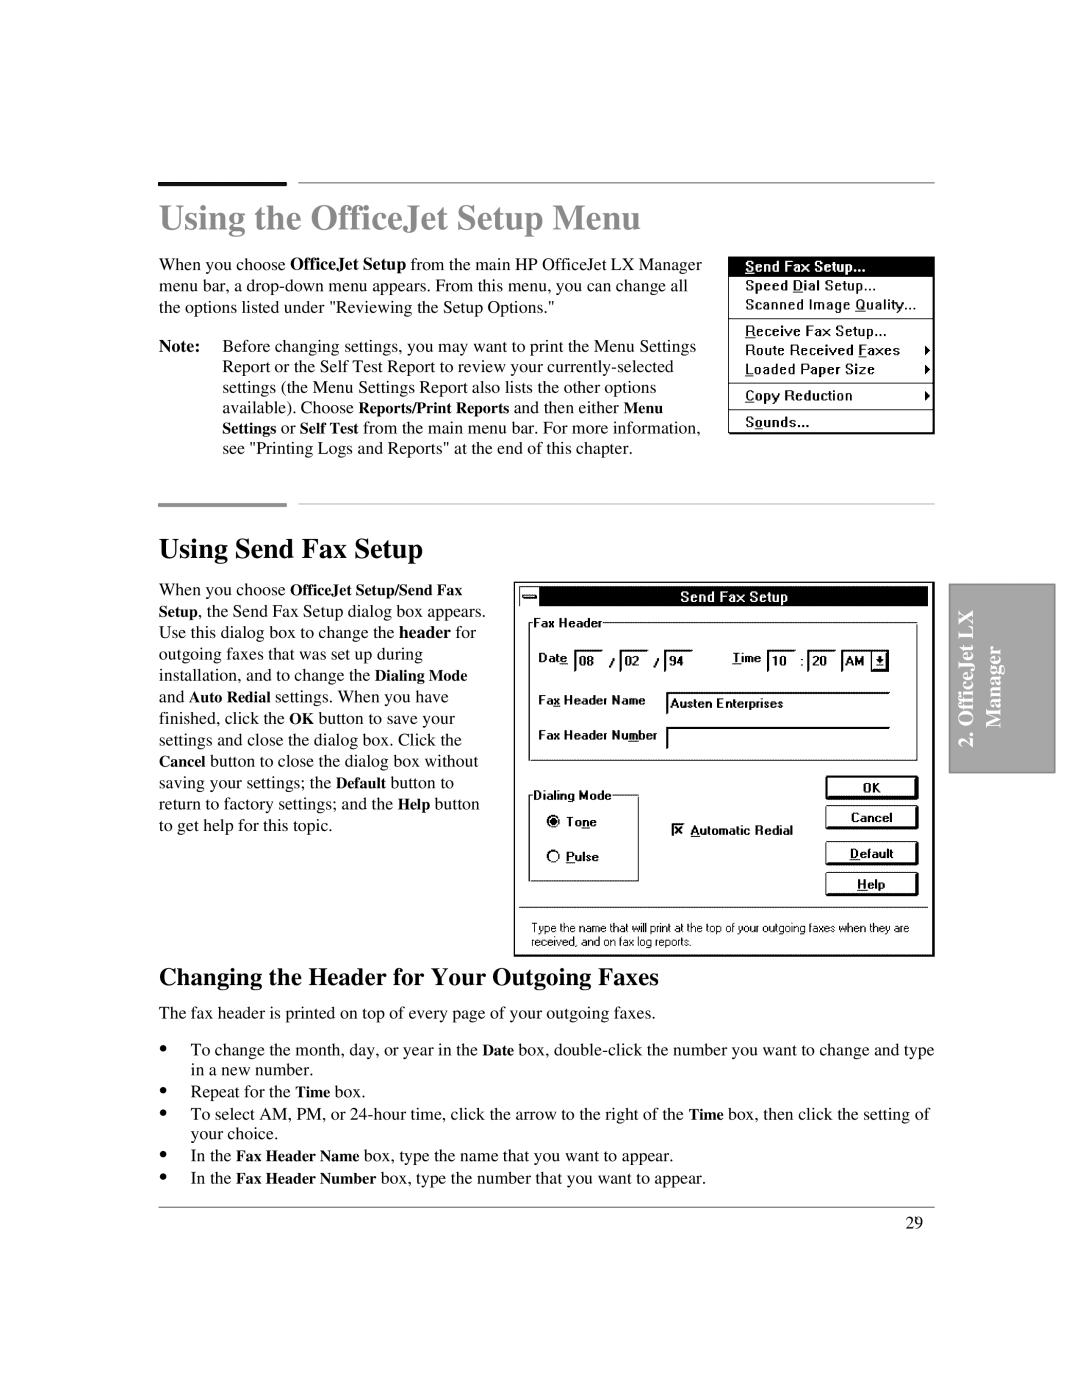
When you choose OfficeJet Setup/Send Fax Setup, the Send Fax Setup dialog box appears. Use this dialog box to change the header for outgoing faxes that was set up during installation, and to change the Dialing Mode and Auto Redial settings. When you have finished, click the OK button to save your settings and close the dialog box. Click the Cancel button to close the dialog box without saving your settings; the Default button to return to factory settings; and the Help button to get help for this topic.
OfficeJet LX | Manager |
2. |
|
|
|
Changing the Header for Your Outgoing Faxes
The fax header is printed on top of every page of your outgoing faxes.
:To change the month, day, or year in the Date box,
:Repeat for the Time box.
:To select AM, PM, or
:In the Fax Header Name box, type the name that you want to appear.
:In the Fax Header Number box, type the number that you want to appear.
2`9