Using Phonebooks
A phonebook is a list of names, fax numbers, and related information. Eclipse FAX SE comes with one phonebook, Phonebook 1. You can create as many as five additional phonebooks in Eclipse FAX SE, for a total of six phonebooks. (You can also delete Phonebook 1, if you wish, and add six new phonebooks.) For example, you might want to add one phonebook for colleagues, another for clients, and a third for vendors.
Note: The phonebooks that you create in Eclipse FAX SE can be used with PC faxes only. For paper faxes, you must either use a Speed Dial entry or dial the number on the control panel. For more information, see "Using Speed Dial Setup (for Paper Faxes Only) " in chapter 2, and "Sending a Fax" in chapter 3.
Adding a New Phonebook
Follow these steps to add your first phonebook and to add additional phonebooks.
Note: There are several alternatives to typing phonebook entries in Eclipse FAX SE. If you already have a Winfax or CAS phonebook, you can import it directly into Eclipse FAX SE. You may also be able to import entries from an existing file that contains names, phone numbers, and fax numbers. Or, you can use another application to create your entries, and then import them into Eclipse FAX SE. See "Importing Names and Fax Numbers into Eclipse FAX SE" for more information.
1.If necessary, open Eclipse FAX SE. (Remember that the HP OfficeJet LX Manager must be running.)
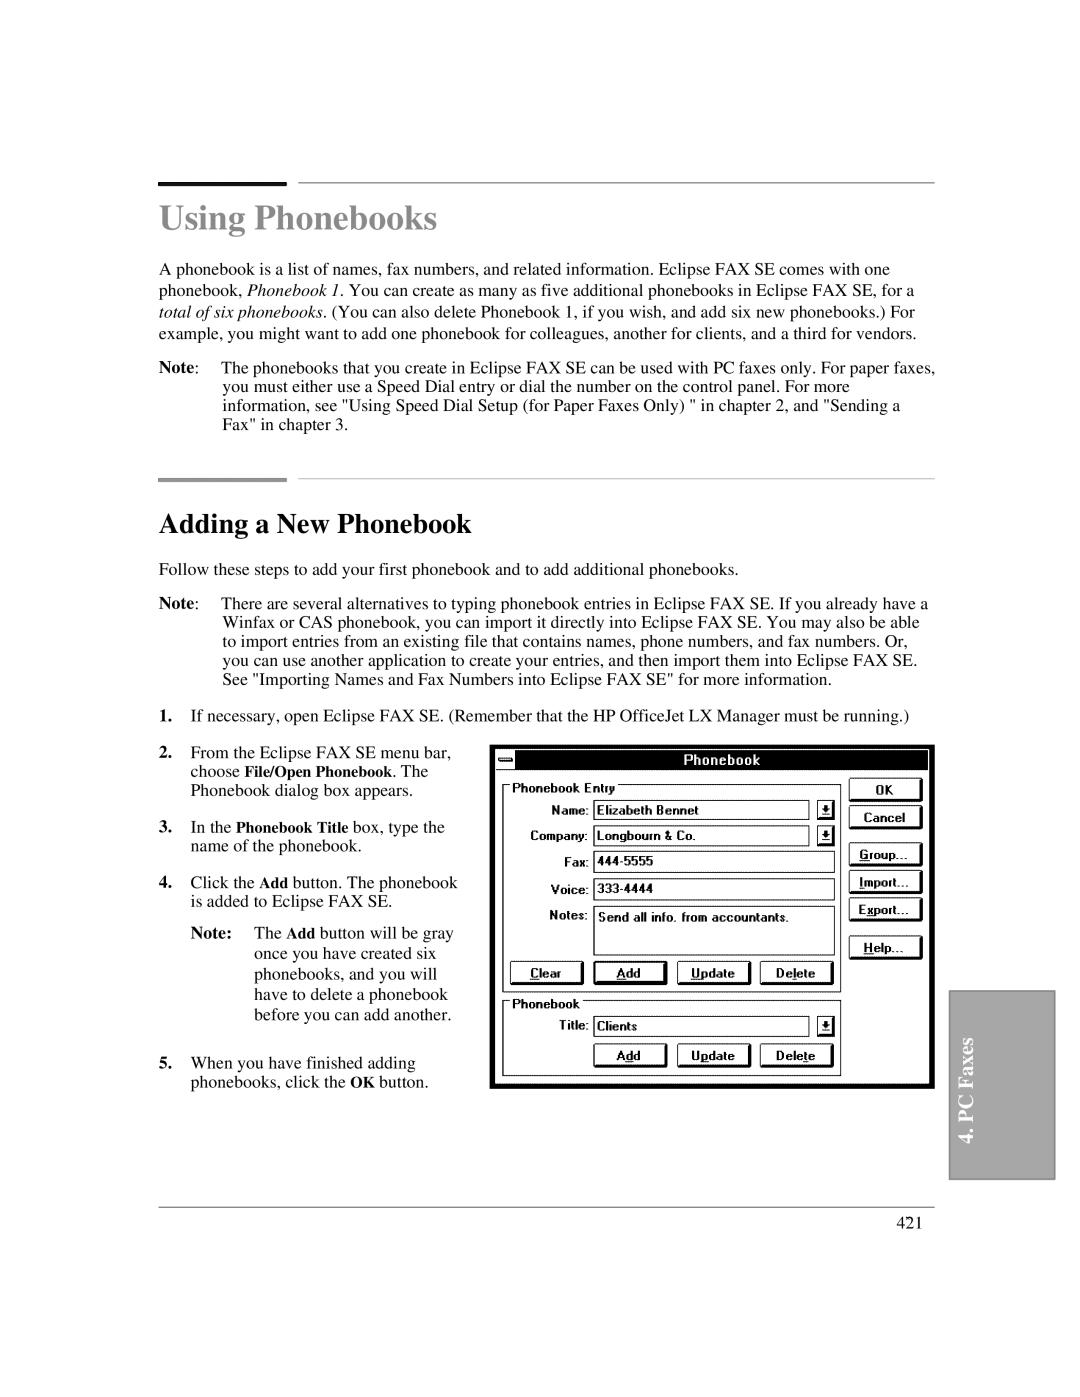
2.From the Eclipse FAX SE menu bar, choose File/Open Phonebook. The Phonebook dialog box appears.
3.In the Phonebook Title box, type the name of the phonebook.
4.Click the Add button. The phonebook is added to Eclipse FAX SE.
Note: The Add button will be gray once you have created six phonebooks, and you will have to delete a phonebook before you can add another.
5.When you have finished adding phonebooks, click the OK button.
4. PC Faxes
4`21
