HP OfficeJet LX
Safety Information
Table of Contents
Using the HP OfficeJet LX Manager
Sending and Receiving Paper Faxes
Page
Page
Printing and Making Copies
Troubleshooting & Maintenance
If You Dont Read Anything Else
Key Things to Remember about Faxing
Summary
Table below summarizes the HP OfficeJet LXs capabilities
Sending a Paper Fax
Name and Fax
Sending a Fax Directly from Your PC
Send Fax button
Confirming Your PC Fax Was Sent
All Faxes button
Receiving a Fax
No action is required, with the exception noted below
Receiving a Fax to the HP OfficeJet LX
Receive/Setup dialog box
Receiving a Fax Directly to Your PC
Page
Making Copies
About This Manual
Installing the HP OfficeJet LX
Topic
Introduction
Features Overview
Software Programs
When Youre Ready to Begin
Before You Start
Installing the Hardware
Verify the Package Contents
Remove the Tape and Packing Material from
HP OfficeJet LX
Helpful Hints
Install the Print Cartridge
Using the HP OfficeJet LX Manager
Introducing the HP OfficeJet LX Manager
Running the HP OfficeJet LX Manager
Using the HP OfficeJet LX Manager Window
Using the HP OfficeJet LX Manager Help System
Using the Alert Options
Monitoring the Status of Your HP OfficeJet LX
Setting Use Whenever You Need To Applies To
Reviewing the Device Settings
Running Eclipse FAX SE from the HP OfficeJet LX Manager
Remote Service=Off
PC. The factory setting is Route Received Faxes=To Printer
Beep Volume=Soft
Automatic Reduction=On
Using Send Fax Setup
Using the OfficeJet Setup Menu
Changing the Header for Your Outgoing Faxes
Selecting Tone or Pulse Dialing Mode
Setting Automatic Redial
Switching from Pulse to Tone Dialing
Dialing Mode box
Using Speed Dial Setup for Paper Faxes Only
`11
Valid Characters for Fax Numbers
Inserting a Pause in a Speed Dial Number
Valid Character Use in Fax Numbers
Setting Up a Speed Dial Group
Changing Scanned Image Quality
Adjusting the Contrast
Goal Do this
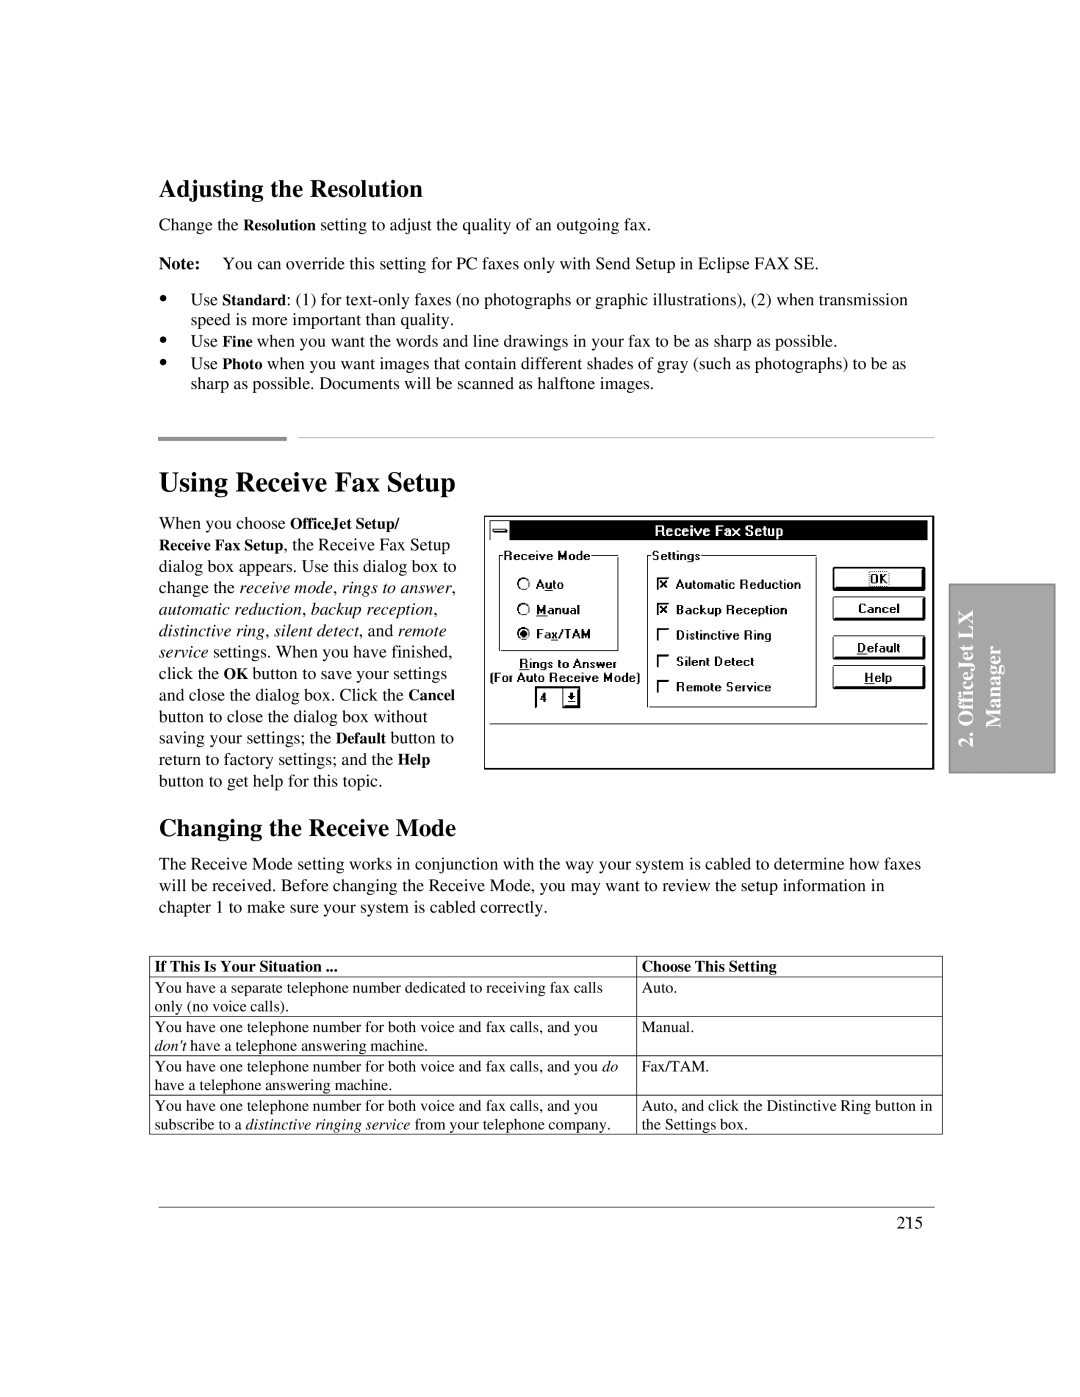
Using Receive Fax Setup
Adjusting the Resolution
Changing the Receive Mode
If This Is Your Situation Choose This Setting
Setting Automatic Reduction
Changing the Number of Rings to Answer
Setting Backup Reception
Enabling Distinctive Ring
Receive Mode is set to Fax/TAM
Enabling Remote Service
Enabling Silent Detect
Routing Received Faxes
Changing the Loaded Paper Size
Controlling Sound Settings
Type of Sound Occurs When Control With
Beep Volume
Volume
Controlling Rings and Beeps
Controlling Outgoing Fax Tones
Printing Logs and Reports
Controlling the Printing of Fax Logs
Printing Fax Logs
Last 30 faxes
This heading Describes this information
Printing Reports
Speed Dial Report
HP OfficeJet LX Speed Dial Report for
Menu Settings Report
Error only
Normal
Letter 8.5x11
Soft
CR only
PC-8
Off 100%
Menu Feature Current Setting Factory Setting
Self Test Report
Font Samples
Acme Co 619
Menu Features
Current Settings
Factory Settings
This heading Describes this information Font Samples
Power Fail Report
Sending and Receiving Paper Faxes
Goal
Do this
Adjusting the Resolution
Use this setting For this goal
Adjusting the Contrast
Use this setting For these kinds of fax originals
Press Start/Copy to begin
Speed Dialing
Using These buttons
For this display
Sending Paper Faxes to Multiple Fax Numbers
Using These buttons For this display
Press Enter/Save not Start/Copy
Redialing with the Redial/Pause Button
Then press Redial/Pause
Fax Settings Send Fax Later
Using Do this These buttons For this display
Sending a Paper Fax at a Future Time
5554138
To cancel a to-be-polled setup
Menu Fax Settings
Asking to Receive a Fax from Another Fax Machine Polling
Using
Do this These buttons
Faxing and Scanning Sending from and Receiving to Your PC
Topic
Introducing Eclipse FAX SE
Running Eclipse FAX SE
Using the Eclipse FAX SE Help System
Choose File/Run Eclipse FAX SE
Sending Faxes from Your PC
Switching from Pulse to Tone Dialing
Inserting a Pause in a Fax Number
Resolution
Preparing to Send a Fax Send Setup
Best Available resolution is 204 x 196 dpi
Viewing the Eclipse FAX SE Cover Pages
Viewing Your Eclipse FAX SE Cover Pages
Print Setup Commands for Selected Windows Applications
Sending a Fax from a Windows Application
Using the Phonebook Button
Company box Phonebook box
Using the Clear Button
Changing the Selected Phonebook
2nd Sheets button
Using the Special Options
If You Get a Busy Signal
Sending a Quick Note from Eclipse FAX SE
Destination Date and Time Status Pages Duration
Viewing Faxes
Changing the Display
Viewing Fax Information
Rescheduling a Fax
Resending a Fax from the Send Log
Printing a Fax
Printing the Send Log
Deleting Faxes
Sending a Fax to More Than One Recipient
Page
Using Phonebooks
Adding a New Phonebook
Adding Names to a Phonebook
Modifying a Phonebook
Deleting a Phonebook
Using the Remove Button
Creating a Group of Names from One or More Phonebooks
`25
Importing a File of Existing Entries
Importing Names and Fax Numbers into Eclipse FAX SE
File Formats for Imported Phonebooks
Importing a Winfax or CAS Phonebook
Receiving Faxes on Your PC
Preparing to Receive a Fax Receive Setup
Routing Incoming Faxes to the PC
Receiving a Fax to Your PC
Using the Receive Log to View, Print, or Delete Faxes
Date and Time Sender Status Pages Duration
Viewing Fax Information
Printing the Receive Log
Forwarding a Fax