Field Replaceable Units
FRU Removal and Replacement
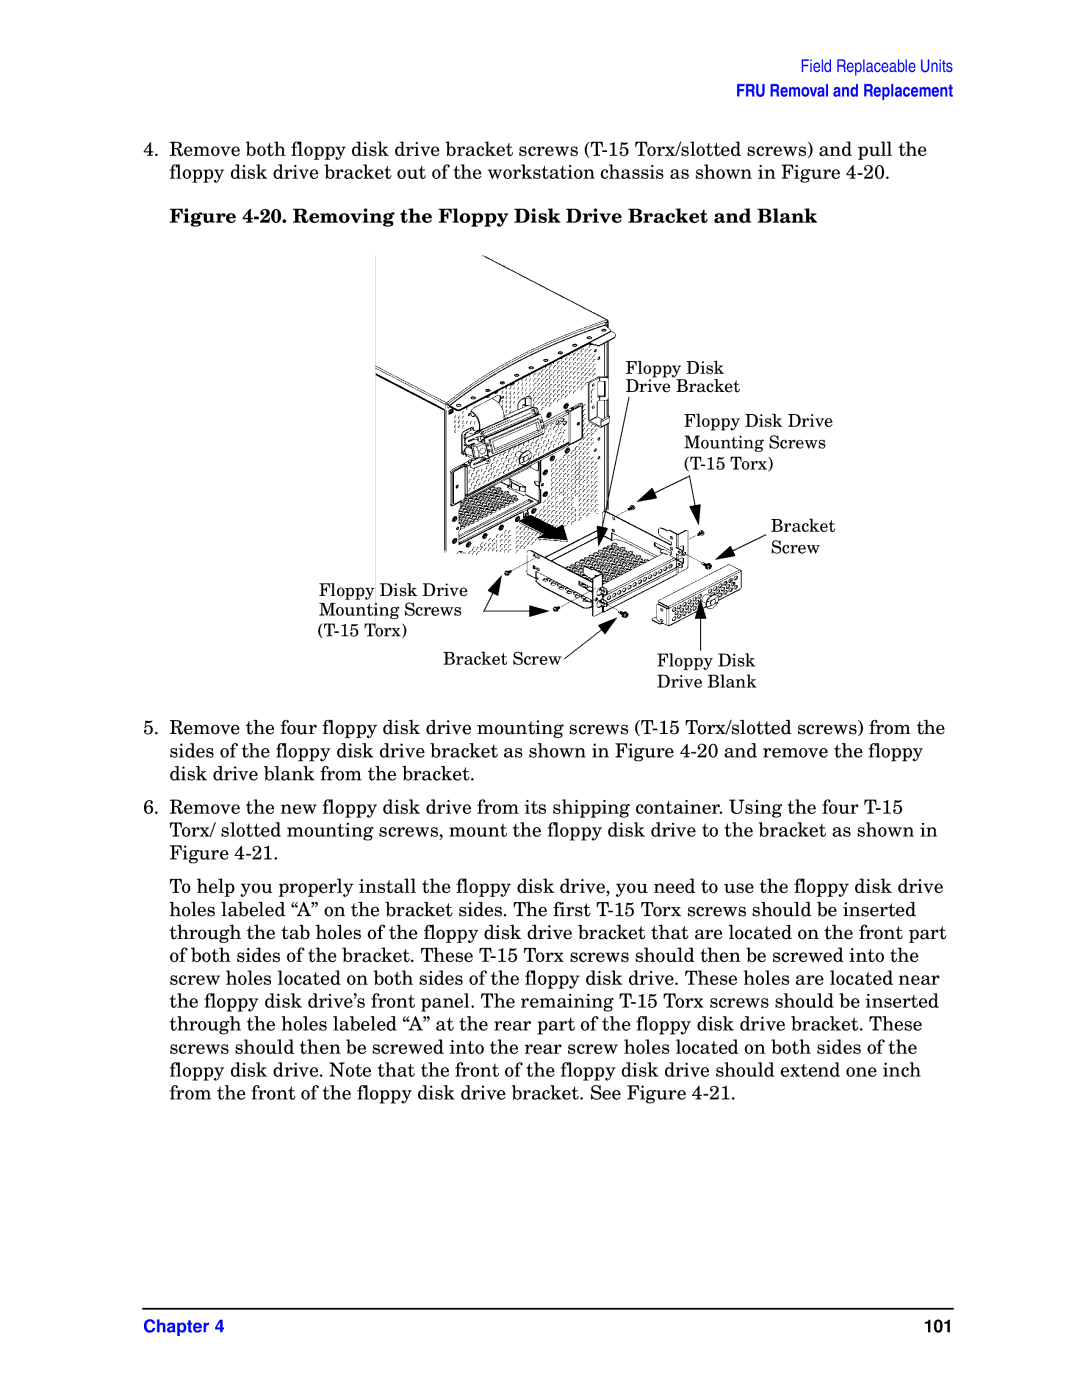
4.Remove both floppy disk drive bracket screws (T-15 Torx/slotted screws) and pull the floppy disk drive bracket out of the workstation chassis as shown in Figure 4-20.
Figure 4-20. Removing the Floppy Disk Drive Bracket and Blank
Floppy Disk
Drive Bracket
Floppy Disk Drive
Mounting Screws
(T-15 Torx)
Bracket
 Screw
Screw
Floppy Disk Drive
Mounting Screws
(T-15 Torx)
Drive Blank
5.Remove the four floppy disk drive mounting screws (T-15 Torx/slotted screws) from the sides of the floppy disk drive bracket as shown in Figure 4-20 and remove the floppy disk drive blank from the bracket.
6.Remove the new floppy disk drive from its shipping container. Using the four T-15 Torx/ slotted mounting screws, mount the floppy disk drive to the bracket as shown in Figure 4-21.
To help you properly install the floppy disk drive, you need to use the floppy disk drive holes labeled “A” on the bracket sides. The first T-15 Torx screws should be inserted through the tab holes of the floppy disk drive bracket that are located on the front part of both sides of the bracket. These T-15 Torx screws should then be screwed into the screw holes located on both sides of the floppy disk drive. These holes are located near the floppy disk drive’s front panel. The remaining T-15 Torx screws should be inserted through the holes labeled “A” at the rear part of the floppy disk drive bracket. These screws should then be screwed into the rear screw holes located on both sides of the floppy disk drive. Note that the front of the floppy disk drive should extend one inch from the front of the floppy disk drive bracket. See Figure 4-21.

![]() Screw
Screw