Field Replaceable Units
FRU Removal and Replacement
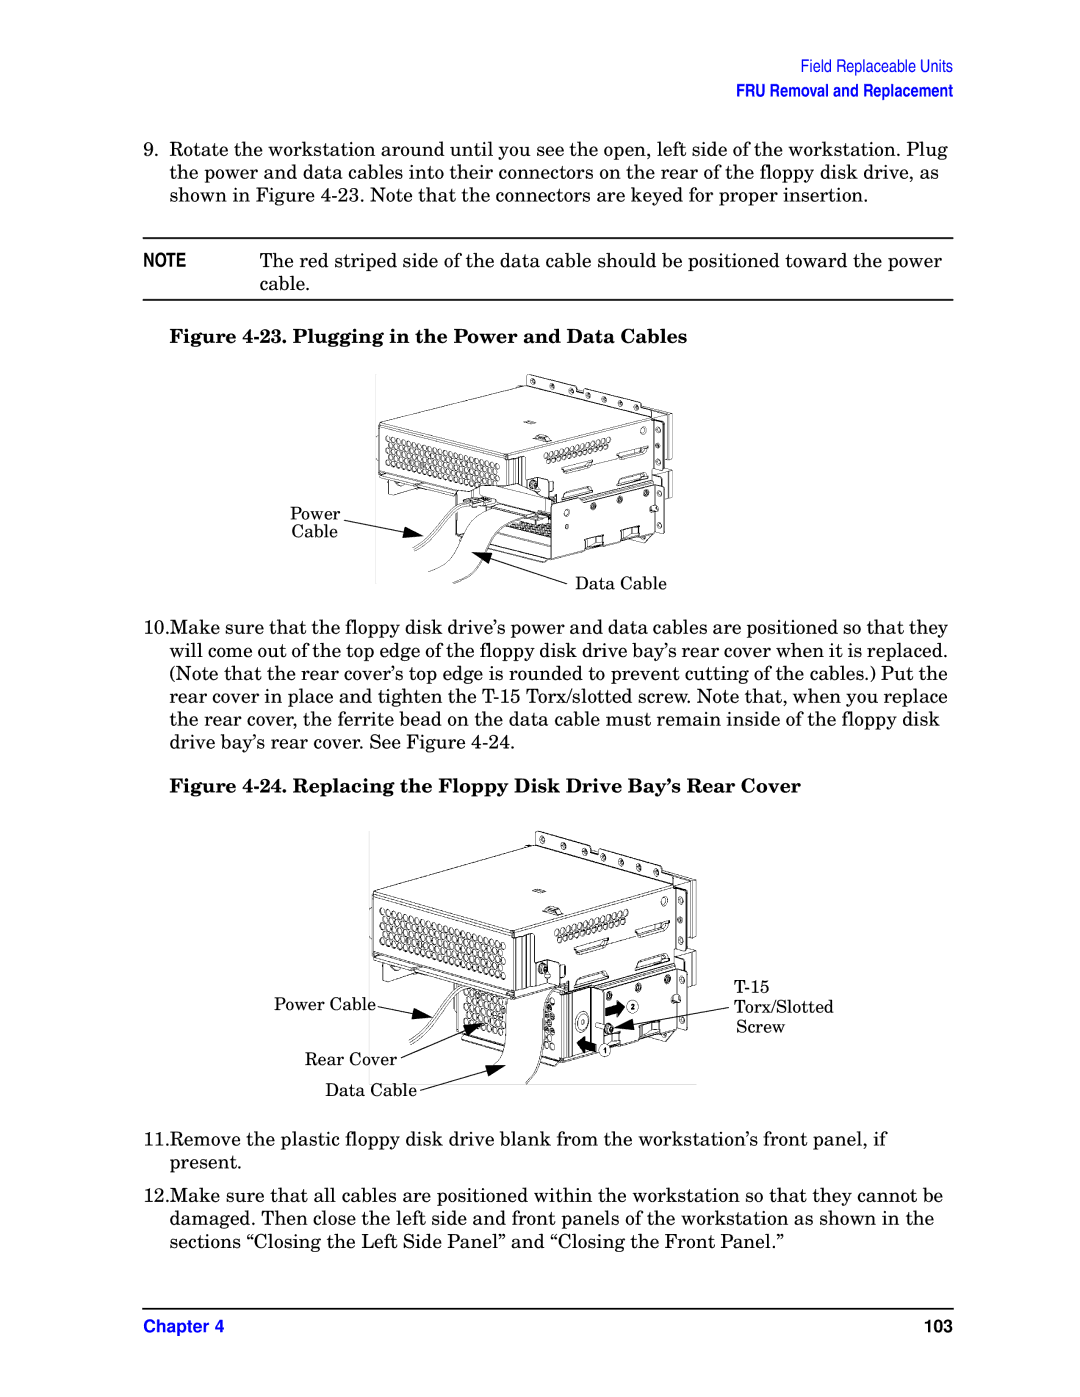
9.Rotate the workstation around until you see the open, left side of the workstation. Plug the power and data cables into their connectors on the rear of the floppy disk drive, as shown in Figure
NOTE | The red striped side of the data cable should be positioned toward the power |
| cable. |
|
|
Figure 4-23. Plugging in the Power and Data Cables
Power
Cable ![]()
![]() Data Cable
Data Cable
10.Make sure that the floppy disk drive’s power and data cables are positioned so that they will come out of the top edge of the floppy disk drive bay’s rear cover when it is replaced. (Note that the rear cover’s top edge is rounded to prevent cutting of the cables.) Put the rear cover in place and tighten the
Figure 4-24. Replacing the Floppy Disk Drive Bay’s Rear Cover
Power Cable | |
Torx/Slotted | |
| Screw |
Rear Cover
Data Cable ![]()
11.Remove the plastic floppy disk drive blank from the workstation’s front panel, if present.
12.Make sure that all cables are positioned within the workstation so that they cannot be damaged. Then close the left side and front panels of the workstation as shown in the sections “Closing the Left Side Panel” and “Closing the Front Panel.”
Chapter 4 | 103 |