Field Replaceable Units
FRU Removal and Replacement
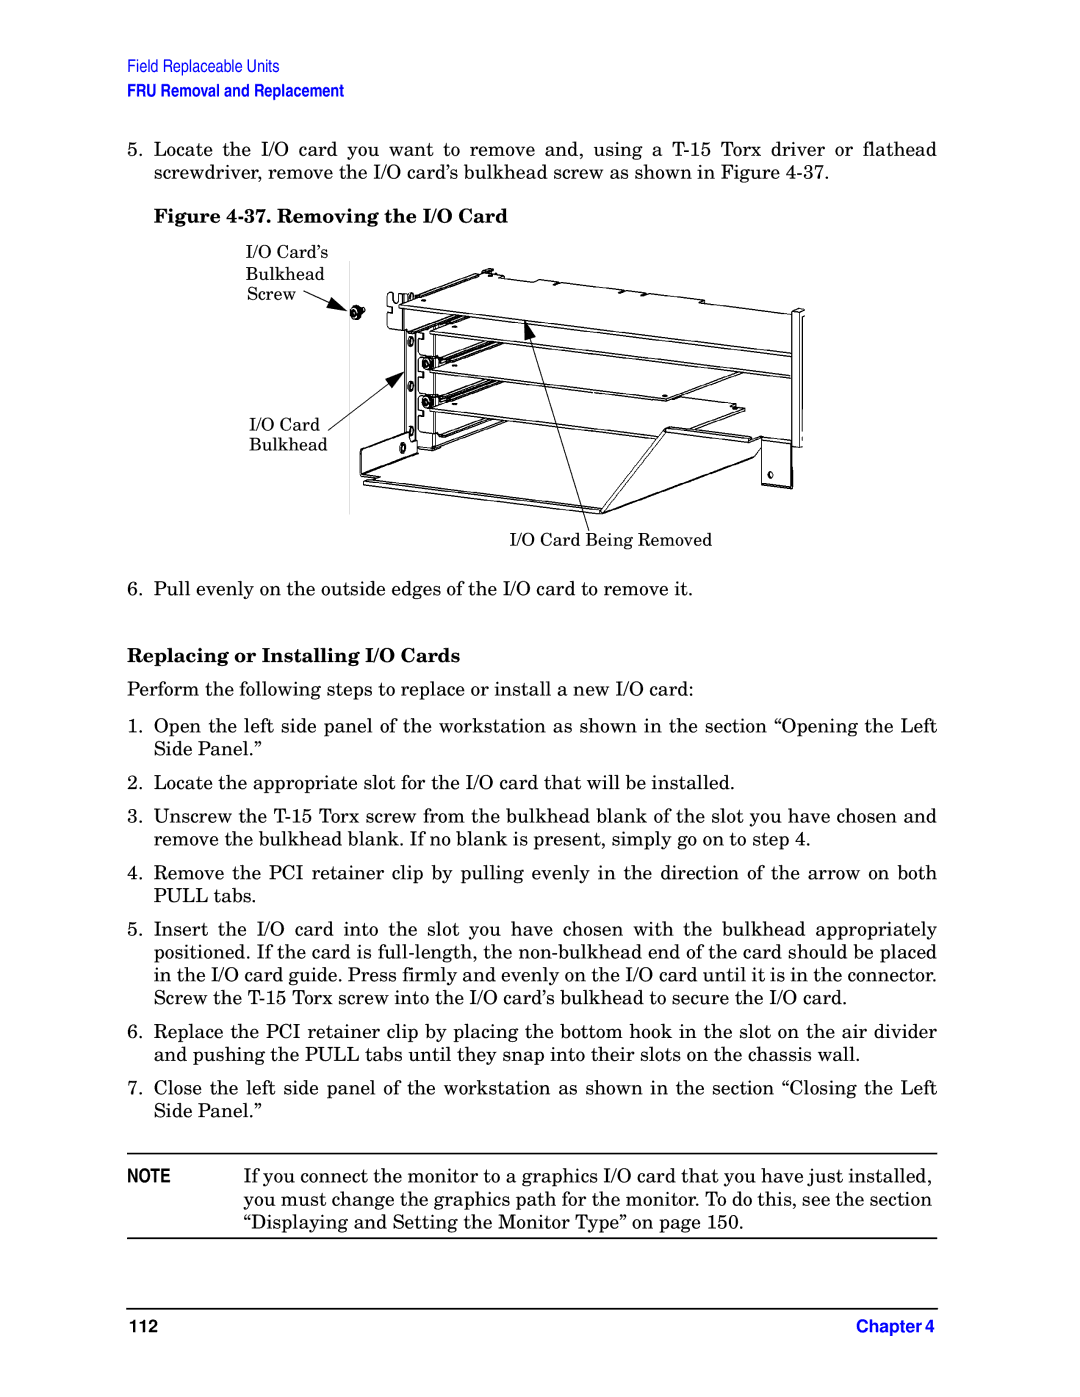
5.Locate the I/O card you want to remove and, using a
Figure 4-37. Removing the I/O Card
I/O Card’s
Bulkhead
Screw ![]()
I/O Card ![]()
Bulkhead
I/O Card Being Removed
6. Pull evenly on the outside edges of the I/O card to remove it.
Replacing or Installing I/O Cards
Perform the following steps to replace or install a new I/O card:
1.Open the left side panel of the workstation as shown in the section “Opening the Left Side Panel.”
2.Locate the appropriate slot for the I/O card that will be installed.
3.Unscrew the
4.Remove the PCI retainer clip by pulling evenly in the direction of the arrow on both PULL tabs.
5.Insert the I/O card into the slot you have chosen with the bulkhead appropriately positioned. If the card is
6.Replace the PCI retainer clip by placing the bottom hook in the slot on the air divider and pushing the PULL tabs until they snap into their slots on the chassis wall.
7.Close the left side panel of the workstation as shown in the section “Closing the Left Side Panel.”
NOTE | If you connect the monitor to a graphics I/O card that you have just installed, |
| you must change the graphics path for the monitor. To do this, see the section |
| “Displaying and Setting the Monitor Type” on page 150. |
|
|
112 | Chapter 4 |