Field Replaceable Units
FRU Removal and Replacement
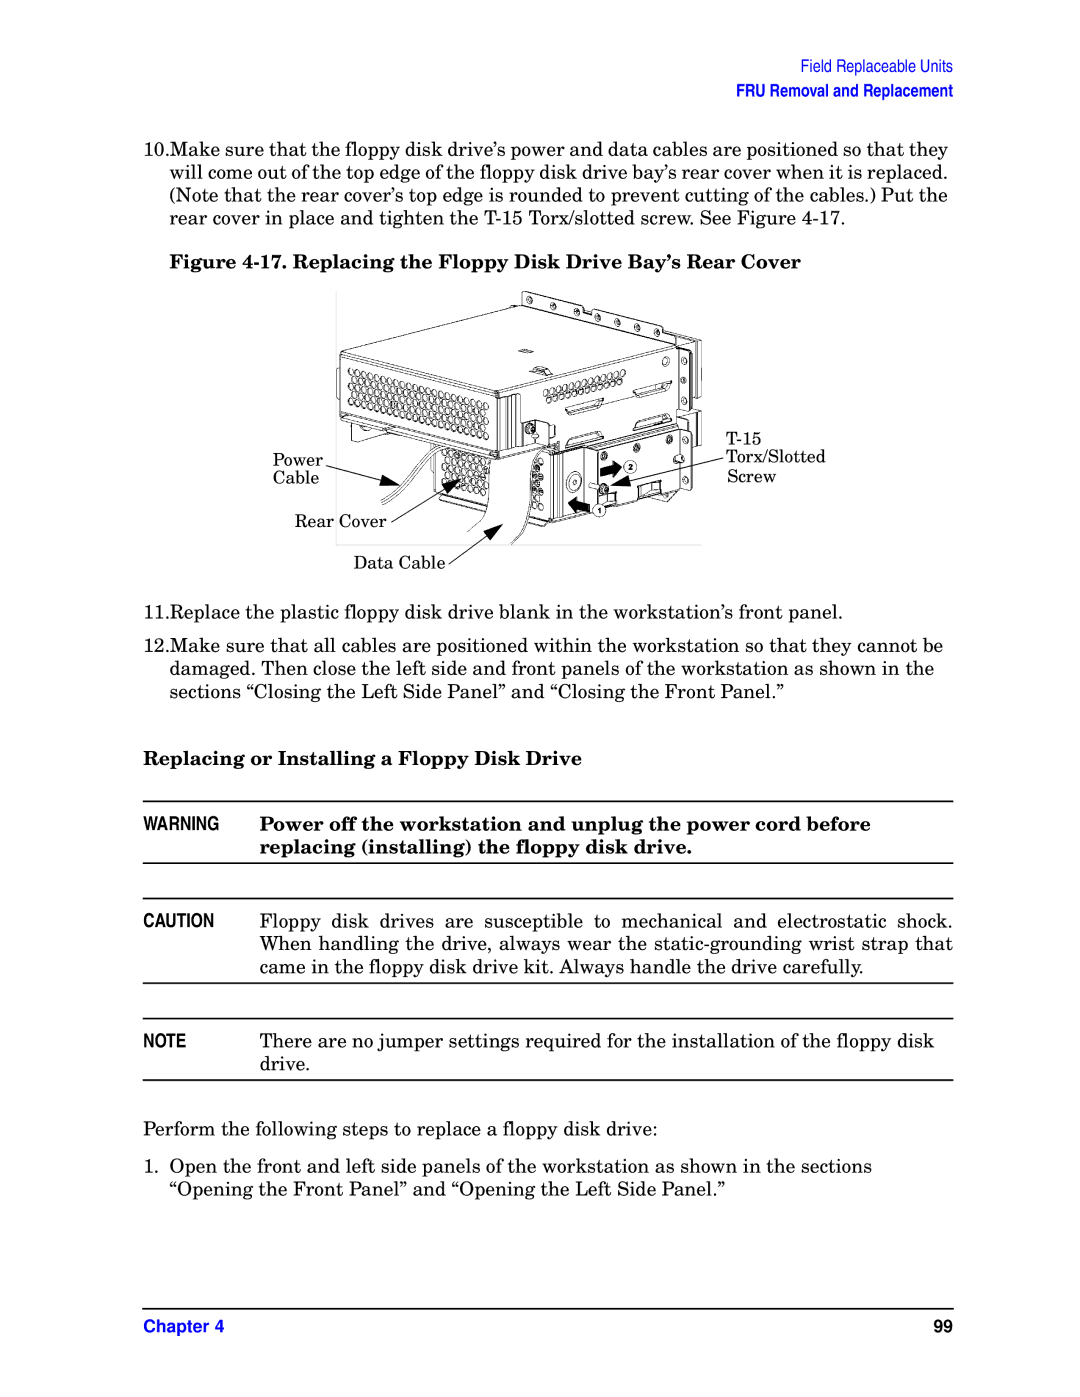
10.Make sure that the floppy disk drive’s power and data cables are positioned so that they will come out of the top edge of the floppy disk drive bay’s rear cover when it is replaced. (Note that the rear cover’s top edge is rounded to prevent cutting of the cables.) Put the rear cover in place and tighten the
Figure 4-17. Replacing the Floppy Disk Drive Bay’s Rear Cover
| |
Power | Torx/Slotted |
Cable | Screw |
Rear Cover ![]()
Data Cable ![]()
11.Replace the plastic floppy disk drive blank in the workstation’s front panel.
12.Make sure that all cables are positioned within the workstation so that they cannot be damaged. Then close the left side and front panels of the workstation as shown in the sections “Closing the Left Side Panel” and “Closing the Front Panel.”
Replacing or Installing a Floppy Disk Drive
WARNING Power off the workstation and unplug the power cord before replacing (installing) the floppy disk drive.
CAUTION Floppy disk drives are susceptible to mechanical and electrostatic shock. When handling the drive, always wear the
NOTE | There are no jumper settings required for the installation of the floppy disk |
| drive. |
|
|
Perform the following steps to replace a floppy disk drive:
1.Open the front and left side panels of the workstation as shown in the sections “Opening the Front Panel” and “Opening the Left Side Panel.”
Chapter 4 | 99 |
