Field Replaceable Units
FRU Removal and Replacement
Voltage Regulator Modules
This section explains how to remove and replace the voltage regulator modules (master and slave), which are connected to the system board in the B2000 workstation.
Removing a Voltage Regulator Module
WARNING To prevent injury, unplug the workstation’s power cord from the electrical outlet before removing the voltage regulator modules.
Perform the following steps to remove a voltage regulator module:
1.Open the left side panel of the workstation as shown in the section “Opening the Left Side Panel.”
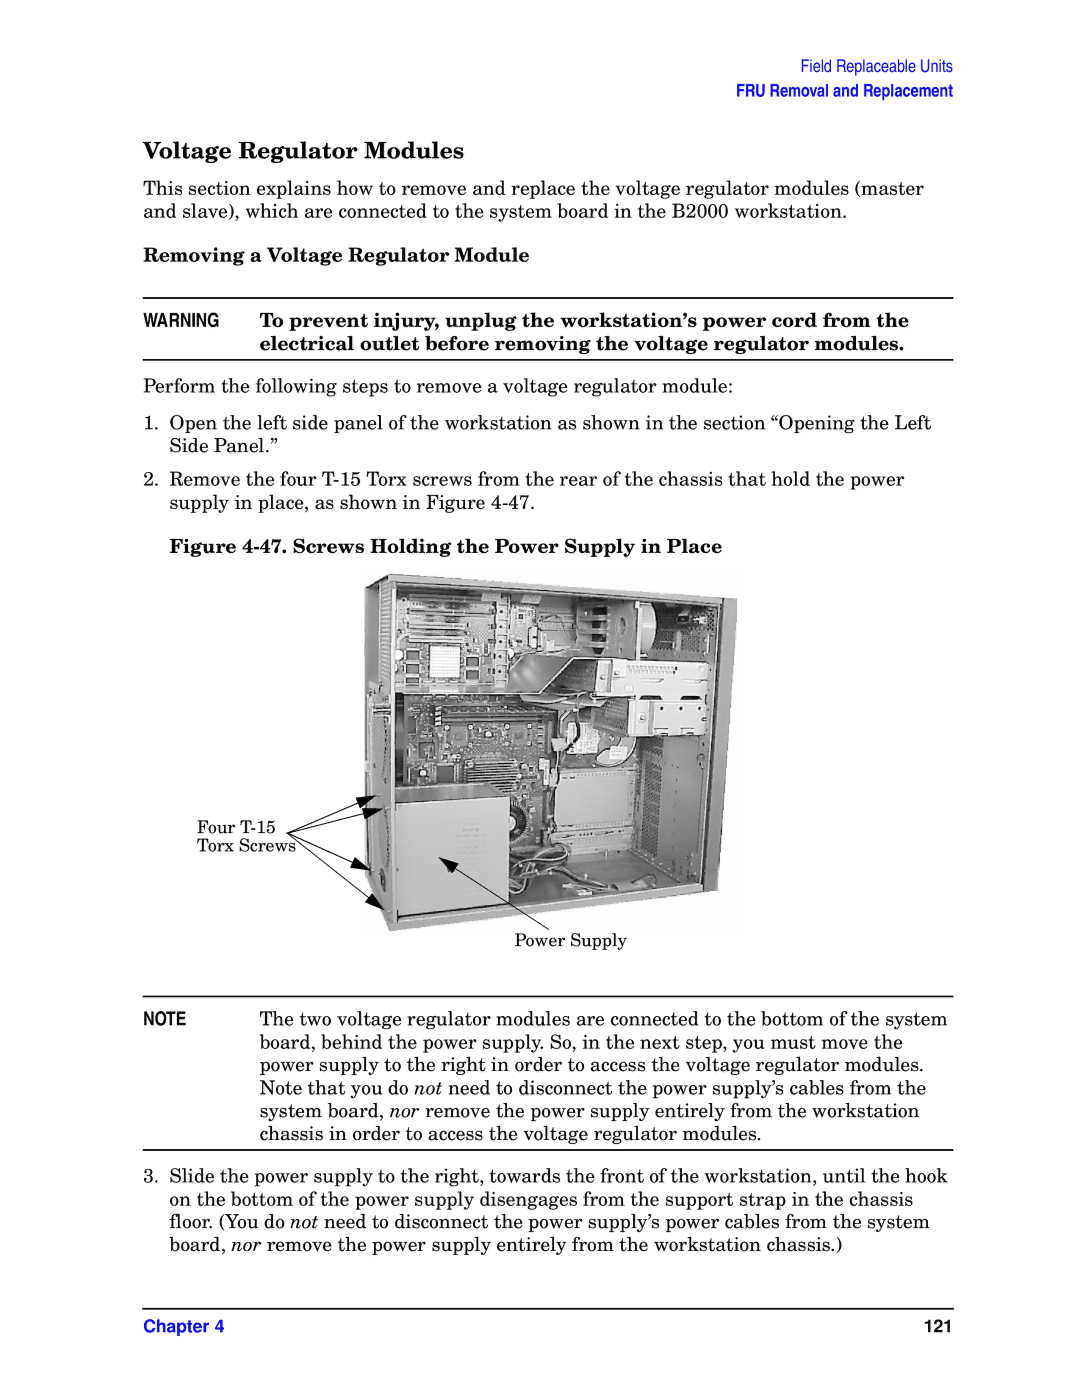
2.Remove the four
Figure 4-47. Screws Holding the Power Supply in Place
Four
Torx Screws
| Power Supply |
|
|
NOTE | The two voltage regulator modules are connected to the bottom of the system |
| board, behind the power supply. So, in the next step, you must move the |
| power supply to the right in order to access the voltage regulator modules. |
| Note that you do not need to disconnect the power supply’s cables from the |
| system board, nor remove the power supply entirely from the workstation |
| chassis in order to access the voltage regulator modules. |
|
|
3.Slide the power supply to the right, towards the front of the workstation, until the hook on the bottom of the power supply disengages from the support strap in the chassis floor. (You do not need to disconnect the power supply’s power cables from the system board, nor remove the power supply entirely from the workstation chassis.)
Chapter 4 | 121 |