HP unix manual Replacing or Installing a Hard Disk Drive, Location of the Hard Disk Drives

Models: unix

1 204
Download 204 pages 13.99 Kb
Page 107
Image 107

Field Replaceable Units

FRU Removal and Replacement

Replacing or Installing a Hard Disk Drive

NOTE

After replacing or installing a hard disk drive, you will need to mount it and


create a file system on it. Follow the procedures in the section “Configuring a


Hard Disk Drive as a File System” on page 33.


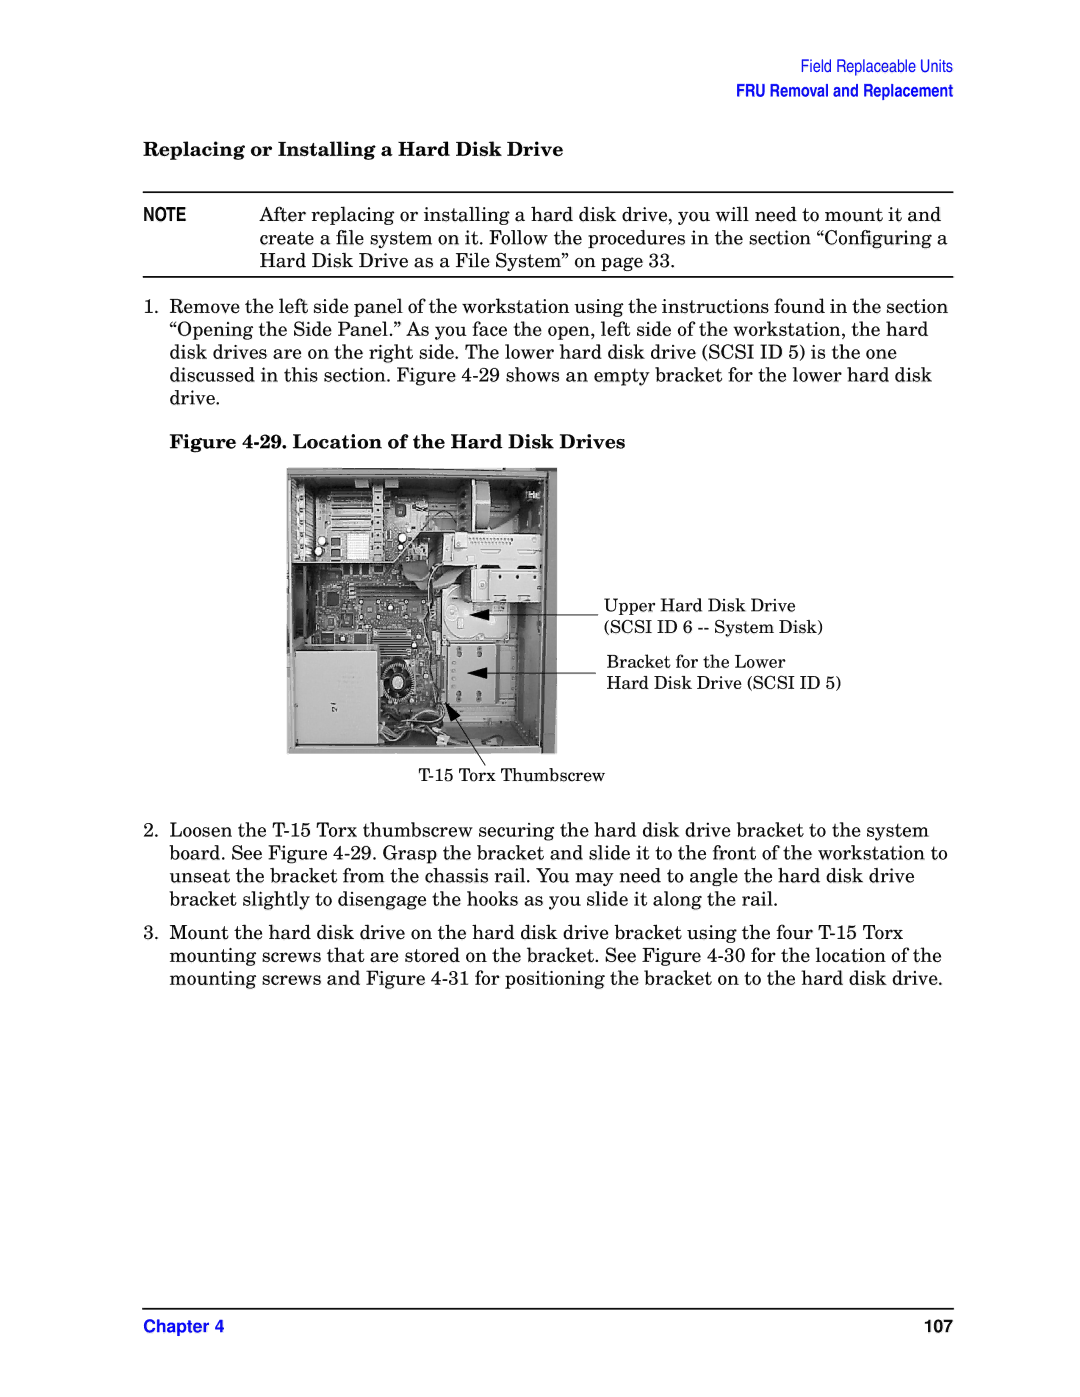
1.Remove the left side panel of the workstation using the instructions found in the section “Opening the Side Panel.” As you face the open, left side of the workstation, the hard disk drives are on the right side. The lower hard disk drive (SCSI ID 5) is the one discussed in this section. Figure 4-29 shows an empty bracket for the lower hard disk drive.

Figure 4-29. Location of the Hard Disk Drives

Upper Hard Disk Drive

(SCSI ID 6 -- System Disk)

Bracket for the Lower

Hard Disk Drive (SCSI ID 5)

T-15 Torx Thumbscrew

2.Loosen the T-15 Torx thumbscrew securing the hard disk drive bracket to the system board. See Figure 4-29. Grasp the bracket and slide it to the front of the workstation to unseat the bracket from the chassis rail. You may need to angle the hard disk drive bracket slightly to disengage the hooks as you slide it along the rail.

3.Mount the hard disk drive on the hard disk drive bracket using the four T-15 Torx mounting screws that are stored on the bracket. See Figure 4-30 for the location of the mounting screws and Figure 4-31 for positioning the bracket on to the hard disk drive.

Chapter 4

107

Page 107
Image 107
HP unix manual Replacing or Installing a Hard Disk Drive, Location of the Hard Disk Drives