Field Replaceable Units
FRU Removal and Replacement
Figure 4-13. Front of Workstation with the Front Panel Removed
LCD
Floppy | Bracket | |
Screw | ||
Disk Drive | ||
(hidden) | ||
|
Bracket Screw ![]()
![]()
5.Remove both floppy disk drive bracket screws
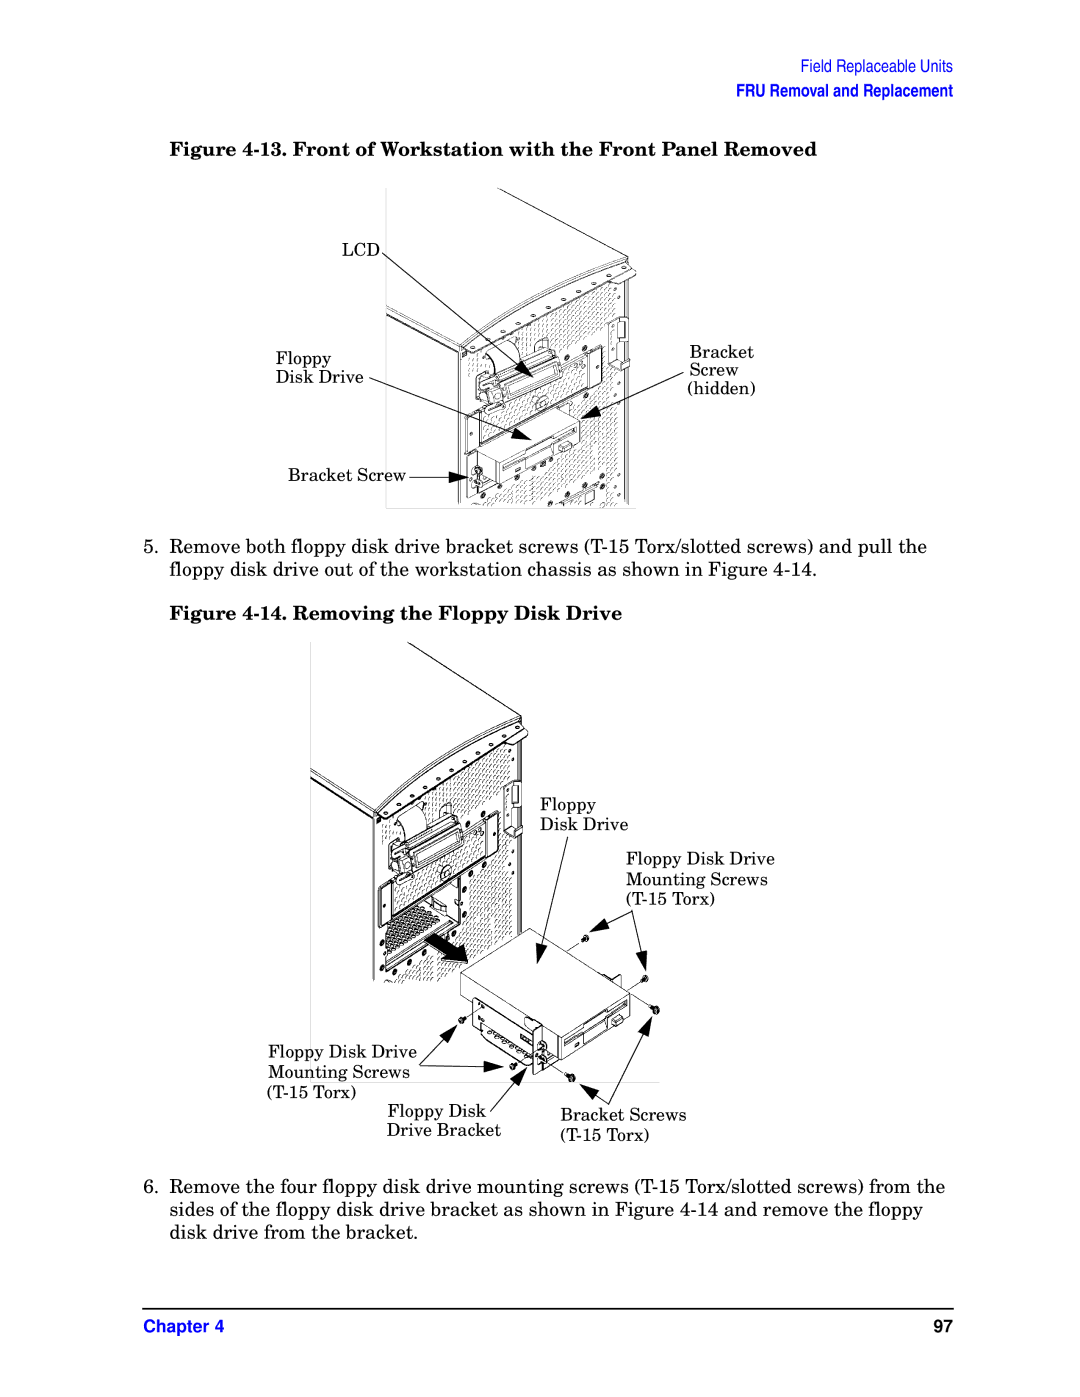
Figure 4-14. Removing the Floppy Disk Drive
Floppy
Disk Drive
Floppy Disk Drive
Mounting Screws
Floppy Disk Drive ![]()
Mounting Screws
Floppy Disk | Bracket Screws |
Drive Bracket |
6.Remove the four floppy disk drive mounting screws
Chapter 4 | 97 |