Field Replaceable Units
FRU Removal and Replacement
Removing a Floppy Disk Drive
WARNING Power off the workstation and unplug the power cord before removing the floppy disk drive.
CAUTION Floppy disk drives are susceptible to mechanical and electrostatic shock. When handling the drive, always wear the
Perform the following steps to remove a floppy disk drive:
1.Open the front and left side panels of the workstation as shown in the sections “Opening the Front Panel” and “Opening the Left Side Panel.”
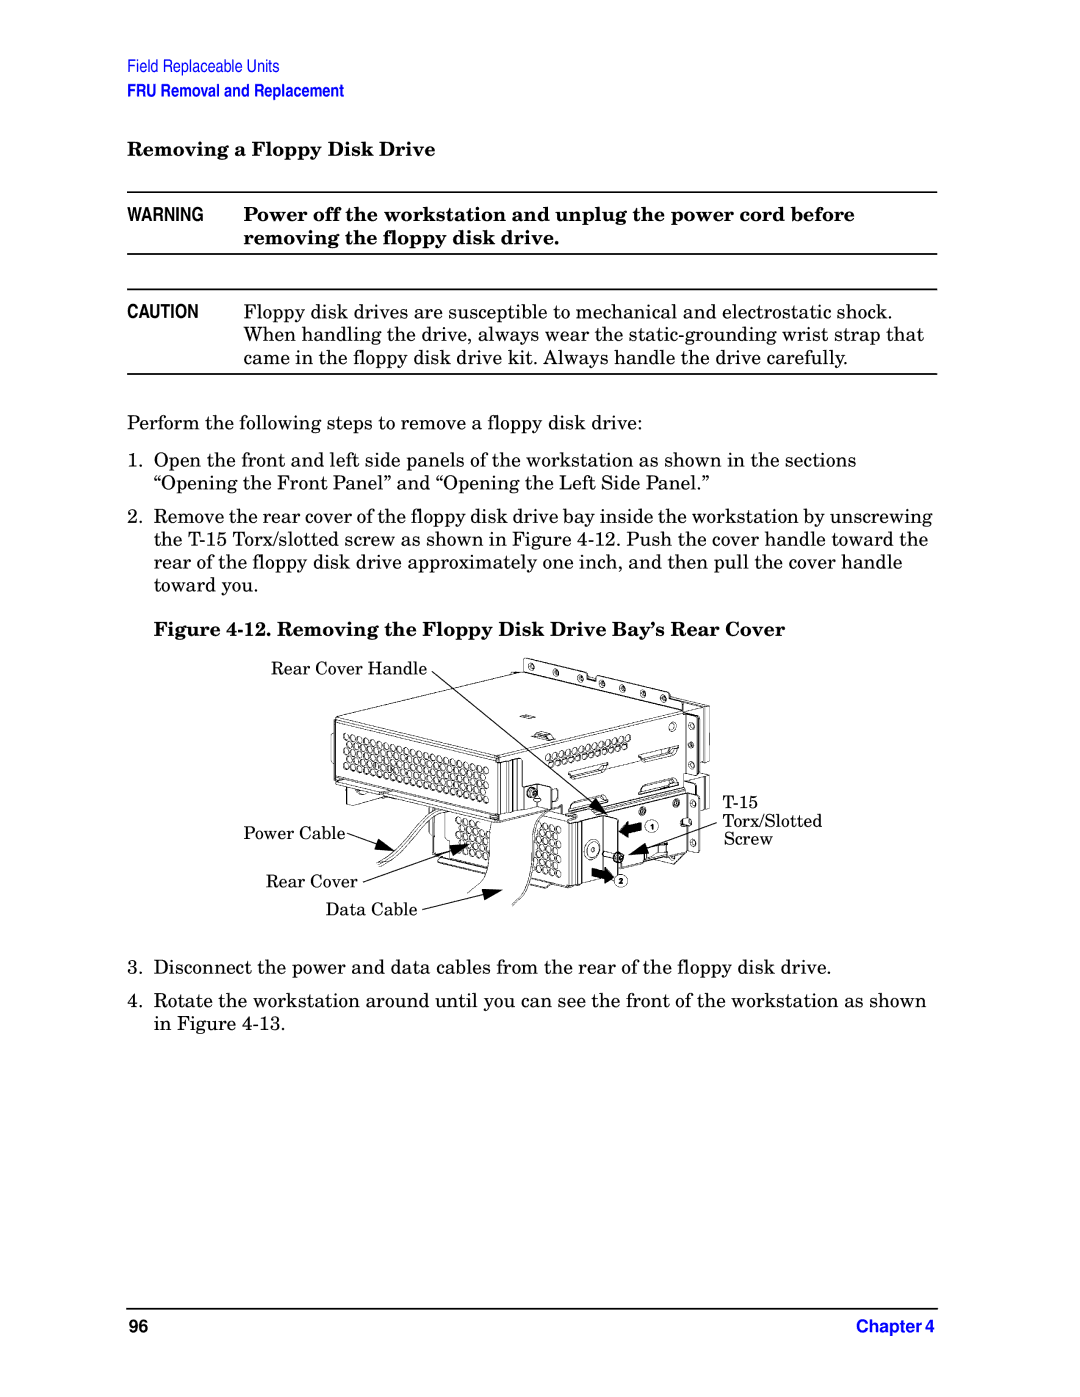
2.Remove the rear cover of the floppy disk drive bay inside the workstation by unscrewing the
Figure 4-12. Removing the Floppy Disk Drive Bay’s Rear Cover
Rear Cover Handle
| ||
Power Cable | Torx/Slotted | |
Screw | ||
|
Rear Cover ![]()
Data Cable ![]()
3.Disconnect the power and data cables from the rear of the floppy disk drive.
4.Rotate the workstation around until you can see the front of the workstation as shown in Figure
96 | Chapter 4 |