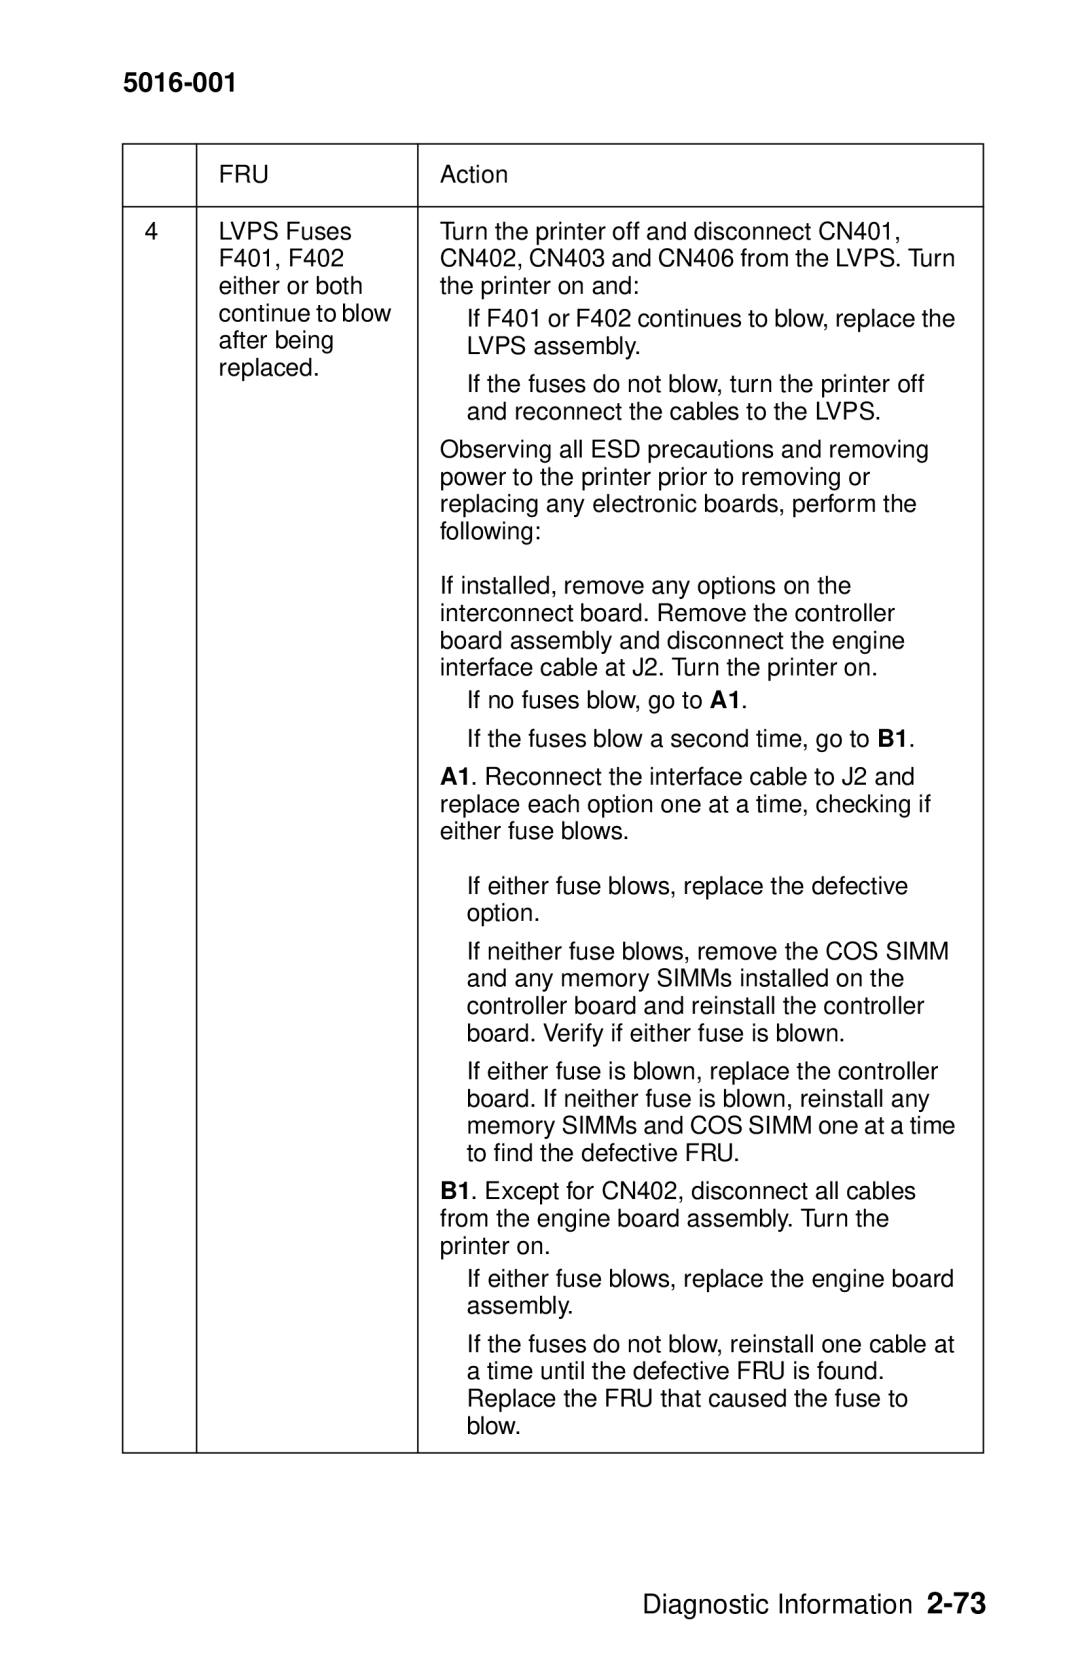
5016-001
| FRU | Action | |
|
|
| |
4 | LVPS Fuses | Turn the printer off and disconnect CN401, | |
| F401, F402 | CN402, CN403 and CN406 from the LVPS. Turn | |
| either or both | the printer on and: | |
| continue to blow | • If F401 or F402 continues to blow, replace the | |
| after being |
| LVPS assembly. |
| replaced. | • | If the fuses do not blow, turn the printer off |
|
| ||
|
|
| and reconnect the cables to the LVPS. |
|
| Observing all ESD precautions and removing | |
|
| power to the printer prior to removing or | |
|
| replacing any electronic boards, perform the | |
|
| following: | |
|
| If installed, remove any options on the | |
|
| interconnect board. Remove the controller | |
|
| board assembly and disconnect the engine | |
|
| interface cable at J2. Turn the printer on. | |
|
| • | If no fuses blow, go to A1. |
|
| • | If the fuses blow a second time, go to B1. |
A1. Reconnect the interface cable to J2 and replace each option one at a time, checking if either fuse blows.
•If either fuse blows, replace the defective option.
•If neither fuse blows, remove the COS SIMM and any memory SIMMs installed on the controller board and reinstall the controller board. Verify if either fuse is blown.
•If either fuse is blown, replace the controller board. If neither fuse is blown, reinstall any memory SIMMs and COS SIMM one at a time to find the defective FRU.
B1. Except for CN402, disconnect all cables from the engine board assembly. Turn the printer on.
•If either fuse blows, replace the engine board assembly.
•If the fuses do not blow, reinstall one cable at a time until the defective FRU is found. Replace the FRU that caused the fuse to blow.
Diagnostic Information
