DSM250 User’s Manual
6.19.6Gauge Resistance, + to Sender
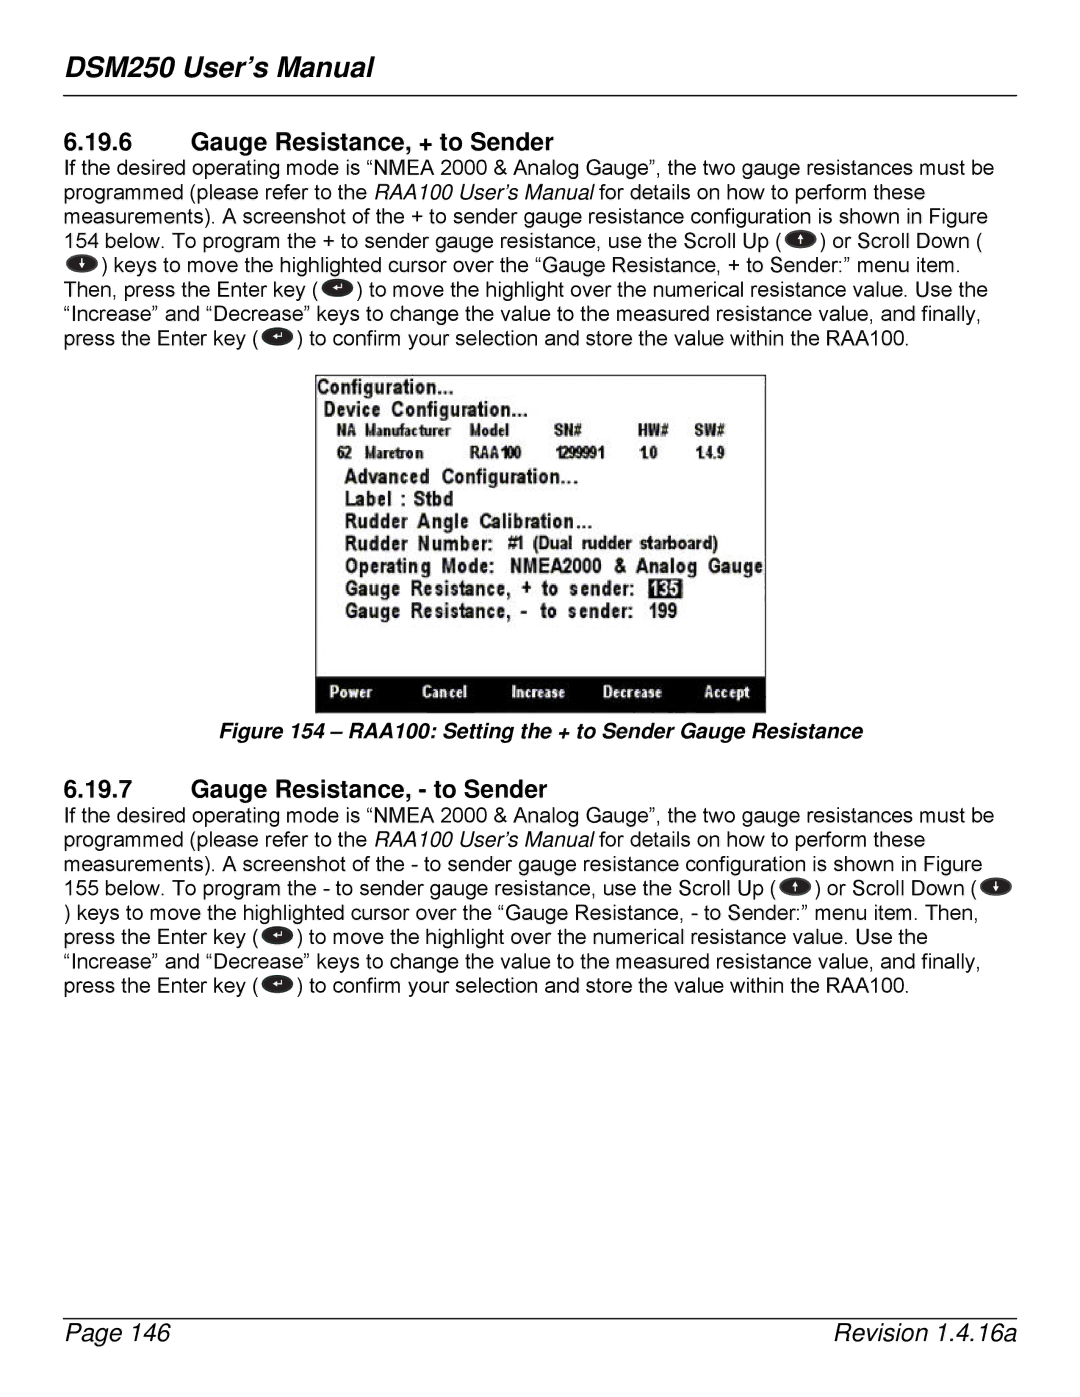
If the desired operating mode is “NMEA 2000 & Analog Gauge”, the two gauge resistances must be programmed (please refer to the RAA100 User’s Manual for details on how to perform these measurements). A screenshot of the + to sender gauge resistance configuration is shown in Figure 154 below. To program the + to sender gauge resistance, use the Scroll Up ( ![]() ) or Scroll Down (
) or Scroll Down ( ![]() ) keys to move the highlighted cursor over the “Gauge Resistance, + to Sender:” menu item. Then, press the Enter key (
) keys to move the highlighted cursor over the “Gauge Resistance, + to Sender:” menu item. Then, press the Enter key ( ![]() ) to move the highlight over the numerical resistance value. Use the “Increase” and “Decrease” keys to change the value to the measured resistance value, and finally, press the Enter key (
) to move the highlight over the numerical resistance value. Use the “Increase” and “Decrease” keys to change the value to the measured resistance value, and finally, press the Enter key ( ![]() ) to confirm your selection and store the value within the RAA100.
) to confirm your selection and store the value within the RAA100.
Figure 154 – RAA100: Setting the + to Sender Gauge Resistance
6.19.7Gauge Resistance, - to Sender
If the desired operating mode is “NMEA 2000 & Analog Gauge”, the two gauge resistances must be programmed (please refer to the RAA100 User’s Manual for details on how to perform these measurements). A screenshot of the - to sender gauge resistance configuration is shown in Figure 155 below. To program the - to sender gauge resistance, use the Scroll Up ( ![]() ) or Scroll Down (
) or Scroll Down ( ![]() ) keys to move the highlighted cursor over the “Gauge Resistance, - to Sender:” menu item. Then, press the Enter key (
) keys to move the highlighted cursor over the “Gauge Resistance, - to Sender:” menu item. Then, press the Enter key ( ![]() ) to move the highlight over the numerical resistance value. Use the “Increase” and “Decrease” keys to change the value to the measured resistance value, and finally, press the Enter key (
) to move the highlight over the numerical resistance value. Use the “Increase” and “Decrease” keys to change the value to the measured resistance value, and finally, press the Enter key ( ![]() ) to confirm your selection and store the value within the RAA100.
) to confirm your selection and store the value within the RAA100.
Page 146 | Revision 1.4.16a |