4.Right click on the server name in the left pane of the console and click the New Scope command.
5.Click Next on the Welcome to the New Scope Wizard page.
6.On the Scope Name page, enter a name for the scope in the Name text box and enter an optional description in the Description text box. In this example, we will name the scope Scope1 and will not enter a description. Click Next.
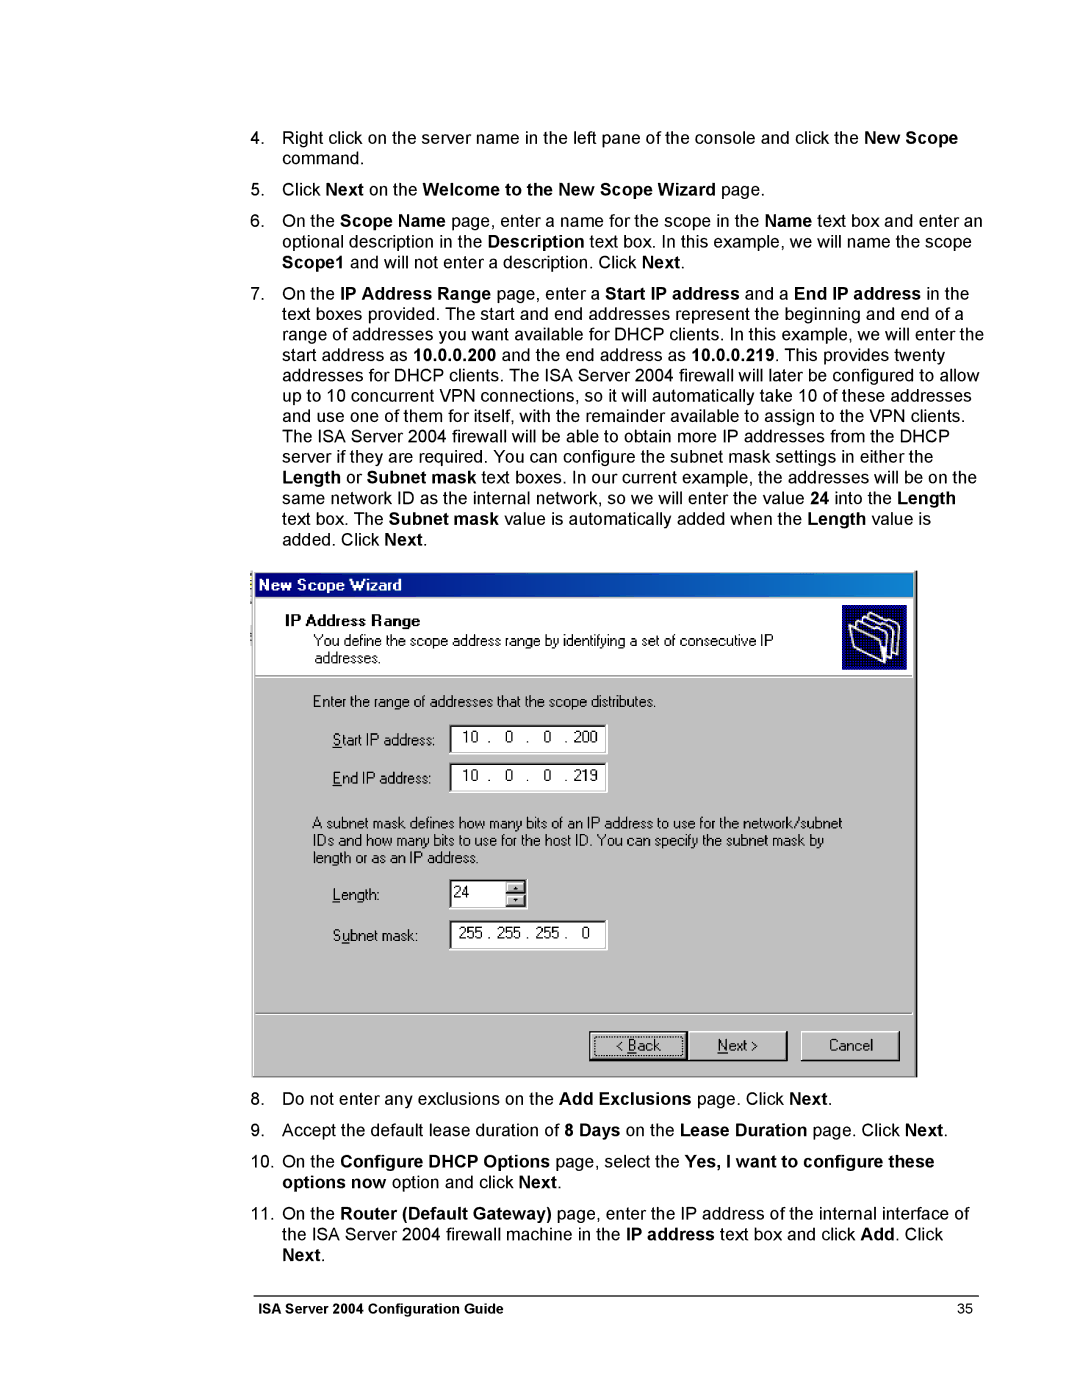
7.On the IP Address Range page, enter a Start IP address and a End IP address in the text boxes provided. The start and end addresses represent the beginning and end of a range of addresses you want available for DHCP clients. In this example, we will enter the start address as 10.0.0.200 and the end address as 10.0.0.219. This provides twenty addresses for DHCP clients. The ISA Server 2004 firewall will later be configured to allow up to 10 concurrent VPN connections, so it will automatically take 10 of these addresses and use one of them for itself, with the remainder available to assign to the VPN clients. The ISA Server 2004 firewall will be able to obtain more IP addresses from the DHCP server if they are required. You can configure the subnet mask settings in either the Length or Subnet mask text boxes. In our current example, the addresses will be on the same network ID as the internal network, so we will enter the value 24 into the Length text box. The Subnet mask value is automatically added when the Length value is added. Click Next.
8.Do not enter any exclusions on the Add Exclusions page. Click Next.
9.Accept the default lease duration of 8 Days on the Lease Duration page. Click Next.
10.On the Configure DHCP Options page, select the Yes, I want to configure these options now option and click Next.
11.On the Router (Default Gateway) page, enter the IP address of the internal interface of the ISA Server 2004 firewall machine in the IP address text box and click Add. Click Next.
ISA Server 2004 Configuration Guide | 35 |
