Installing ISA Server 2004
Installing ISA Server 2004 on Windows Server 2003 is relatively straightforward. The major decision you make during setup is what IP addresses should be part of the Internal network. The Internal network address configuration is important because the firewall’s System Policy uses the Internal network addresses to define a set of Access Rules.
Perform the following steps to install the ISA Server 2004 software on the
1.Insert the ISA Server 2004
2.On the Microsoft Internet Security and Acceleration Server 2004 page, click the link for Review Release Notes and read the release notes. The release notes contain useful information about important issues and configuration options. After reading the release notes, close the release notes window and then click the Read Setup and Feature Guide link. You don’t need to read the entire guide right now, but you may want to print it out to read later. Close the Setup and Feature Guide window. Click the Install ISA Server 2004 link.
3.Click Next on the Welcome to the Installation Wizard for Microsoft ISA Server 2004 page.
4.Select the I accept the terms in the license agreement option on the License Agreement page. Click Next.
5.On the Customer Information page, enter your name and the name of your organization in the User Name and Organization text boxes. Enter Product Serial Number. Click Next.
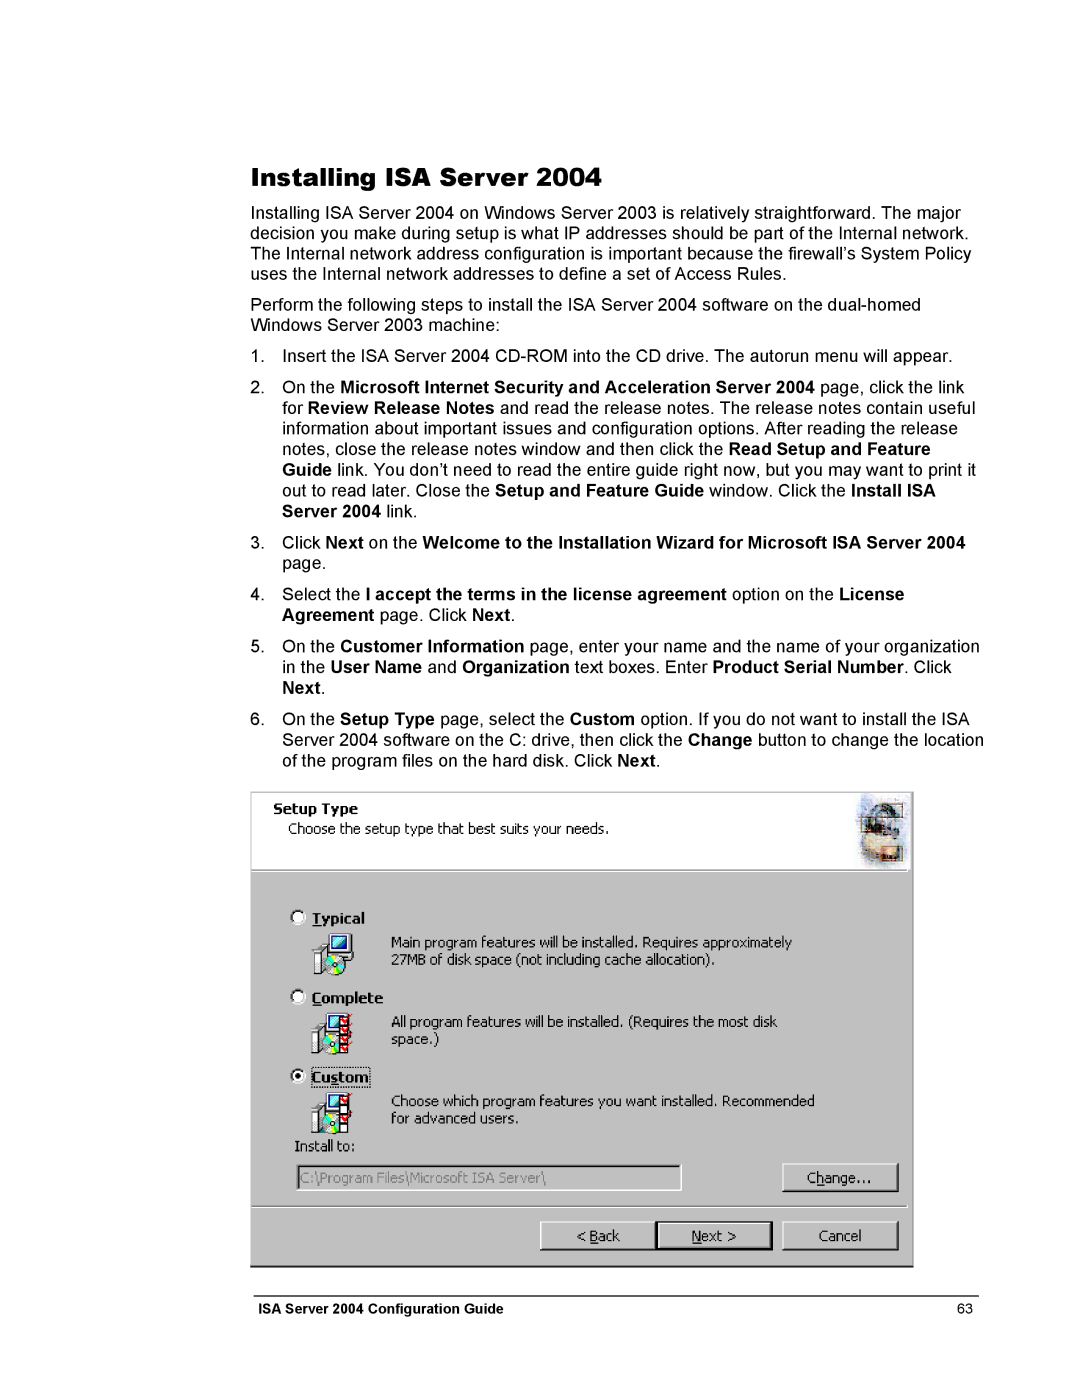
6.On the Setup Type page, select the Custom option. If you do not want to install the ISA Server 2004 software on the C: drive, then click the Change button to change the location of the program files on the hard disk. Click Next.
ISA Server 2004 Configuration Guide | 63 |