Menu map
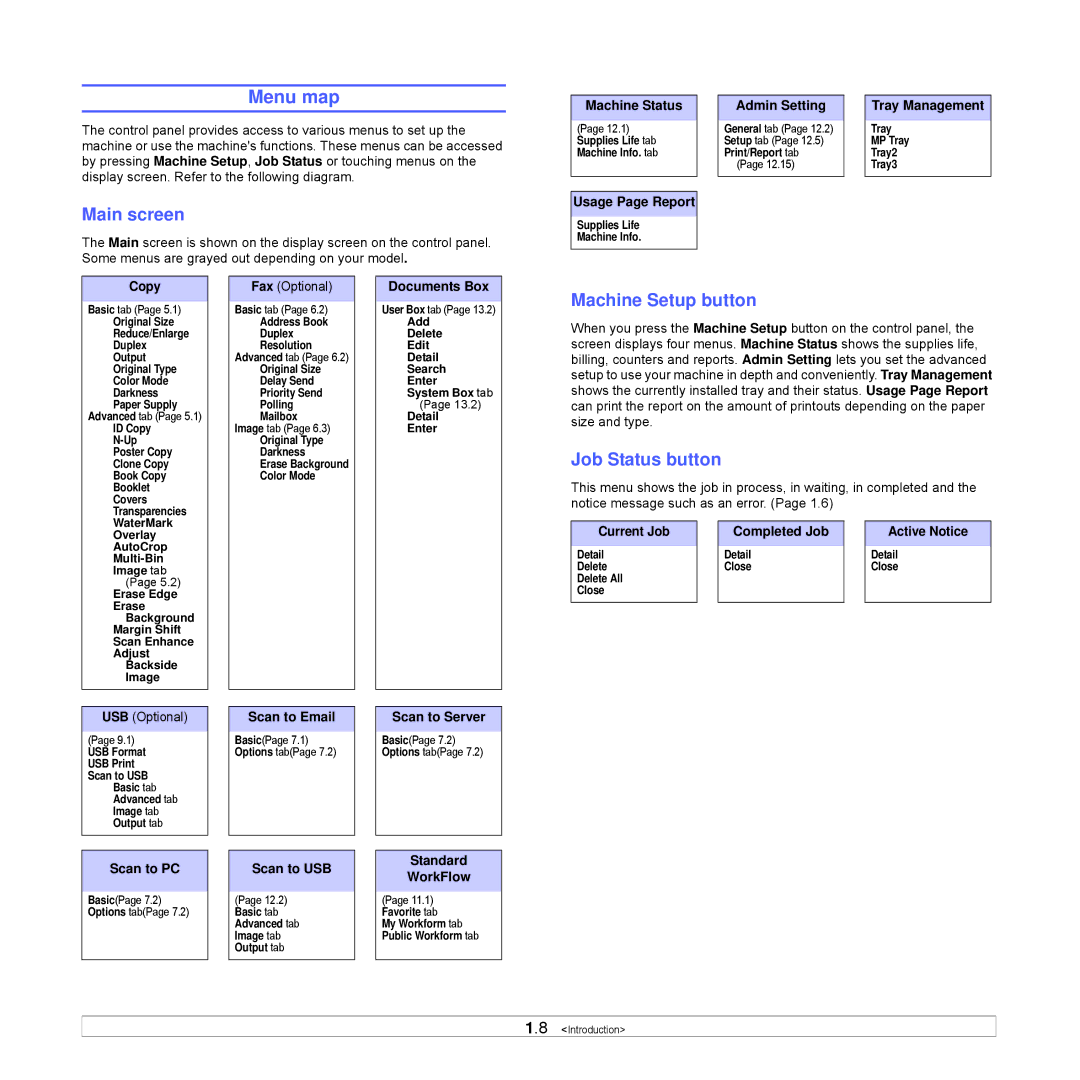
The control panel provides access to various menus to set up the machine or use the machine's functions. These menus can be accessed by pressing Machine Setup, Job Status or touching menus on the display screen. Refer to the following diagram.
Main screen
The Main screen is shown on the display screen on the control panel. Some menus are grayed out depending on your model.
Machine Status
(Page 12.1) Supplies Life tab Machine Info. tab
Usage Page Report
Supplies Life
Machine Info.
Admin Setting
General tab (Page 12.2) Setup tab (Page 12.5) Print/Report tab
(Page 12.15)
Tray Management
Tray
MP Tray
Tray2
Tray3
Copy
Basic tab (Page 5.1)
Original Size
Reduce/Enlarge
Duplex
Output
Original Type
Color Mode
Darkness
Paper Supply
Advanced tab (Page 5.1)
ID Copy
Poster Copy
Clone Copy
Book Copy
Booklet
Covers
Transparencies
WaterMark
Overlay
AutoCrop
Image tab
(Page 5.2)
Erase Edge
Erase
Background
Margin Shift
Scan Enhance
Adjust
Backside
Image
Fax (Optional)
Basic tab (Page 6.2)
Address Book
Duplex
Resolution
Advanced tab (Page 6.2)
Original Size
Delay Send
Priority Send
Polling
Mailbox
Image tab (Page 6.3)
Original Type
Darkness
Erase Background
Color Mode
Documents Box
User Box tab (Page 13.2)
Add
Delete
Edit
Detail
Search
Enter
System Box tab (Page 13.2)
Detail
Enter
Machine Setup button
When you press the Machine Setup button on the control panel, the screen displays four menus. Machine Status shows the supplies life, billing, counters and reports. Admin Setting lets you set the advanced setup to use your machine in depth and conveniently. Tray Management shows the currently installed tray and their status. Usage Page Report can print the report on the amount of printouts depending on the paper size and type.
Job Status button
This menu shows the job in process, in waiting, in completed and the notice message such as an error. (Page 1.6)
Current Job |
| Completed Job |
| Active Notice |
|
|
|
|
|
Detail |
| Detail |
| Detail |
Delete |
| Close |
| Close |
Delete All |
|
|
|
|
Close |
|
|
|
|
USB (Optional)
(Page 9.1)
USB Format
USB Print Scan to USB
Basic tab Advanced tab Image tab Output tab
Scan to PC
Basic(Page 7.2) Options tab(Page 7.2)
Scan to Email
Basic(Page 7.1) Options tab(Page 7.2)
Scan to USB
(Page 12.2) Basic tab Advanced tab Image tab Output tab
Scan to Server
Basic(Page 7.2) Options tab(Page 7.2)
Standard
WorkFlow
(Page 11.1) Favorite tab My Workform tab Public Workform tab
1.8 <Introduction>