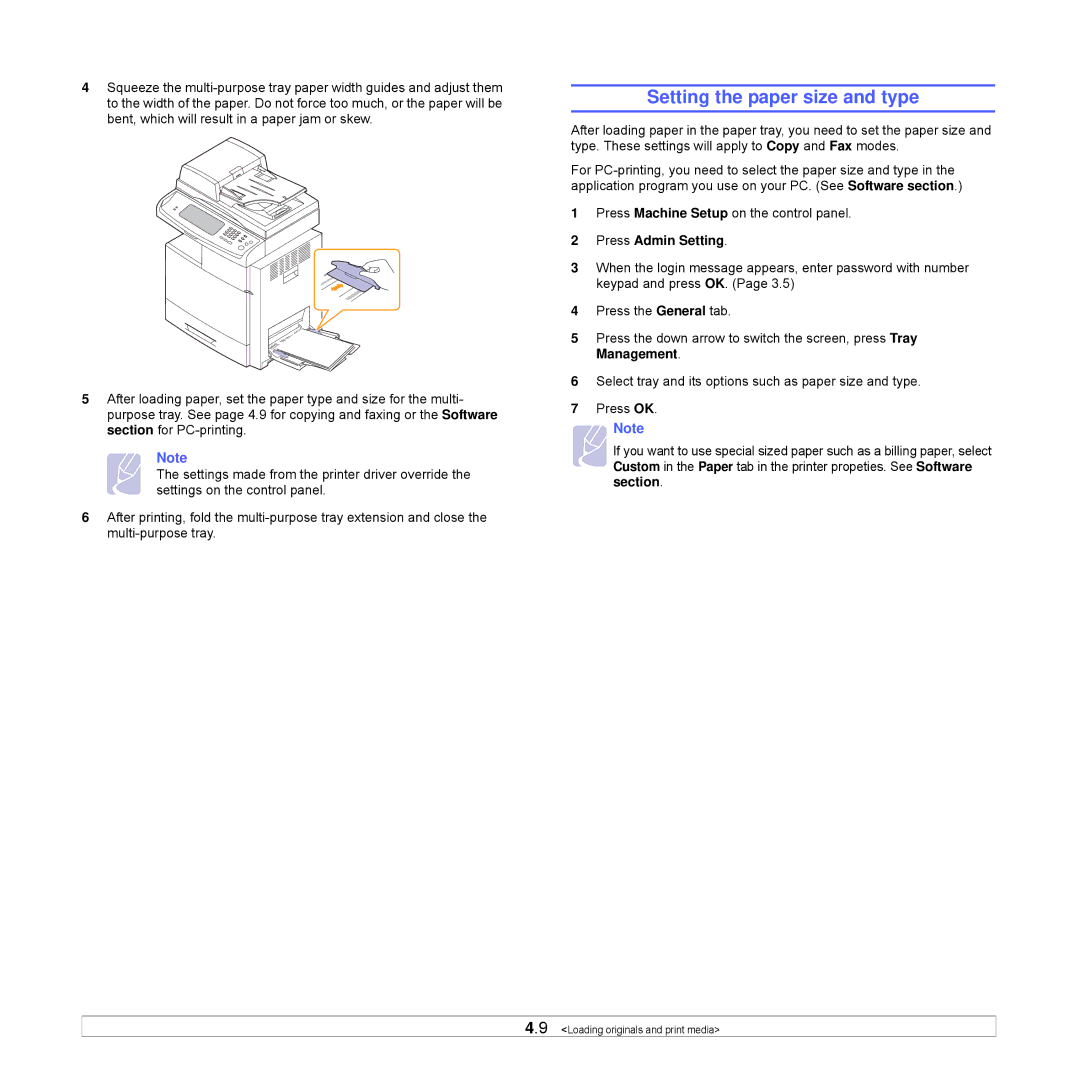
Multi Functional Printer
User’s Guide
imagine the possibilities
CLX-8540ND Series
UFST and MicroType are registered trademarks of Monotype Imaging Inc
PCL and PCL 6 are trademarks of Hewlett-Packard company
PostScript 3 is a trademark of Adobe System, Inc
CONTACT SAMSUNG WORLDWIDE
Country
Customer Care Center
Web Site
Country
Customer Care Center
Web Site
TURKEY
Introduction
Software overview
Getting Started
CONTENTS
Faxing Optional
4. Loading originals and print media
Copying
Setting the fax header
Delaying a fax transmission
Receiving manually in Telephone mode
Receiving automatically in Answering Machine/Fax mode
8. Basic printing
9. Using USB flash memory
7. Scanning
10.Using Document Box
11. Using Standard Workflow
12. Machine status and advanced setup
13. Maintenance
14. Troubleshooting
15. Ordering supplies and accessories
16. Installing accessories
Specifications
Glossary
Index
About this user’s guide
Finding more information
Copy Setup
Quick Install
Laser Safety Statement
Safety and Regulatory Information
Important Precautions and Safety Information
Ozone Safety
Power Saver
Recycling
Correct disposal of batteries in this product
Fax Branding
Ringer Equivalence Number
Replacing the Fitted Plug for UK Only
You should also know that
Declaration of Conformity European Countries
OpenSSL License
Original SSLeay License
Approvals and Certifications
Redistribution and use in source and binary forms, with or without modification, are permitted provided that the following conditions are met
Special features
1 Introduction
Special features Machine overview Control panel overview
Introducing the touch screen and useful buttons
Machine features
Features
Use USB flash memory devices
IPv6
Machine overview
Front view
DADF cover
Stand
Rear view
Power switch
Power receptacle
Finisher Stacker & Stapler
Control panel overview
Machine Setup Leads you to the machine setup and
advanced settings. Page
On Hook Dial Engages the telephone line
Machine Setup button
Introducing the touch screen and useful buttons
Touch screen
Job Status button
Power Saver button
Understanding the Status LED
Interrupt button
Status
Menu map
Main screen
Machine Setup button
Admin Setting
2 Software overview
Supplied software
Supplied software Printer driver features System requirements
Contents
Printer driver features
System requirements
Feature
Windows
Macintosh
Linux
Requirement recommended
Operating
Setting up the hardware
3 Getting Started
Setting up the hardware Setting up the network
Installing the software Using the SetIP program Altitude adjustment
Setting a Color Standard
Setting up the network
Configuring network protocol via the machine
Supported operating systems
Installing the software
8 Press IP Setting
Using the SetIP program
Installing the program
Starting the program
3 Double click Application SetIP
Altitude adjustment
Machines basic settings
Setting the authentication password
Setting the date and time
Setting job timeout
Using power saving feature
Setting the default tray and paper
Changing the display language
Changing the default settings
Changing the font setting
Understanding the keyboard
2 Press Admin Setting
4 Loading originals and print media
Loading originals
On the scanner glass
In the DADF
Selecting print media
Specification on print media
Dimensions
Weight
Type
Media sizes supported in each mode
Guidelines for selecting and storing print media
Copy mode
Guidelines for special print media
Check your machine’s specification to view the
Media type
Guidelines
Media type
Changing the size of the paper in the paper tray
Loading paper
Envelope
Punched paper
Label
In the multi-purpose tray
Tips on using the multi-purpose tray
Envelope
Punched paper
4.9 Loading originals and print media
Setting the paper size and type
2 Press Admin Setting
5 Copying
Understanding the Copy screen
Basic tab
Advanced tab
Copying originals
Image tab
Changing the settings for each copy
Changing the size of originals
Reducing or enlarging copies
Copying on both sides of originals Duplex
Deciding the form of copy output Collated / Staple
5.4 Copying
Using special copy features
Color Mode
Selecting the type of originals
Changing the darkness
ID card copying
Copying ID with the manual ID copy option
3 Press the Setup tab Copy Setup Mamual ID Copy Setup
5 Press Edit Template
2-up or 4-up copying N-up
Poster copying
9 Press the Advanced tab ID Copy Mamual ID Copy Setup
4 Press the Advanced tab Poster Copy
Clone copying
Book copying
Booklet copying
4 Press the Advanced tab Clone Copy
Cover copying
Transparency copying
Watermark copying
5 Press the Advanced tab Transparencies
Overlay copying
Auto crop copying
Multi-Bin
Erasing edges
Adjusting backside images
Erasing background images
Shifting margins
Gray enhance copying
6 Faxing Optional
Preparing to fax
Sending a fax from a computer
Sending a fax from your Computer
Understanding the Fax screen
Checking a sent fax list
Basic tab
Advanced tab
Setting the fax header
Sending a fax
Sending a fax
3 Press the Setup tab Fax Setup Machine ID & Fax No
Sending a fax manually On Hook Dial
Automatic resending
Redialing the last number
5 Select Redial Term and Redial Times
Delaying a fax transmission
Sending a priority fax
Sending multiple faxes in a single transmission
4 Press the Advanced tab Delay Send
Receiving manually in Telephone mode
Receiving automatically in Answering Machine/ Fax mode
Receiving faxes manually using an extension telephone
Receiving in secure receiving mode
Adjusting the document settings
Resolution
Printing received faxes on both sides of the paper
Receiving faxes in memory
Setting up a fax phonebook
Original Type
Darkness
Erase Background
Using the polling option
Setting up a fax phonebook using SyncThru Web Service
Storing Group fax numbers Group No
Individual
Storing the originals for polling
Printing Deleting the polling document
4 Press the Advanced tab Polling Store
2 Press the Advanced tab Polling Print or Delete 3 Enter Passcode
Using Mailbox
Polling a remote fax
Polling from a remote Mailbox
Creating Mailbox
Storing originals in Mailbox
Faxing to a remote Mailbox
8 Press Edit Mailbox
4 Press the Advanced tab Mailbox Store
Adding documents to a reserved delay fax job
Printing a report after sending a fax
Sending a fax in toll save time
3 Press the Print/Report tab Report Fax Report Fax Send Report
Forwarding a received fax to other destination
Forwarding a sent fax to other destination by a fax
Forwarding a received fax to other destination by a fax
Forwarding a sent fax to other destination by an email
Setting up the end fax tone
Setting up receiving faxes in color
Forwarding a sent fax to other destination by server
Forwarding a received fax to other destination by server
7 Scanning
Understanding the Scan screen
Basic screen
Using Samsung Scan Manager
Scan to Server
Options tab
Scan to PC
Scanning originals and sending through email Scan to Email
2 Press Scan to Email
Setting up an email account
Storing email addresses
3 Click Go to access the SyncThru Web Service
5 Click Settings Network Settings Outgoing Mail ServerSMTP
Entering email addresses by the address book
Entering email addresses by the keyboard
3 Click Go to access the SyncThru Web Service
Global
Using Samsung Scan Manager
Set Scan Button tab
Change Port tab
Scan Destination
Scanning originals and sending via SMB/ FTP Scan to Server
Preparation for scanning to SMB/FTP
Scanning and sending to SMB/FTP server
3 Click Go to access the SyncThru Web Service 4 Click Address Book
Changing the scan feature settings
Original Size
Resolution
Press Scan to Server the Basic tab Resolution
Scan Preset
Scan to Edge
Quality
Color Mode
File Format
PDF Encryption
The PDF Encryption can be used in the Scan to Server feature
Press Scan to Email Or Scan to Server the Options tab File Format
Printing a document
Canceling a print job
8 Basic printing
9 Using USB flash memory
About USB memory
Understanding the USB screen
Plugging in an USB memory device
Scanning to an USB memory device
Scan to USB
Scanning
Basic tab
Output tab
Changing the scan feature settings
Resolution
Press Scan to USB the Basic tab Resolution
Color Mode
Press Scan to USB the Image tab Color Mode
Or, press USB Scan to USB the Image tab Color Mode
Original Size
Scan Preset
Press Scan to USB the Output tab Scan Preset
Or, press USB Scan to USB the Output tab Scan Preset
Erase Background
Printing from a USB memory device
File Policy
To print a document from a USB memory device
Press Scan to USB the Output tab File Policy
10Using Document Box
About Document Box
Understanding the Document Box screen
Document Box Screen
Box Adding Screen
Edit a Box Screen
Document List Screen
10.2 Using Document Box
Storing documents to Document box
Storing documents from document box
Storing documents during copy, scan, fax function
5 Press Add From Scan
11 Using Standard Workflow
About Standard Workflow
Understanding the Standard Workflow Screen
Workflow Screen
Workform Creating Screen
Input Tab
Transmit Tab
Properties Tab
Delayed start feature
Notification feature
Approval feature
Various Operations with Workform
Machine Setup
Admin Setting screen
Machine Status screen
12 Machine status and advanced setup
General settings
Browsing the machine’s status
Default Settings
2 Press Machine Status the Machine Info. tab
Timers
Power Saver
adjusted here. Tray Confirmation Message is
Adjustment
from SyncThru Web Service. Click Settings
Machine Settings System Home
Option
Description
Copy Setup
Fax Setup
Error Correction
Option
Fax Initial Setup
You can set Receive Mode for Telephone, Fax
or Answering Machine/Fax, and Dial Mode at
When you select Answering Machine/Fax
Network Setup
Security
3 Press the Setup tab Network Setup
Clear Setting
Access Control
Authentication
It disables Authentication
Authentication
User Authentication Method
Web Admin Service’s job
Admin Service
Report in Machine Setup
Enabling network authentication by Kerberos
Enabling network authentication by SMB
2 Select Security External Authentication Server SMB Server
Enabling network authentication by LDAP
Change Admin. Password
Information Hiding
3 Select Security User Access Control Accounting Accounting Method
You can enable or disable job log to record job
Optional Service
Adjusting the color contrast
3 Press the Setup tab Optional Service
Option
Inner Temperature Condition The machine
LSU Temperature Condition The machine
Adjustment
Color Tone Adjustment Activation Activates
Document Box Management
Standard Workflow Management
3 Press the Setup tab Document Box Management
If you set this option to Administrators only, only
Printing a report
Configuration, PS3 Font List, PCL
waiting, in delayed faxing or the
It displays user login IDs and emails
12.16 Machine status and advanced
13 Maintenance
Printing a machine report
Monitoring the supplies life
Finding the serial number
Cleaning your machine
Cleaning the outside
Cleaning the inside
Cleaning the scan unit
Maintaining the toner cartridge
Redistributing toner
Toner cartridge storage
Handling instructions
Replacing the toner cartridge
4 Pull the corresponding toner cartridge out from the machine
13.5 Maintenance
Replacing the imaging unit
Expected cartridge life
13.7 Maintenance
Replacing the waste toner container
13.8 Maintenance
Maintenance Parts
To access SyncThru Web Service
Managing your machine from the website
Items
14 Troubleshooting
Tips for avoiding paper jams
Clearing document jams
Solving other problems
Misfeed of exiting paper
Roller misfeed
Clearing paper jams
In the tray
Message
Location of jam
2 Open the guide in the direction shown
In the optional tray
14.5 Troubleshooting
In the optional high capacity feeder
14.6 Troubleshooting
In the multi-purpose tray
In the paper inside the machine
14.7 Troubleshooting
14.8 Troubleshooting
In the fuser area
In the duplex unit area
Paper jam inside finisher, Paper jam inside finisher? duplex
In the stacker finisher
Paper jam in front of finisher
Understanding display messages
Suggested solutions
is not installed
Install it
Suggested solutions
installed. Install it
reinstall
Suggested solutions
Suggested solutions
Suggested solutions
Message
Meaning
Suggested solutions
switch is locked or
another problem
service
Solving other problems
Touch screen problem
Paper feeding problems
Printing problems
Suggested solutions
Suggested solutions
Condition
Possible cause
Printing quality problems
Suggested solutions
Suggested solutions
Condition
Suggested solutions
Suggested solutions
Condition
White Spots
Suggested solutions
Suggested solutions
option through Printer Settings Utility or the
Condition
Copying problems
Scanning problems
Suggested solutions
Suggested solutions
Samsung Scan Manager Problem
Fax problems optional
Suggested solutions
Suggested solutions
Common Windows problems
Common PostScript problems
Suggested solutions
Problem
Common Linux problems
Problem
Possible Cause and Solution
Problem
Problem
Possible Cause and Solution
Problem
Possible Cause and Solution
Common Macintosh problems
Problem
Suggested solutions
14.24 Troubleshooting
15 Ordering supplies and accessories
Accessories
Supplies
Supplies Accessories How to purchase
How to purchase
Accessory
Accessory
Description
16 Installing accessories
Precautions to take when installing accessories
Installing a memory module
Disconnect the power cord
Replacing the Stapler
Activating the added memory in the PS printer properties
5 Select Device Settings
4 Select the Samsung CLX-8540 Series PS printer
16.3 Installing accessories
Enabling Fax feature after installing the fax option kit
2 Press Admin Setting
15 Specifications
General specifications
General specifications Printer specifications Copier specifications
Scanner specifications Facsimile specifications optional
Printer specifications
Copier specifications
Description
Description
Scanner specifications
Facsimile specifications optional
Description
Description
18 Glossary
18.2 Glossary
JBIG
Protocol
INDEX
Page
Page
Page
Software section
Samsung Printer
Chapter 1 INSTALLING PRINTER SOFTWARE IN WINDOWS
SOFTWARE SECTION
Chapter 2 BASIC PRINTING
Chapter 3 ADVANCED PRINTING
Chapter 4 USING WINDOWS POSTSCRIPT DRIVER
Chapter 5 USING DIRECT PRINTING UTILITY
Chapter 6 SHARING THE PRINTER LOCALLY
Chapter 7 SCANNING
Chapter 10 USING YOUR PRINTER WITH A MACINTOSH
Chapter 8 USING SMART PANEL
Chapter 9 USING YOUR PRINTER IN LINUX
Changing Printer Settings
Printing a Document
Printing Multiple Pages on One Sheet of Paper
Duplex Printing
1 Installing Printer Software in Windows
Installing Printer Software
Installing Software for Local Printing
Typical Installation
Custom Installation
4 Select Typical installation for a local printer. Click Next
4 Select Custom installation. Click Next
4 Select Typical installation for a network printer. Click Next
Installing Software for Network Printing
Typical Installation
Custom Installation
Installing Printer Software in Windows
Reinstalling Printer Software
Installing Printer Software in Windows
2 From the Start menu select Programs or All Programs
Removing Printer Software
→ Samsung Printers → your printer driver name → Maintenance
Installing mono printer driver
6 When Add Printer Wizard appears, click Next
12 Click OK in the Install From Disk window
4 Click Start → Printers and Faxes 5 Select Add Printer
2 Basic Printing
Printing a Document
Printing to a file PRN
Printing a Document Printing to a file PRN Printer Settings Basic Tab
Printer Settings
15 Basic Printing
saved in My Documents
2. Select Printers and Faxes 3. Select your printer driver icon
Basic Tab
Paper Tab
Orientation
Quality
Scaling Options
17 Basic Printing
Advanced Paper Options First Page
Cover Page
Graphics Tab
Color Mode
Font/Text
Raster Compression
Using a favorite setting
Advanced Tab
Samsung Tab
Job Settings
Using Help
20 Basic Printing
3 Advanced Printing
Printing Multiple Pages on One Sheet of Paper N-Up Printing
Fitting Your Document to a Selected Paper Size Using Watermarks
Using Overlays
Poster Printing in the Type
Printing Posters
Printing Booklets
Printing on Both Sides of Paper
Change percentage of your document
Fitting Your Document to a
Selected Paper Size
Using Watermarks
Using an Existing Watermark
Editing a Watermark
Deleting a Watermark
Using Overlays
Using a Page Overlay
What is an Overlay?
Creating a New Page Overlay
4 Using Windows PostScript Driver
Advanced
Printer Settings
Using Help
5 Using Direct Printing Utility
Overview Direct Printing Utility
Printing
From the Direct Printing Utility window
Setting Up a Host Computer
Setting Up a Client Computer
6 Sharing the Printer Locally
2 From the Start menu select Printers and Faxes
Using SmarThru Office
7 Scanning
Starting SmarThru Office
Quick Start Guide
Scanning Process with TWAIN- enabled Software
Uninstalling SmarThru Office
2 Scan Setting window opens
Scan To FTP
Scanning Using the WIA Driver
Windows XP/Server
Windows 2008/Vista
Windows
8 Using Smart Panel
Understanding Smart Panel
Printer Setting
Troubleshooting Guide
33 Using Smart Panel
Opening the Troubleshooting Guide
Changing the Smart Panel Program Settings
9 Using Your Printer in Linux
Installing the Unified Linux Driver
Getting Started
3 Click Uninstall
Installing the SmartPanel
Uninstalling the Unified Linux Driver
Using the Unified Driver Configurator
Printers Configuration
Opening the Unified Driver Configurator
1 Double-click Unified Driver Configurator on the
Scanners Configuration
Ports Configuration
Classes Tab
Sharing Ports Between Printers and Scanners
Printing a Document
Configuring Printer Properties
Printing from Applications
4 Click Properties
Scanning a Document
Printing Files
Using the Image Manager
Adding Job Type Settings
You can use the following tools to edit the image
Tools
Function
10 Using Your Printer with a Macintosh
Installing Software
Uninstalling software
Installing Software Uninstalling software Setting Up the Printer
Setting Up the Printer
For a Network-connected
For a USB-connected
NOTE Some printers do not support a network interface
Changing Printer Settings
Printing a Document
Printing
Layout
Job Setting
Job Accounting
Graphics
Paper
Printer Features Advanced Options
Using Your Printer with a Macintosh
Optional Finisher
Front Cover
Back Cover
Transparency Seperator
Front and Back Cover Option
Smart Color
Printing Multiple Pages on One Sheet of Paper
Duplex Printing
Scanning
Scanning with USB
Scanning with network
3 Start Applications and click Image Capture
INDEX
SOFTWARE SECTION
setting darkness 18 image mode 18 true-type option software install
Macintosh Windows 5 reinstall Windows 11 system requirements
Macintosh 42 uninstall Macintosh Windows 12 status monitor, use
uninstall, software Macintosh 42 Windows uninstalling MFP driver