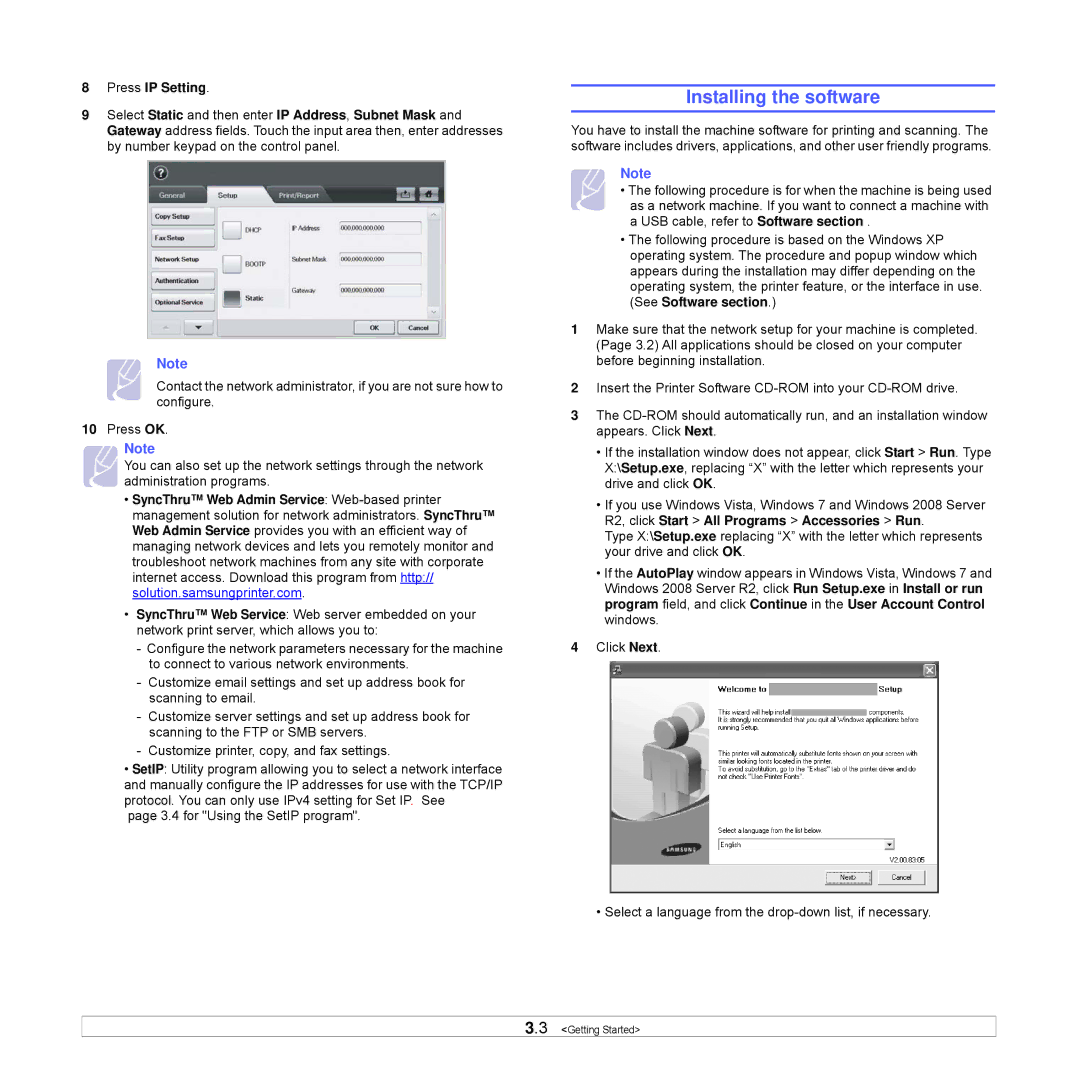
8Press IP Setting.
9Select Static and then enter IP Address, Subnet Mask and Gateway address fields. Touch the input area then, enter addresses by number keypad on the control panel.
Note
Contact the network administrator, if you are not sure how to configure.
10Press OK.
Note
You can also set up the network settings through the network administration programs.
•SyncThru™ Web Admin Service:
•SyncThru™ Web Service: Web server embedded on your network print server, which allows you to:
-Configure the network parameters necessary for the machine to connect to various network environments.
-Customize email settings and set up address book for scanning to email.
-Customize server settings and set up address book for scanning to the FTP or SMB servers.
-Customize printer, copy, and fax settings.
•SetIP: Utility program allowing you to select a network interface and manually configure the IP addresses for use with the TCP/IP protocol. You can only use IPv4 setting for Set IP. See
page 3.4 for "Using the SetIP program".
Installing the software
You have to install the machine software for printing and scanning. The software includes drivers, applications, and other user friendly programs.
Note
• The following procedure is for when the machine is being used as a network machine. If you want to connect a machine with a USB cable, refer to Software section .
•The following procedure is based on the Windows XP operating system. The procedure and popup window which appears during the installation may differ depending on the operating system, the printer feature, or the interface in use. (See Software section.)
1Make sure that the network setup for your machine is completed. (Page 3.2) All applications should be closed on your computer before beginning installation.
2Insert the Printer Software
3The
•If the installation window does not appear, click Start > Run. Type X:\Setup.exe, replacing “X” with the letter which represents your drive and click OK.
•If you use Windows Vista, Windows 7 and Windows 2008 Server R2, click Start > All Programs > Accessories > Run.
Type X:\Setup.exe replacing “X” with the letter which represents your drive and click OK.
•If the AutoPlay window appears in Windows Vista, Windows 7 and Windows 2008 Server R2, click Run Setup.exe in Install or run program field, and click Continue in the User Account Control windows.
4Click Next.
• Select a language from the
3.3 <Getting Started>