Maintenance Parts
To avoid print quality and paper feed problems resulting from worn parts and to maintain your machine in top working condition the following items will need to be replaced after the specified number of pages or when the life span of each item has expired.
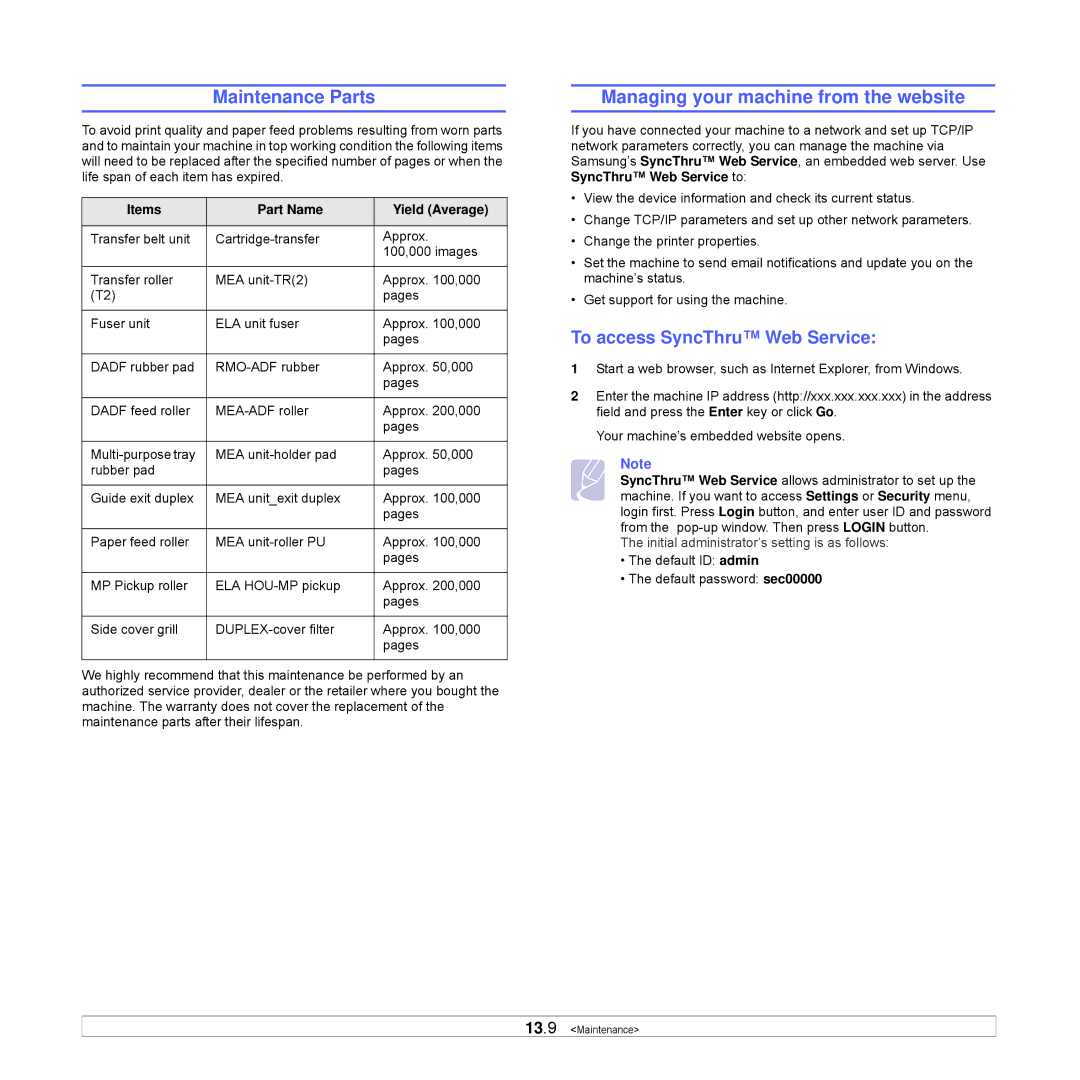
Items | Part Name | Yield (Average) |
|
|
|
Transfer belt unit | Approx. | |
|
| 100,000 images |
|
|
|
Transfer roller | MEA | Approx. 100,000 |
(T2) |
| pages |
|
|
|
Fuser unit | ELA unit fuser | Approx. 100,000 |
|
| pages |
|
|
|
DADF rubber pad | Approx. 50,000 | |
|
| pages |
|
|
|
DADF feed roller | Approx. 200,000 | |
|
| pages |
|
|
|
MEA | Approx. 50,000 | |
rubber pad |
| pages |
|
|
|
Guide exit duplex | MEA unit_exit duplex | Approx. 100,000 |
|
| pages |
|
|
|
Paper feed roller | MEA | Approx. 100,000 |
|
| pages |
|
|
|
MP Pickup roller | ELA | Approx. 200,000 |
|
| pages |
|
|
|
Side cover grill | Approx. 100,000 | |
|
| pages |
|
|
|
We highly recommend that this maintenance be performed by an authorized service provider, dealer or the retailer where you bought the machine. The warranty does not cover the replacement of the maintenance parts after their lifespan.
Managing your machine from the website
If you have connected your machine to a network and set up TCP/IP network parameters correctly, you can manage the machine via Samsung’s SyncThru™ Web Service, an embedded web server. Use SyncThru™ Web Service to:
•View the device information and check its current status.
•Change TCP/IP parameters and set up other network parameters.
•Change the printer properties.
•Set the machine to send email notifications and update you on the machine’s status.
•Get support for using the machine.
To access SyncThru™ Web Service:
1Start a web browser, such as Internet Explorer, from Windows.
2Enter the machine IP address (http://xxx.xxx.xxx.xxx) in the address field and press the Enter key or click Go.
Your machine’s embedded website opens.
Note
SyncThru™ Web Service allows administrator to set up the machine. If you want to access Settings or Security menu, login first. Press Login button, and enter user ID and password from the
The initial administrator’s setting is as follows:
•The default ID: admin
•The default password: sec00000