Professional Access Point
Administrator Guide
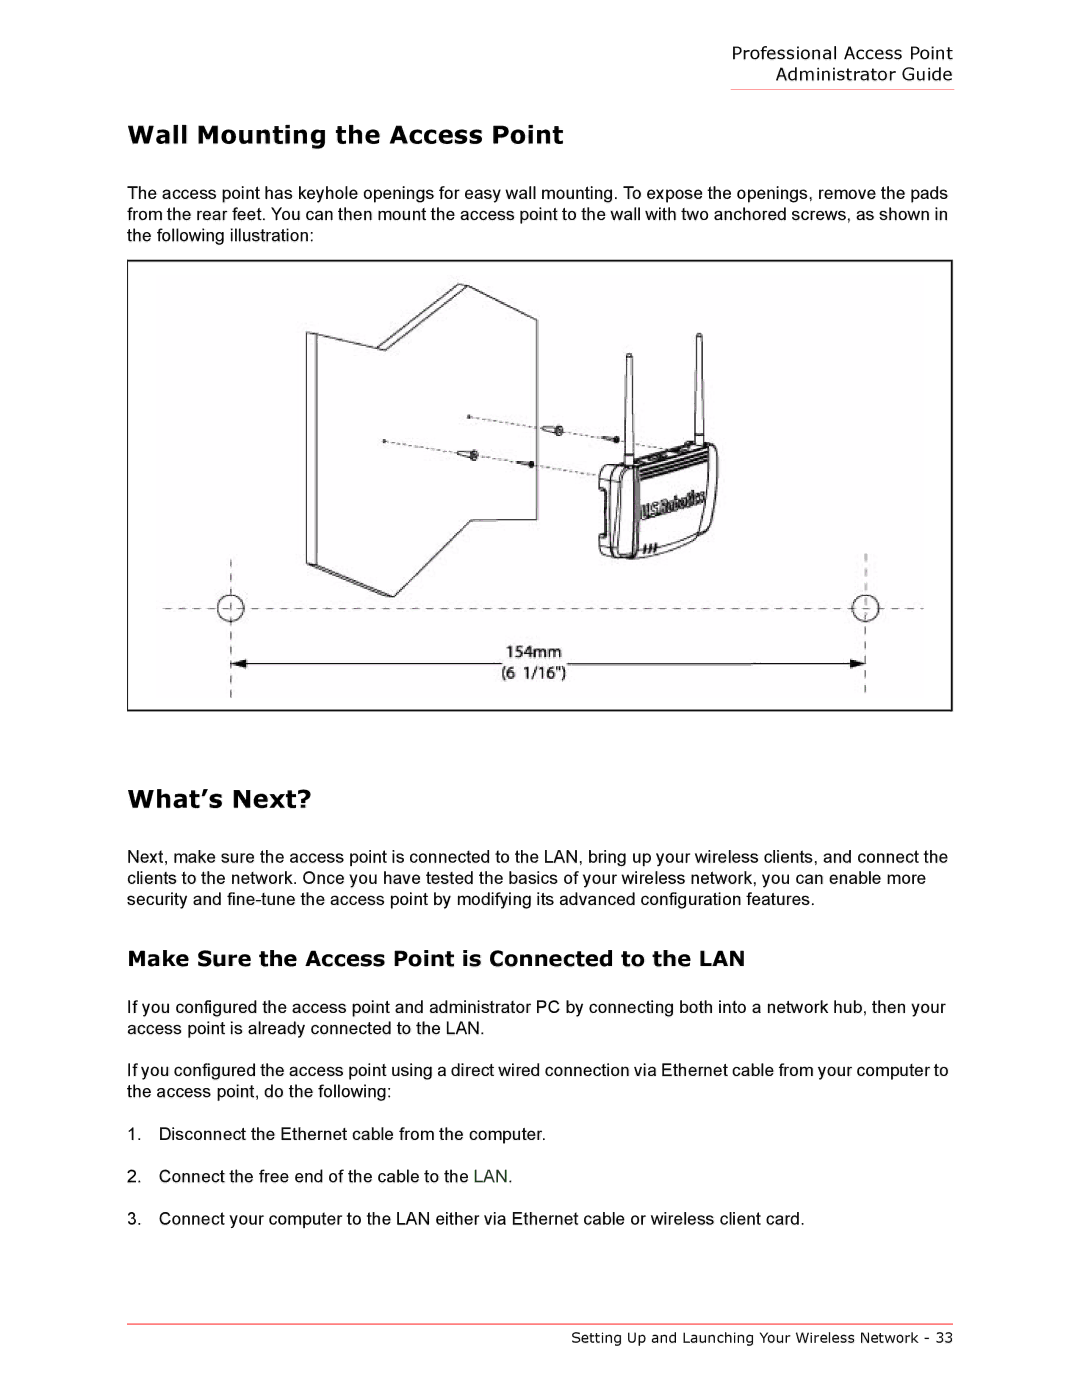
Wall Mounting the Access Point
The access point has keyhole openings for easy wall mounting. To expose the openings, remove the pads from the rear feet. You can then mount the access point to the wall with two anchored screws, as shown in the following illustration:
What’s Next?
Next, make sure the access point is connected to the LAN, bring up your wireless clients, and connect the clients to the network. Once you have tested the basics of your wireless network, you can enable more security and
Make Sure the Access Point is Connected to the LAN
If you configured the access point and administrator PC by connecting both into a network hub, then your access point is already connected to the LAN.
If you configured the access point using a direct wired connection via Ethernet cable from your computer to the access point, do the following:
1.Disconnect the Ethernet cable from the computer.
2.Connect the free end of the cable to the LAN.
3.Connect your computer to the LAN either via Ethernet cable or wireless client card.
Setting Up and Launching Your Wireless Network - 33