Processors
11.2.4 Thermal paste
IOn a new CPU heat sink a thin layer of thermal compound has already been
ÊRemove the cover at the lower surface of the new heat sink.
11.2.5 Installing the processor heat sink
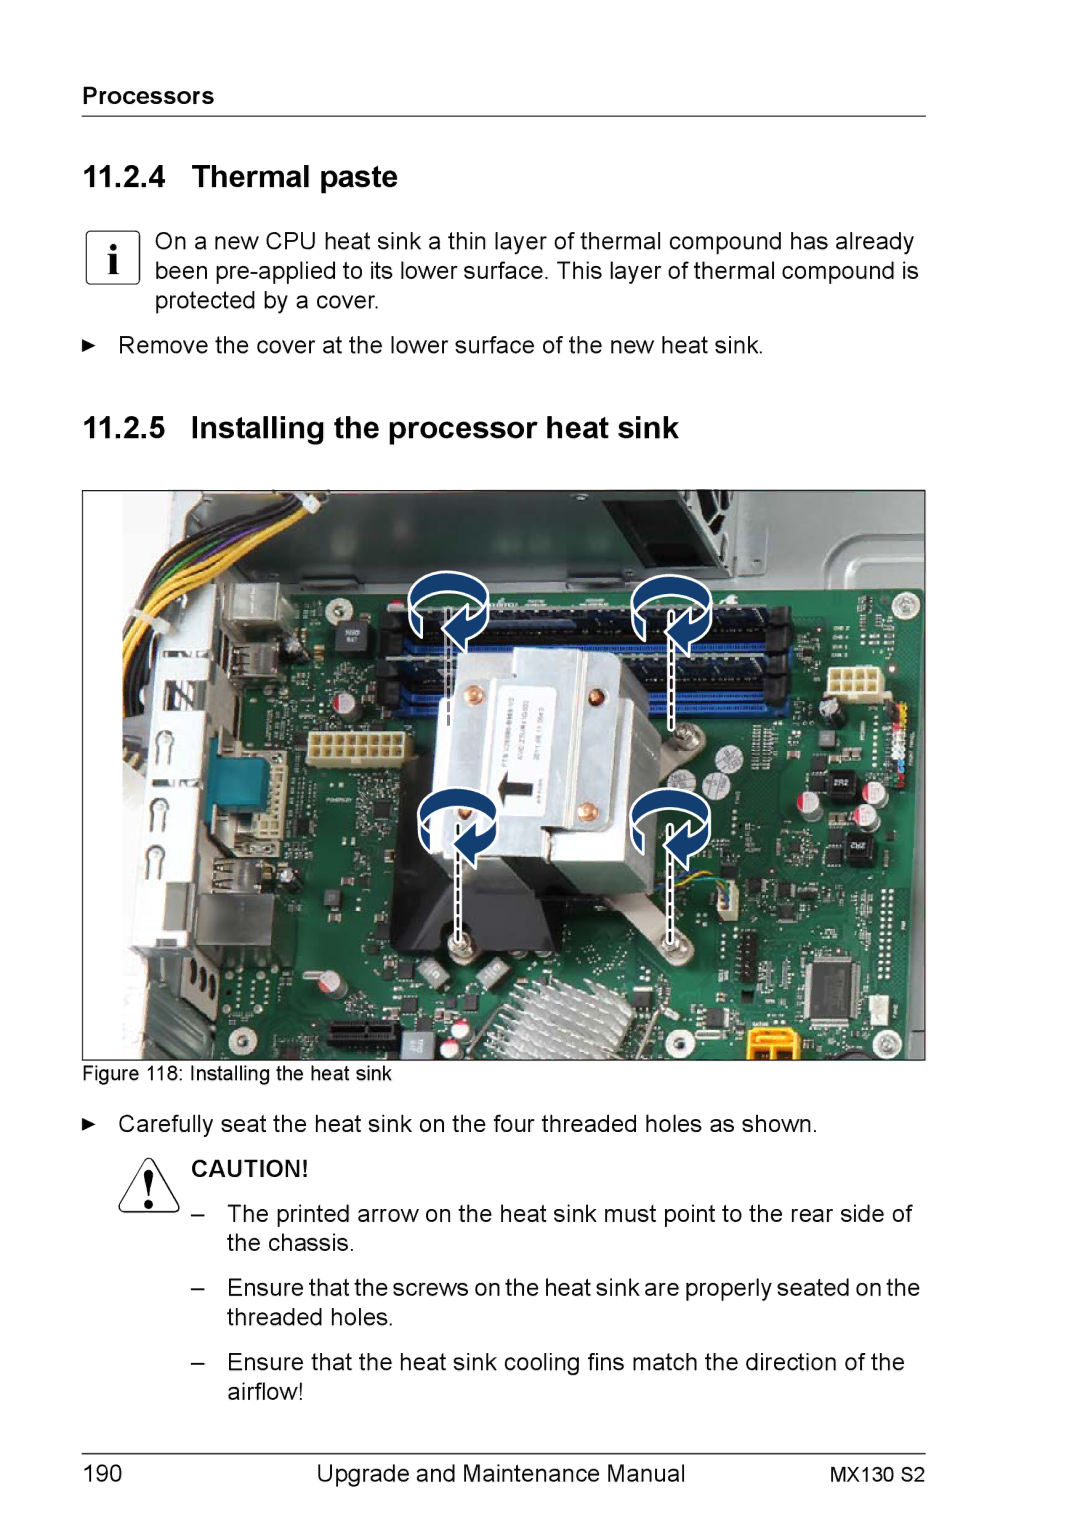
Figure 118: Installing the heat sink
ÊCarefully seat the heat sink on the four threaded holes as shown.
VCAUTION!
–The printed arrow on the heat sink must point to the rear side of the chassis.
–Ensure that the screws on the heat sink are properly seated on the threaded holes.
–Ensure that the heat sink cooling fins match the direction of the airflow!
190 | Upgrade and Maintenance Manual | MX130 S2 |