Installing a simple-swap hard disk drive
Attention:
To install a
1.Read the safety information that begins on page vii and “Installation guidelines” on page 73.
2.Turn off the server and all attached devices; then, disconnect all power cords and external cables.
3.Unlock the side cover.
4.Remove the bezel (see “Removing the bezel” on page 76).
5.Touch the
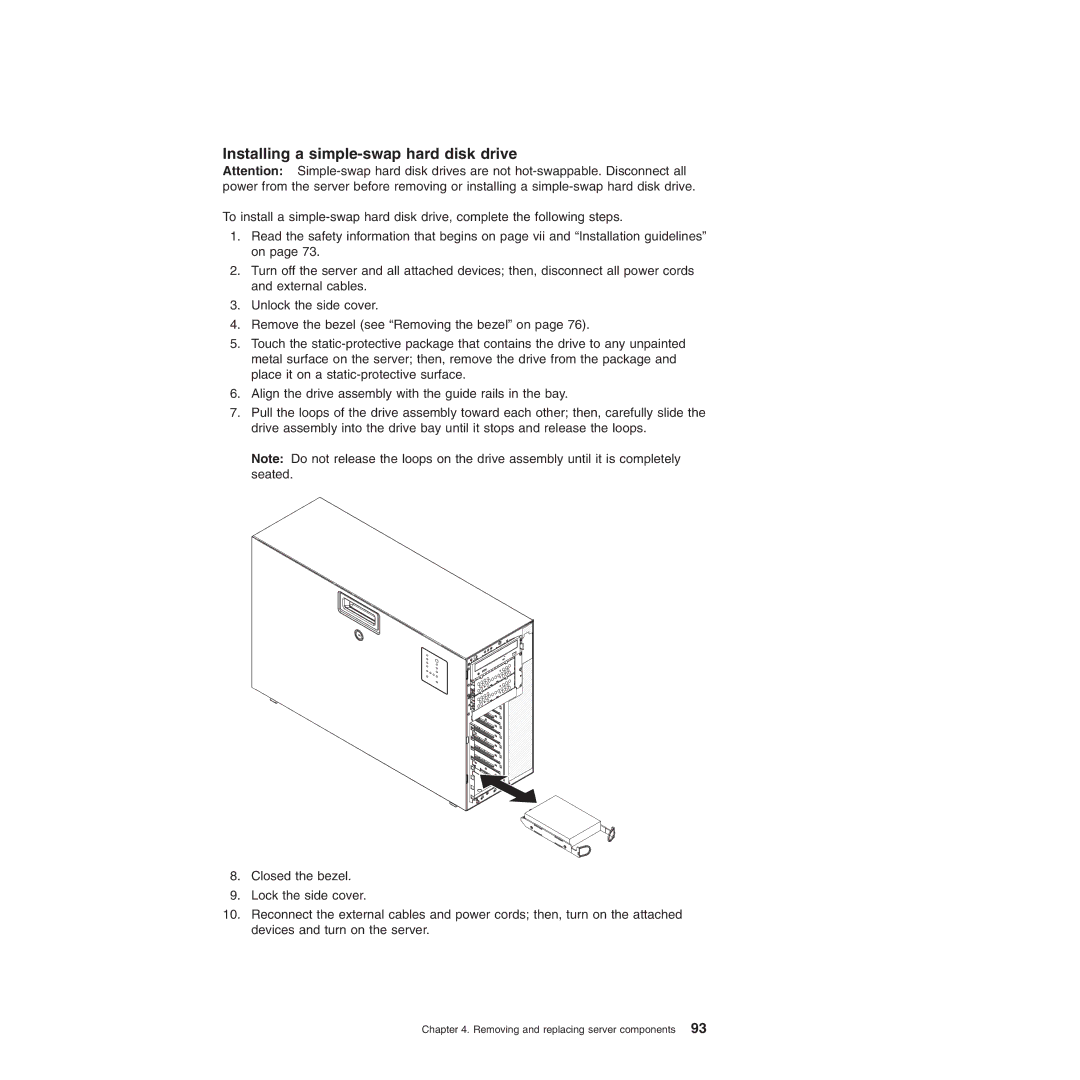
6.Align the drive assembly with the guide rails in the bay.
7.Pull the loops of the drive assembly toward each other; then, carefully slide the drive assembly into the drive bay until it stops and release the loops.
Note: Do not release the loops on the drive assembly until it is completely seated.
8.Closed the bezel.
9.Lock the side cover.
10.Reconnect the external cables and power cords; then, turn on the attached devices and turn on the server.