Front Panel
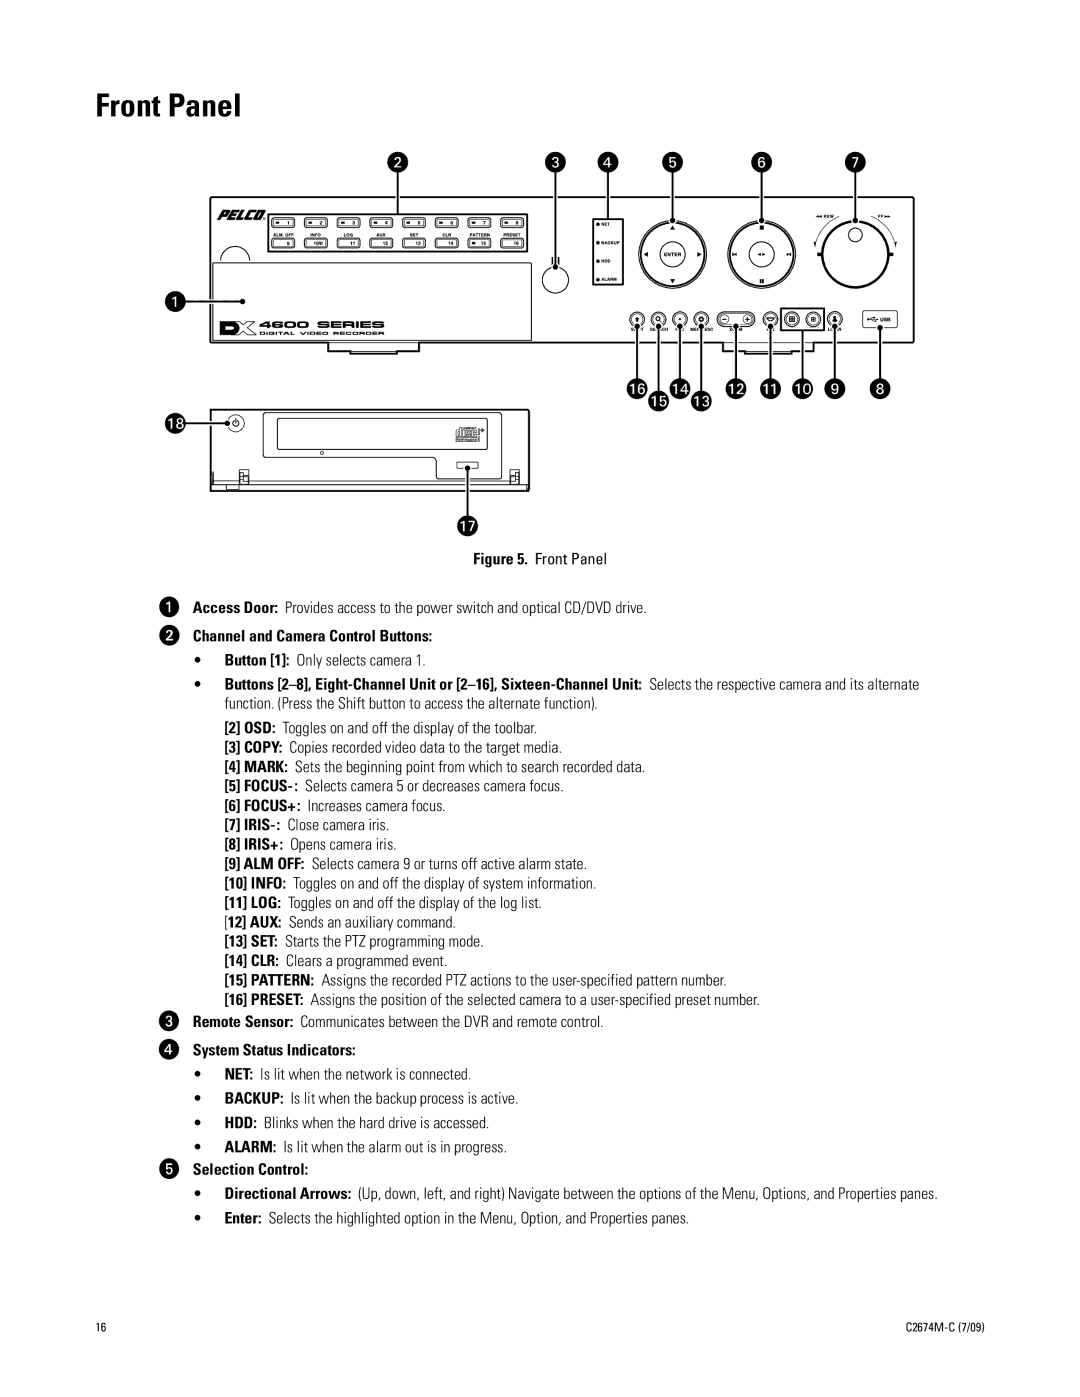
Figure 5. Front Panel
ìAccess Door: Provides access to the power switch and optical CD/DVD drive.
îChannel and Camera Control Buttons:
•Button [1]: Only selects camera 1.
•Buttons
[2]OSD: Toggles on and off the display of the toolbar.
[3]COPY: Copies recorded video data to the target media.
[4]MARK: Sets the beginning point from which to search recorded data.
[5]
[6]FOCUS+: Increases camera focus.
[7]
[8]IRIS+: Opens camera iris.
[9]ALM OFF: Selects camera 9 or turns off active alarm state.
[10]INFO: Toggles on and off the display of system information.
[11]LOG: Toggles on and off the display of the log list.
[12] AUX: Sends an auxiliary command.
[13]SET: Starts the PTZ programming mode.
[14]CLR: Clears a programmed event.
[15]PATTERN: Assigns the recorded PTZ actions to the
[16]PRESET: Assigns the position of the selected camera to a
ï
ñ
Remote Sensor: Communicates between the DVR and remote control.
System Status Indicators:
•NET: Is lit when the network is connected.
•BACKUP: Is lit when the backup process is active.
•HDD: Blinks when the hard drive is accessed.
•ALARM: Is lit when the alarm out is in progress.
óSelection Control:
•Directional Arrows: (Up, down, left, and right) Navigate between the options of the Menu, Options, and Properties panes.
•Enter: Selects the highlighted option in the Menu, Option, and Properties panes.
16 |
