3.To edit a holiday schedule, do the following:
a.On the front panel or remote control, press the up/down arrow buttons ![]()
![]() to highlight a schedule. Using the mouse, click a schedule.
to highlight a schedule. Using the mouse, click a schedule.
b.On the front panel or remote control, press up/down arrow buttons ![]()
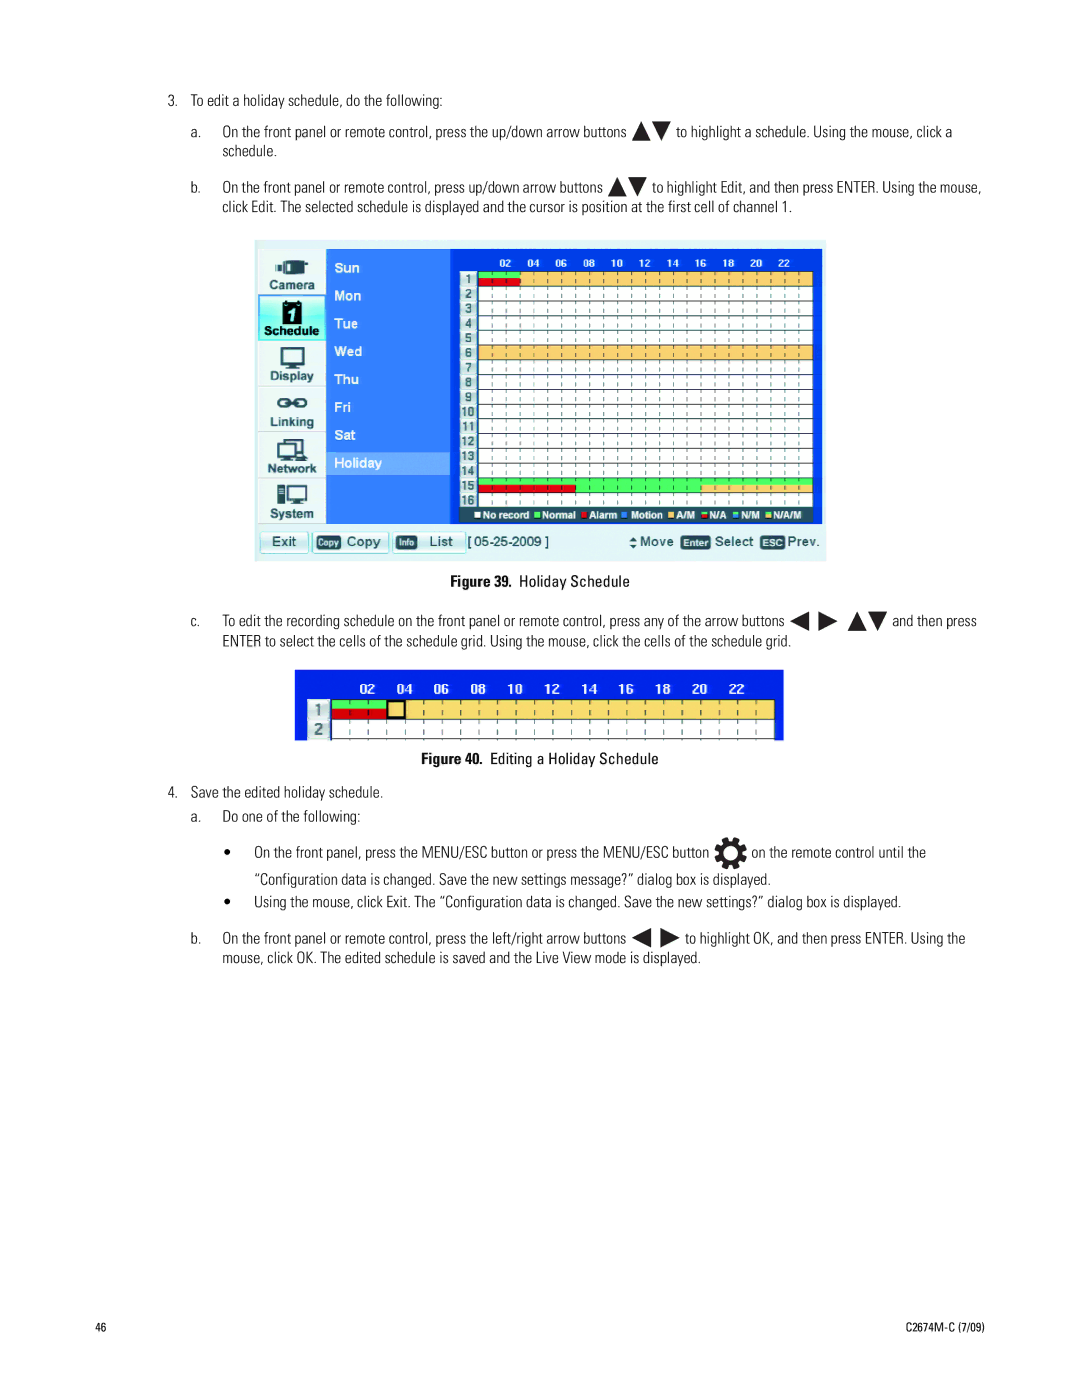
![]() to highlight Edit, and then press ENTER. Using the mouse, click Edit. The selected schedule is displayed and the cursor is position at the first cell of channel 1.
to highlight Edit, and then press ENTER. Using the mouse, click Edit. The selected schedule is displayed and the cursor is position at the first cell of channel 1.
Figure 39. Holiday Schedule
c.To edit the recording schedule on the front panel or remote control, press any of the arrow buttons ![]()
![]()
![]()
![]() and then press ENTER to select the cells of the schedule grid. Using the mouse, click the cells of the schedule grid.
and then press ENTER to select the cells of the schedule grid. Using the mouse, click the cells of the schedule grid.
Figure 40. Editing a Holiday Schedule
4.Save the edited holiday schedule.
a.Do one of the following:
•On the front panel, press the MENU/ESC button or press the MENU/ESC button ![]() on the remote control until the “Configuration data is changed. Save the new settings message?” dialog box is displayed.
on the remote control until the “Configuration data is changed. Save the new settings message?” dialog box is displayed.
•Using the mouse, click Exit. The “Configuration data is changed. Save the new settings?” dialog box is displayed.
b.On the front panel or remote control, press the left/right arrow buttons ![]()
![]() to highlight OK, and then press ENTER. Using the mouse, click OK. The edited schedule is saved and the Live View mode is displayed.
to highlight OK, and then press ENTER. Using the mouse, click OK. The edited schedule is saved and the Live View mode is displayed.
46 |
|