Installing the Fonts
The Fonts on the User Software
SUPPLEMENT:
In the System:Fonts folder, when displayed by Kind, screen fonts appear as type “Font Suitcase” and PostScript printer fonts appear as type “PostScript™ font”.
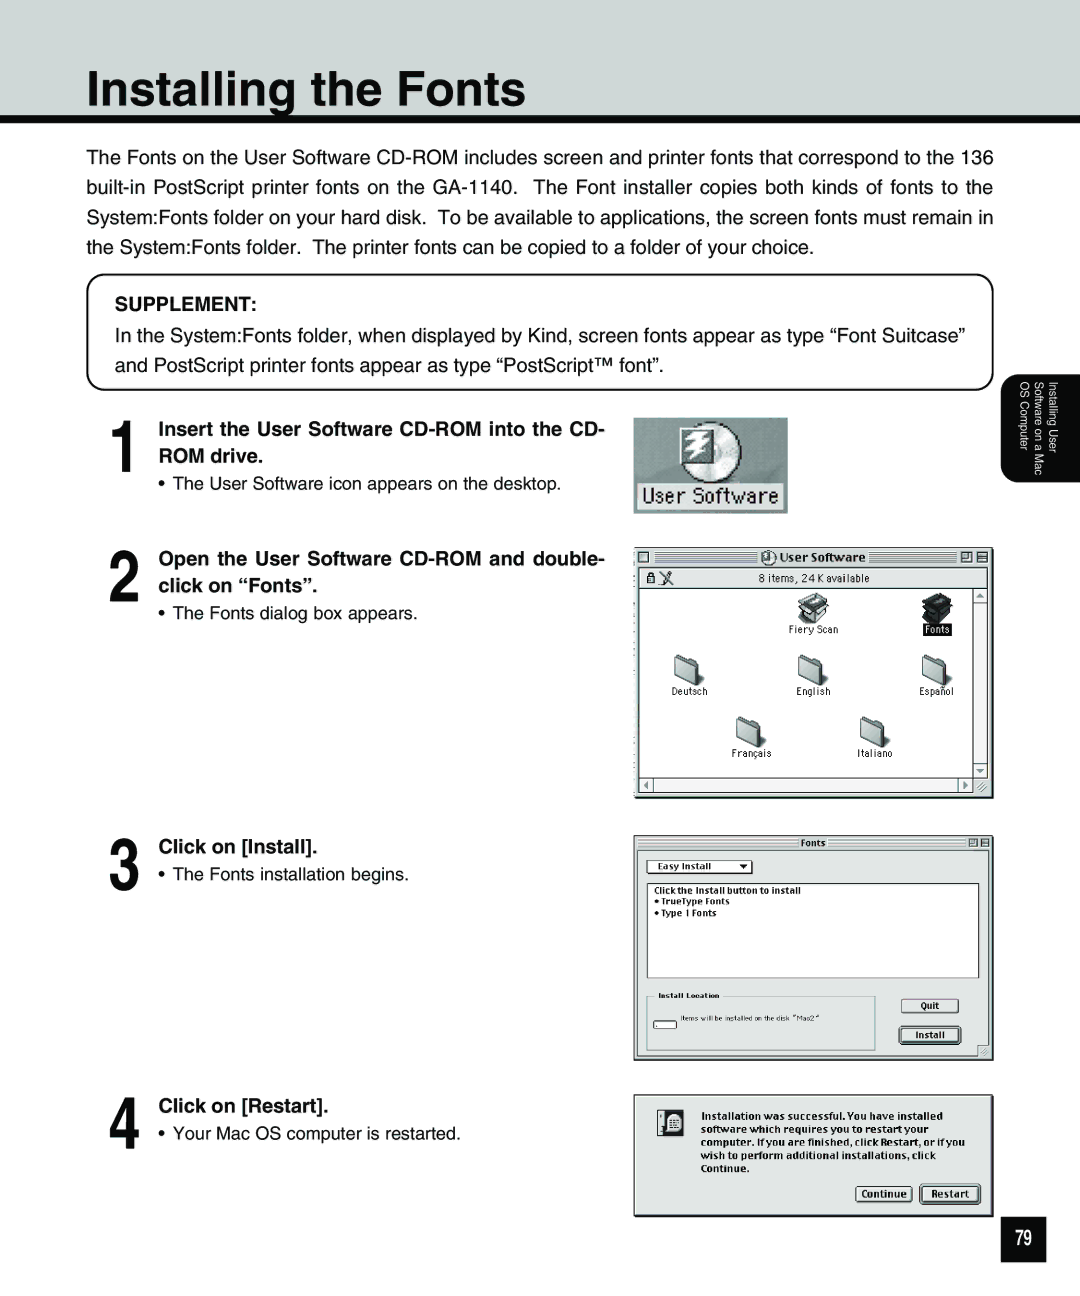
1 Insert the User Software CD-ROM into the CD- ROM drive.
• The User Software icon appears on the desktop.
2 Open the User Software CD-ROM and double- click on “Fonts”.
•The Fonts dialog box appears.
3 Click on [Install].
• The Fonts installation begins.
4 Click on [Restart].
• Your Mac OS computer is restarted.
Software on a OS Computer | Installing User |
Mac |
|
79
