Note
For details on how to change your build tools see Changing build tools on page
4.2.2Creating a new project
To set up the new project:
1.Select Project → New Project... from the default Code window main menu.
This displays the Create New Project dialog box. The Project Base field might be prefilled with your RealView Debugger installation directory name as defined by your environment variable. You can override this.
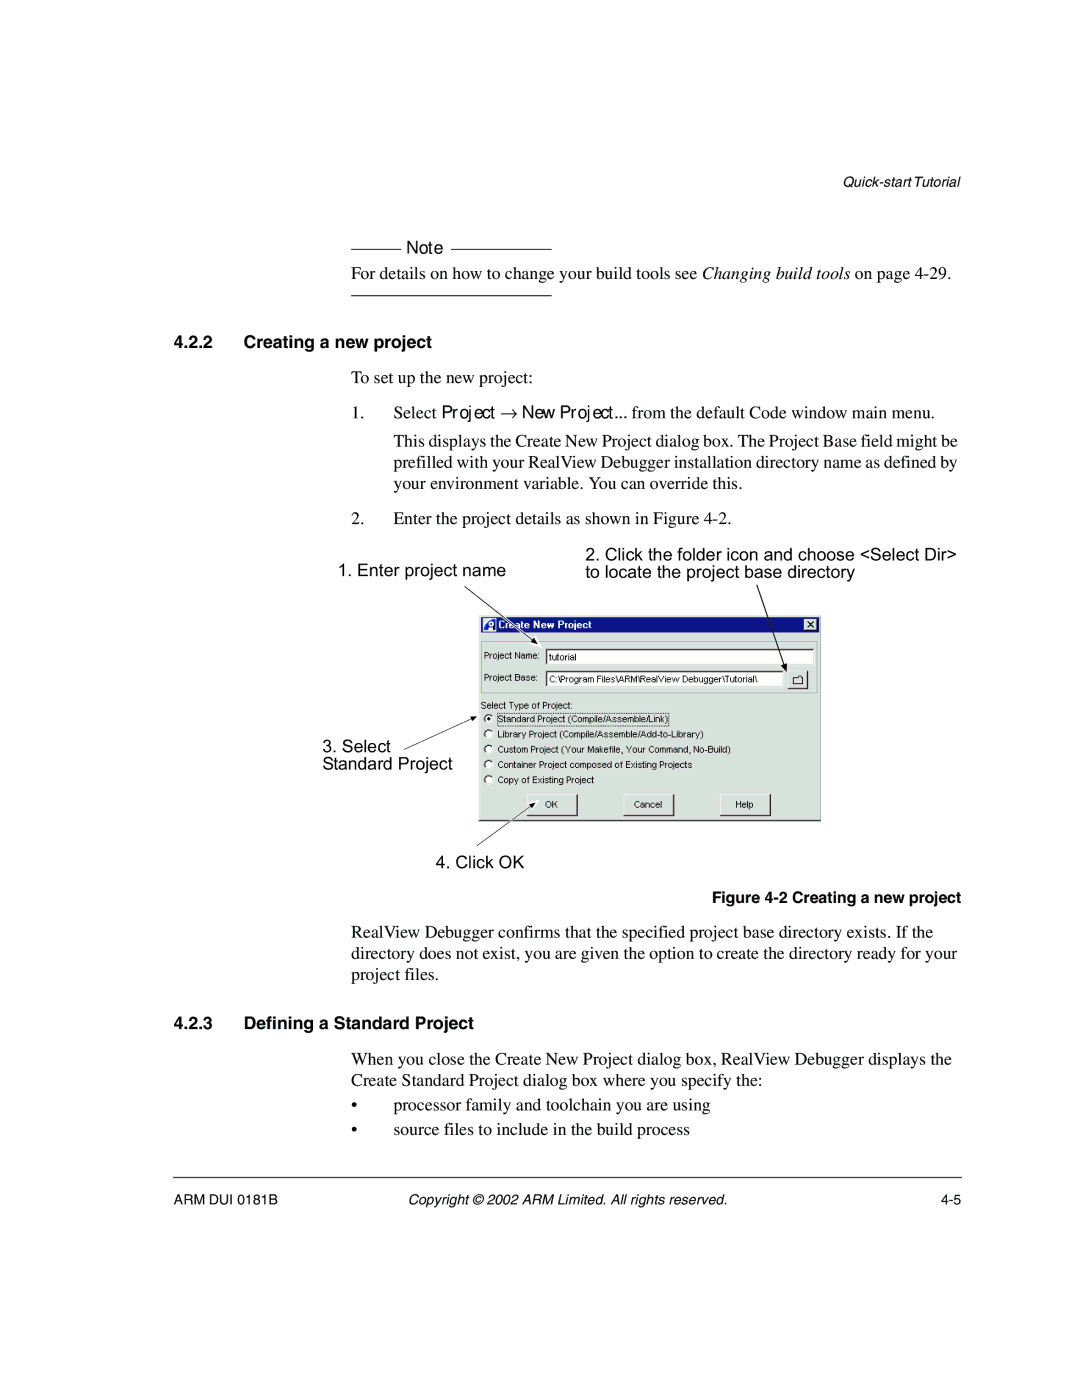
2.Enter the project details as shown in Figure
1. Enter project name | 2. Click the folder icon and choose <Select Dir> |
to locate the project base directory |
3.Select ![]() Standard Project
Standard Project
4.Click OK
Figure 4-2 Creating a new project
RealView Debugger confirms that the specified project base directory exists. If the directory does not exist, you are given the option to create the directory ready for your project files.
4.2.3Defining a Standard Project
When you close the Create New Project dialog box, RealView Debugger displays the Create Standard Project dialog box where you specify the:
•processor family and toolchain you are using
•source files to include in the build process
ARM DUI 0181B | Copyright © 2002 ARM Limited. All rights reserved. |