Chapter 2 Avaya
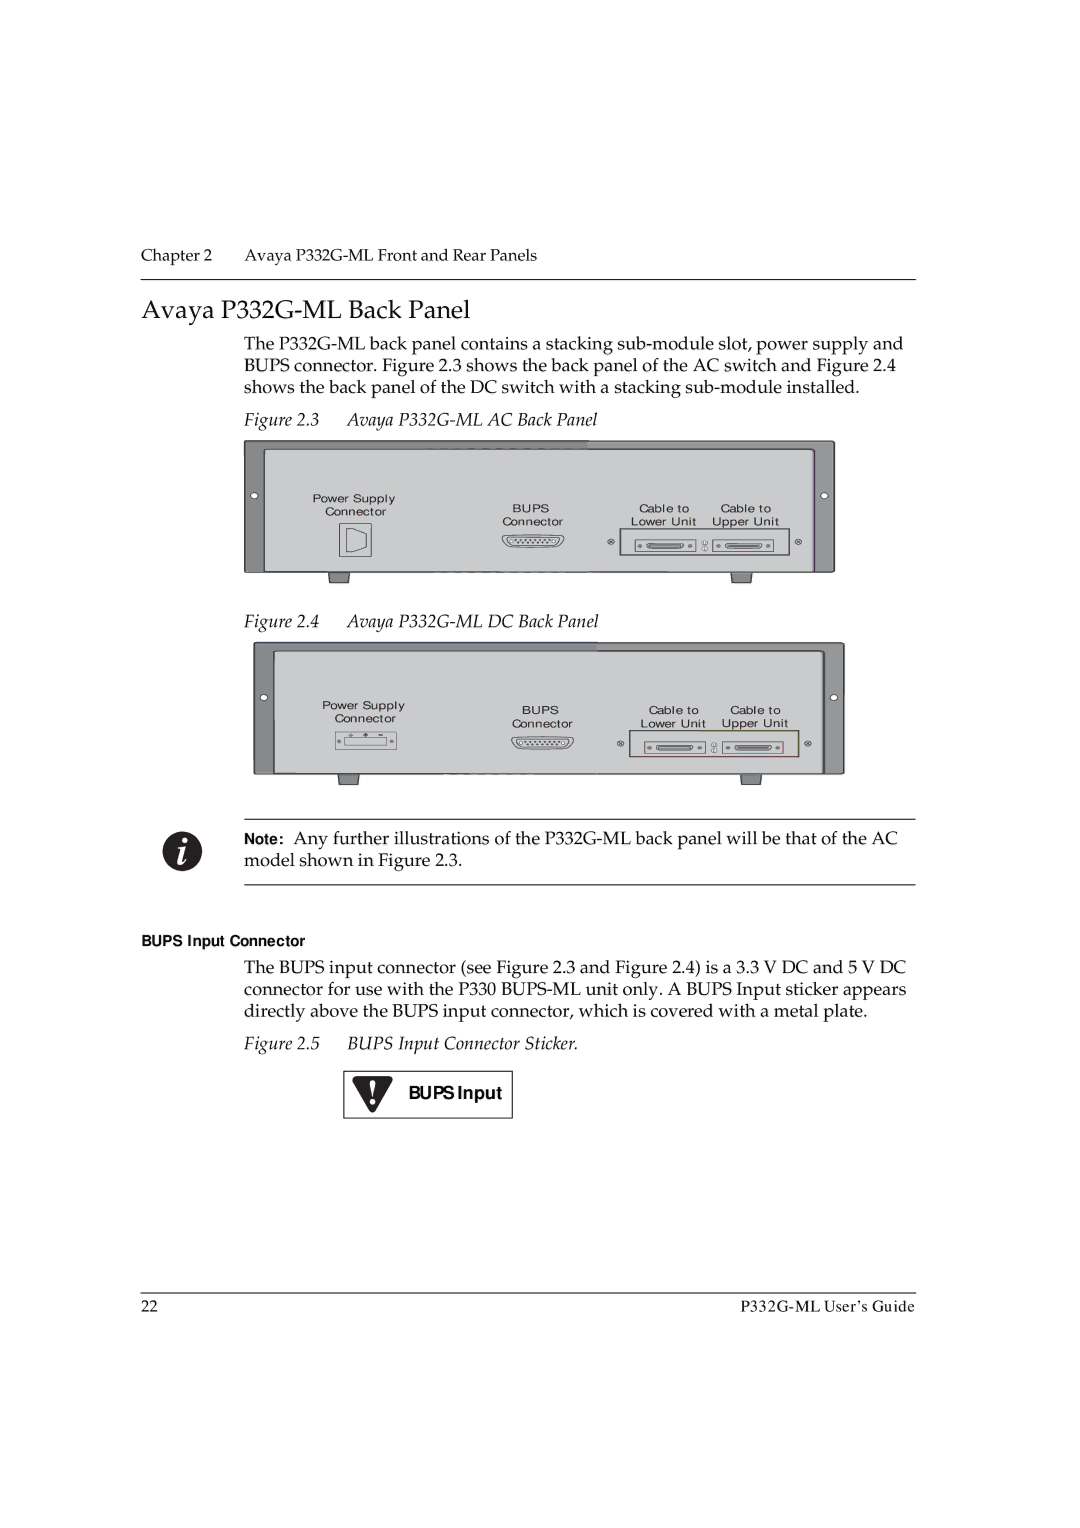
Avaya P332G-ML Back Panel
The
Figure 2.3 Avaya P332G-ML AC Back Panel
Power Supply | BUPS | Cable to | Cable to |
Connector | |||
| Connector | Lower Unit | Upper Unit |
Figure 2.4 Avaya P332G-ML DC Back Panel
Power Supply |
|
|
|
|
|
|
|
|
|
|
|
| BUPS |
|
|
|
| Cable to | Cable to | |||||||||||||||
Connector |
|
|
|
|
|
|
|
|
|
|
|
|
|
|
|
| ||||||||||||||||||
|
|
|
|
|
|
|
|
|
| Connector |
|
|
| Lower Unit | Upper Unit | |||||||||||||||||||
|
|
|
|
|
|
|
|
|
|
|
|
|
|
|
| |||||||||||||||||||
|
|
|
|
|
|
|
|
|
|
|
|
|
|
|
|
|
|
|
|
|
|
|
|
|
|
|
|
|
|
|
|
|
|
|
|
|
|
|
|
|
|
|
|
|
|
|
|
|
|
|
|
|
|
|
|
|
|
|
|
|
|
|
|
|
|
|
|
|
|
|
|
|
|
|
|
|
|
|
|
|
|
|
|
|
|
|
|
|
|
|
|
|
|
|
|
|
|
|
|
|
|
|
|
|
|
|
|
|
|
|
|
|
|
|
|
|
|
|
|
|
|
|
|
|
|
|
|
|
|
|
|
|
|
|
|
|
|
|
|
|
|
|
|
|
|
|
|
|
|
|
|
|
|
|
|
|
|
|
|
|
|
|
|
|
|
|
|
|
|
|
|
|
|
|
|
|
|
|
|
|
|
|
|
|
|
|
|
|
|
|
|
|
|
|
|
|
|
|
|
|
|
|
|
|
|
|
|
|
|
Note: Any further illustrations of the
BUPS Input Connector
The BUPS input connector (see Figure 2.3 and Figure 2.4) is a 3.3 V DC and 5 V DC connector for use with the P330
Figure 2.5 BUPS Input Connector Sticker.
BUPS Input
22 |