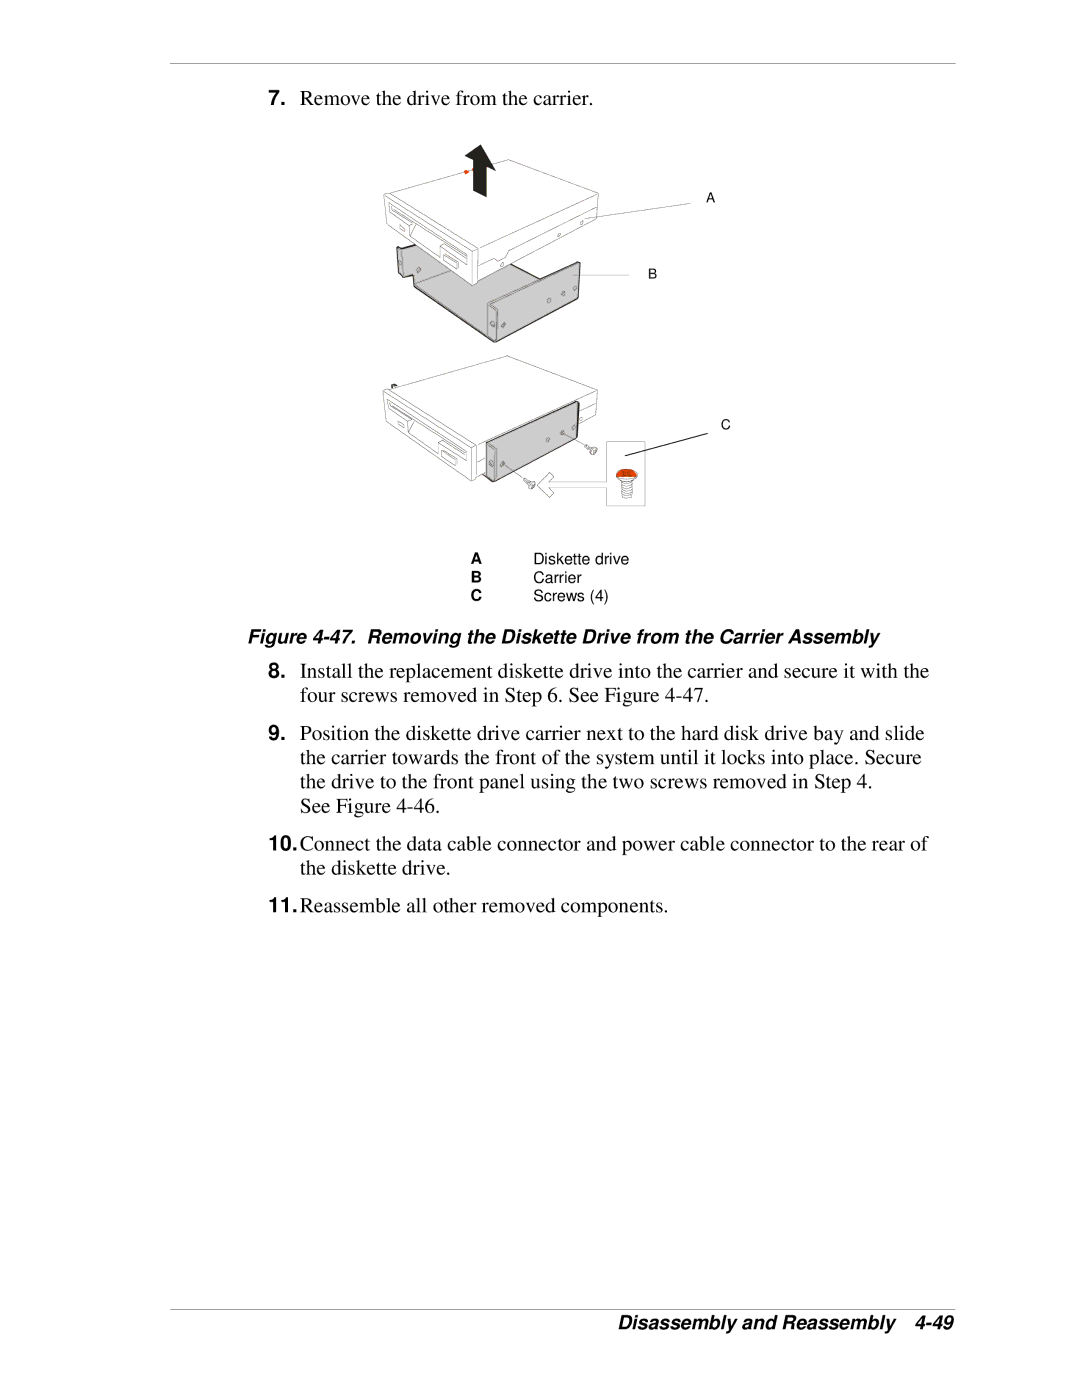
7.Remove the drive from the carrier.
A
B
C
ADiskette drive
BCarrier
CScrews (4)
Figure 4-47. Removing the Diskette Drive from the Carrier Assembly
8.Install the replacement diskette drive into the carrier and secure it with the four screws removed in Step 6. See Figure
9.Position the diskette drive carrier next to the hard disk drive bay and slide the carrier towards the front of the system until it locks into place. Secure the drive to the front panel using the two screws removed in Step 4.
See Figure
10.Connect the data cable connector and power cable connector to the rear of the diskette drive.
11.Reassemble all other removed components.