8.Remove any power supply installed in the system following procedures described earlier it this chapter.
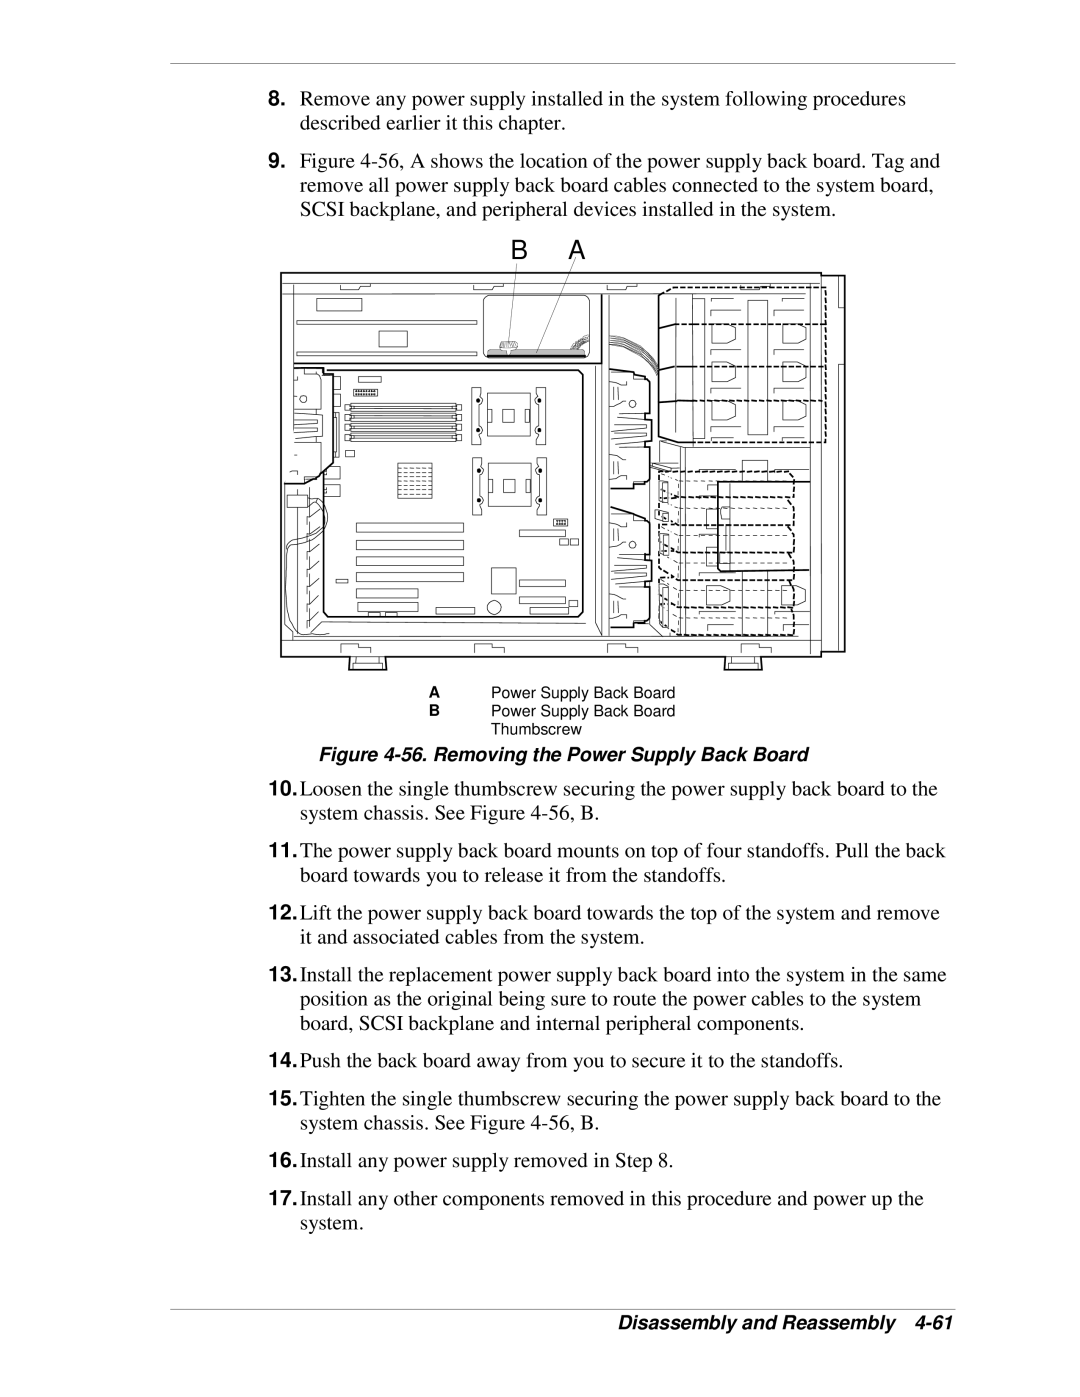
9.Figure 4-56, A shows the location of the power supply back board. Tag and remove all power supply back board cables connected to the system board, SCSI backplane, and peripheral devices installed in the system.
B A
APower Supply Back Board
BPower Supply Back Board Thumbscrew
Figure 4-56. Removing the Power Supply Back Board
10.Loosen the single thumbscrew securing the power supply back board to the system chassis. See Figure
11.The power supply back board mounts on top of four standoffs. Pull the back board towards you to release it from the standoffs.
12.Lift the power supply back board towards the top of the system and remove it and associated cables from the system.
13.Install the replacement power supply back board into the system in the same position as the original being sure to route the power cables to the system board, SCSI backplane and internal peripheral components.
14.Push the back board away from you to secure it to the standoffs.
15.Tighten the single thumbscrew securing the power supply back board to the system chassis. See Figure
16.Install any power supply removed in Step 8.
17.Install any other components removed in this procedure and power up the system.