Removal
NOTE: The disk LED of a defective hard disk drive is amber.
1.Prepare your system for upgrade. See Preparing Your System for Disassembly and Reassembly described earlier in this chapter.
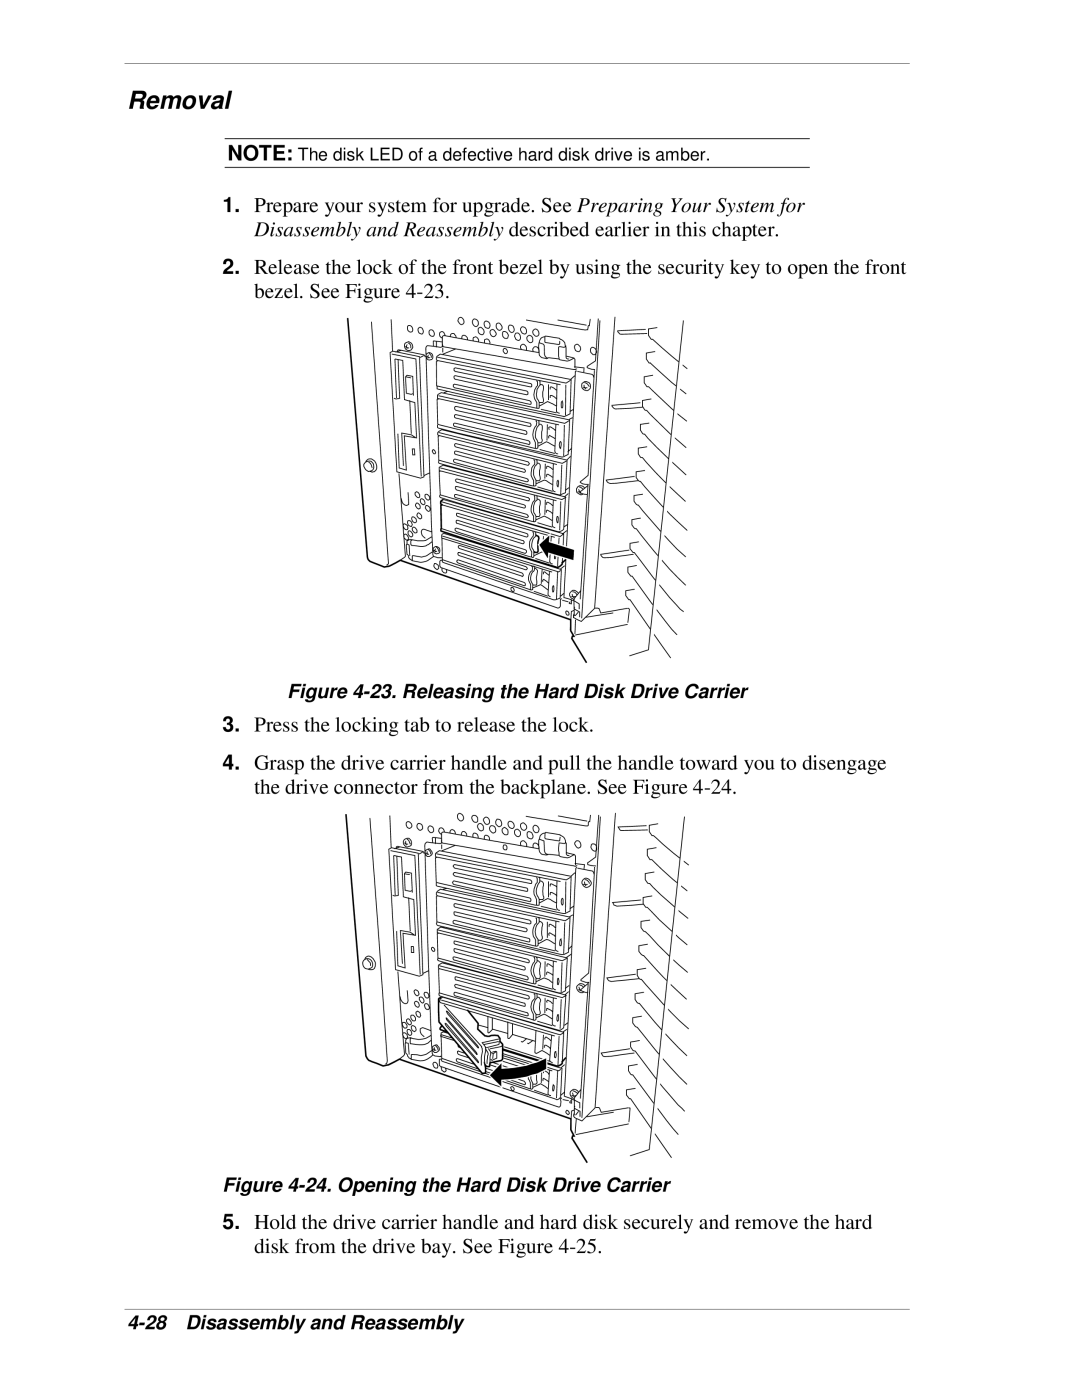
2.Release the lock of the front bezel by using the security key to open the front bezel. See Figure
Figure 4-23. Releasing the Hard Disk Drive Carrier
3.Press the locking tab to release the lock.
4.Grasp the drive carrier handle and pull the handle toward you to disengage the drive connector from the backplane. See Figure
Figure 4-24. Opening the Hard Disk Drive Carrier
5.Hold the drive carrier handle and hard disk securely and remove the hard disk from the drive bay. See Figure
