Hardware Installation
Note: The wireless bridge’s Ethernet port does not support Power over Ethernet (PoE) based on the IEEE 802.3af standard. Do not try to power the unit by connecting it directly to a network switch that provides IEEE 802.3af PoE. Always connect the unit to the included power injector module.
1.Connect the Ethernet cable from the wireless bridge to the
2.Connect a
Note: The
![]()
![]() AC power
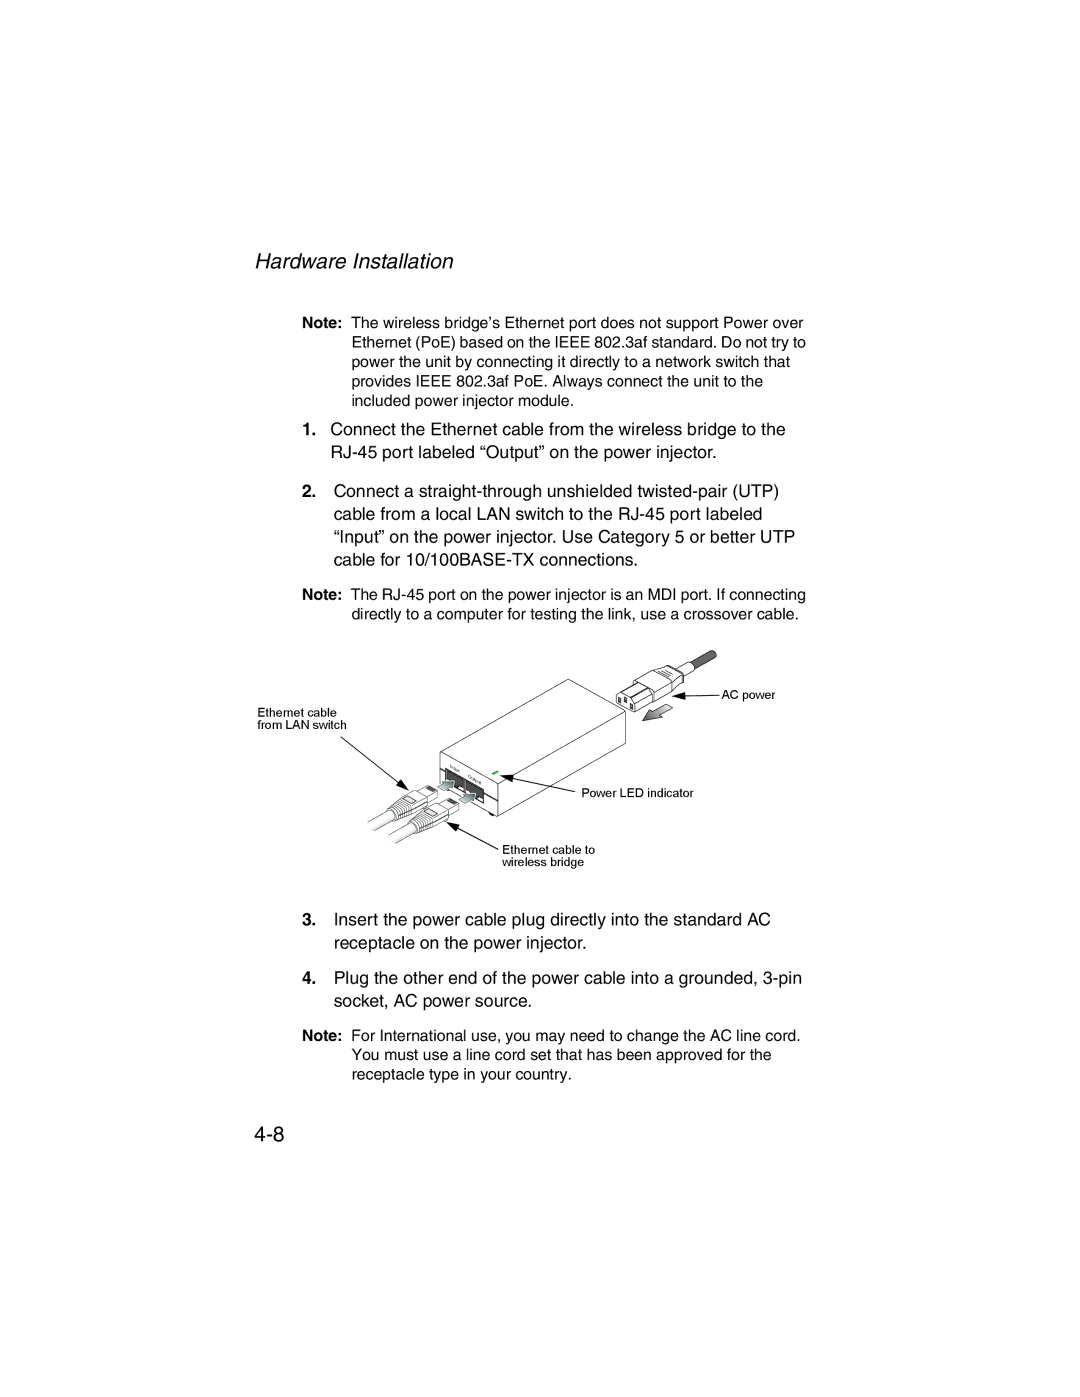
AC power
Ethernet cable from LAN switch
![]() Power LED indicator
Power LED indicator
![]() Ethernet cable to wireless bridge
Ethernet cable to wireless bridge
3.Insert the power cable plug directly into the standard AC receptacle on the power injector.
4.Plug the other end of the power cable into a grounded,
Note: For International use, you may need to change the AC line cord. You must use a line cord set that has been approved for the receptacle type in your country.