Perform each step in sequence:
All steps are required!
1.Load the Tray
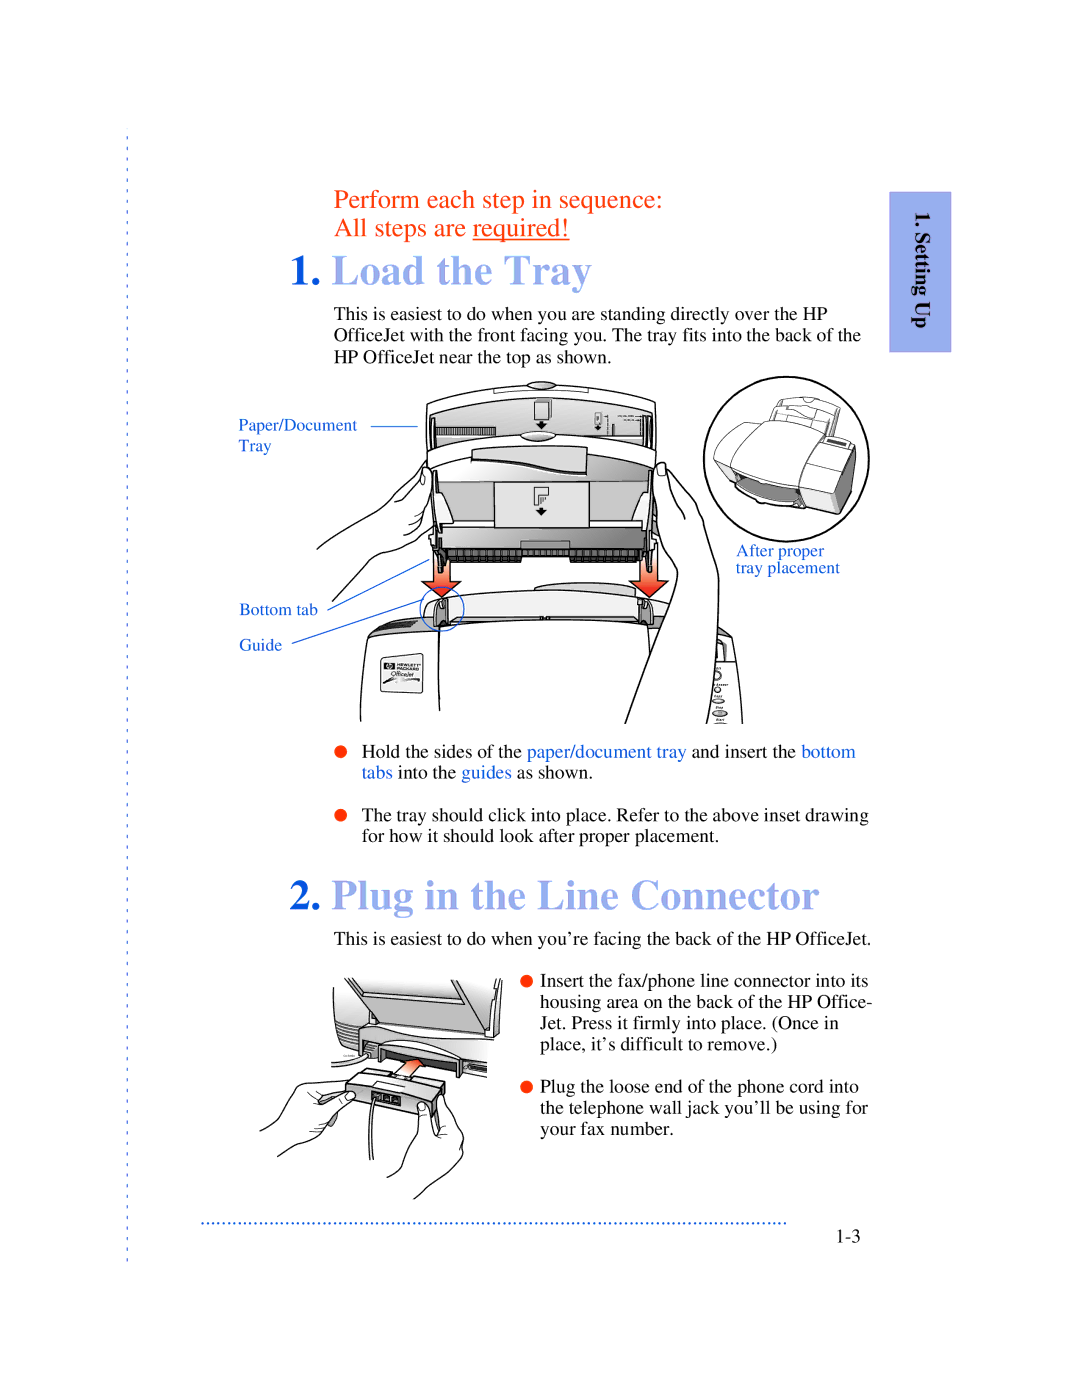
This is easiest to do when you are standing directly over the HP
OfficeJet with the front facing you. The tray fits into the back of the
HP OfficeJet near the top as shown.
Paper/Document |
Tray |
1. Setting Up
After proper tray placement
Bottom tab ![]()
Guide ![]()
●Hold the sides of the paper/document tray and insert the bottom tabs into the guides as shown.
●The tray should click into place. Refer to the above inset drawing for how it should look after proper placement.
2.Plug in the Line Connector
This is easiest to do when you’re facing the back of the HP OfficeJet.
● Insert the fax/phone line connector into its housing area on the back of the HP Office- Jet. Press it firmly into place. (Once in place, it’s difficult to remove.)
● Plug the loose end of the phone cord into the telephone wall jack you’ll be using for your fax number.
...............................................................................................................