●Continue with Step 7, “Install the Software - REQUIRED!”
Shared line with distinctive ring (Case B)
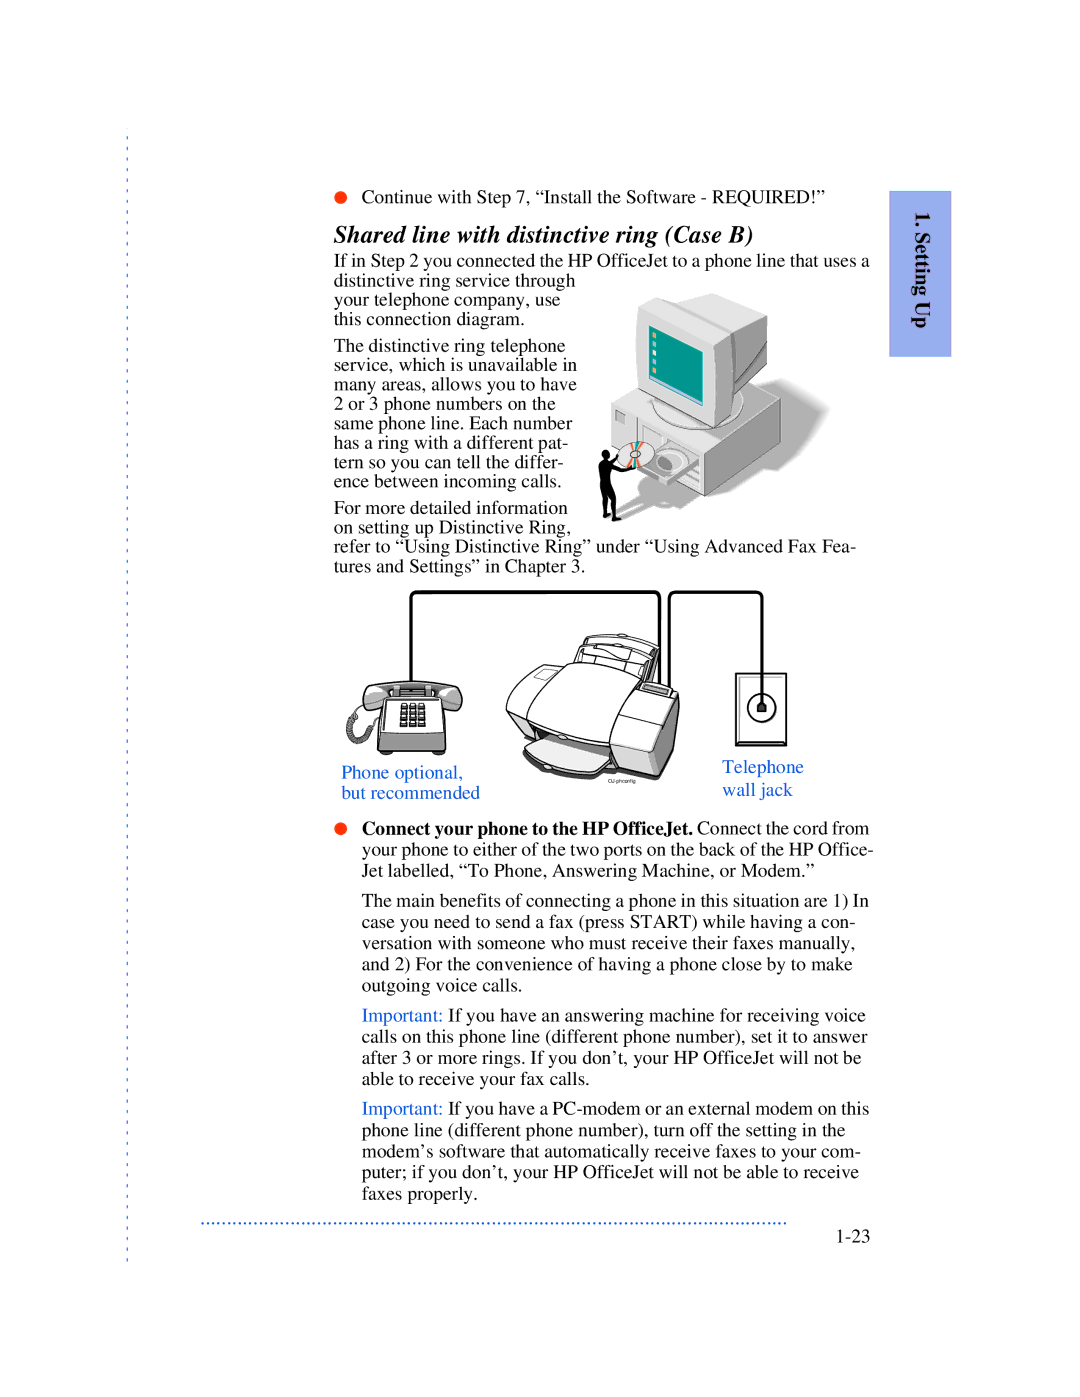
If in Step 2 you connected the HP OfficeJet to a phone line that uses a distinctive ring service through
your telephone company, use this connection diagram.
The distinctive ring telephone service, which is unavailable in many areas, allows you to have
2 or 3 phone numbers on the
same phone line. Each number has a ring with a different pat-
tern so you can tell the differ- ence between incoming calls.
For more detailed information on setting up Distinctive Ring,
refer to “Using Distinctive Ring” under “Using Advanced Fax Fea- tures and Settings” in Chapter 3.
1. Setting Up
Phone optional, but recommended
Telephone wall jack
●Connect your phone to the HP OfficeJet. Connect the cord from your phone to either of the two ports on the back of the HP Office- Jet labelled, “To Phone, Answering Machine, or Modem.”
The main benefits of connecting a phone in this situation are 1) In case you need to send a fax (press START) while having a con- versation with someone who must receive their faxes manually, and 2) For the convenience of having a phone close by to make outgoing voice calls.
Important: If you have an answering machine for receiving voice calls on this phone line (different phone number), set it to answer after 3 or more rings. If you don’t, your HP OfficeJet will not be able to receive your fax calls.
Important: If you have a
...............................................................................................................