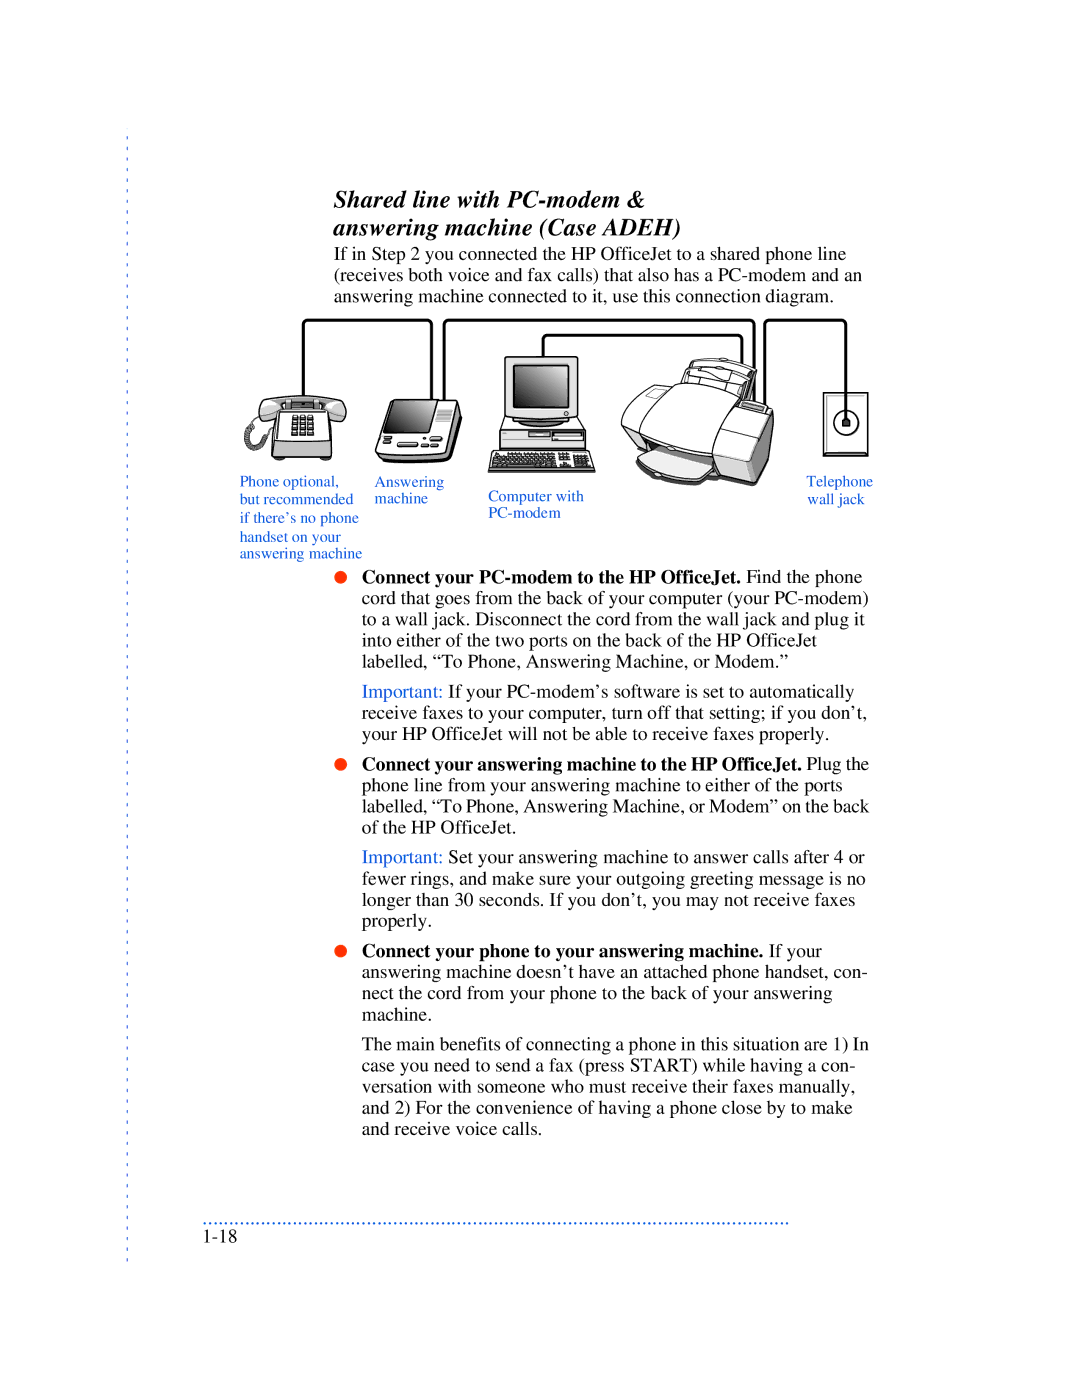
Shared line with PC-modem & answering machine (Case ADEH)
If in Step 2 you connected the HP OfficeJet to a shared phone line (receives both voice and fax calls) that also has a
Phone optional, | Answering | Computer with | Telephone |
but recommended | machine | wall jack | |
if there’s no phone |
|
| |
|
|
| |
handset on your |
|
|
|
answering machine |
|
|
|
●Connect your
Important: If your
●Connect your answering machine to the HP OfficeJet. Plug the phone line from your answering machine to either of the ports labelled, “To Phone, Answering Machine, or Modem” on the back of the HP OfficeJet.
Important: Set your answering machine to answer calls after 4 or fewer rings, and make sure your outgoing greeting message is no longer than 30 seconds. If you don’t, you may not receive faxes properly.
●Connect your phone to your answering machine. If your answering machine doesn’t have an attached phone handset, con- nect the cord from your phone to the back of your answering machine.
The main benefits of connecting a phone in this situation are 1) In case you need to send a fax (press START) while having a con- versation with someone who must receive their faxes manually, and 2) For the convenience of having a phone close by to make and receive voice calls.
...............................................................................................................
