User and
Installation Guide
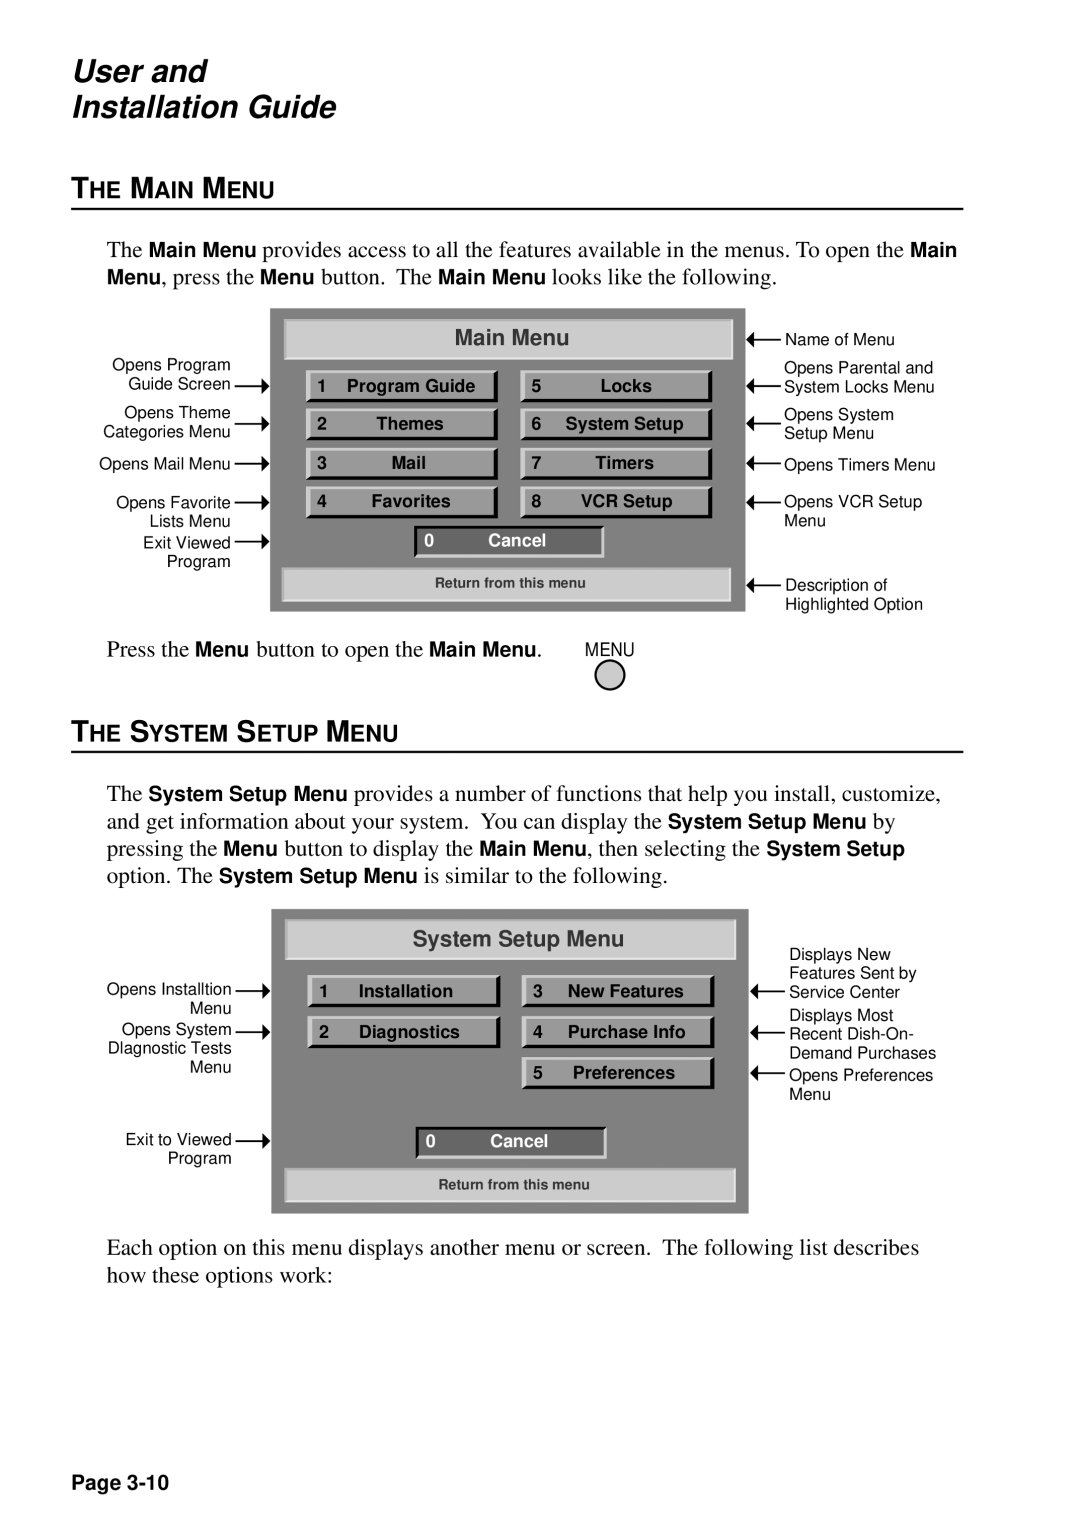
THE MAIN MENU
The Main Menu provides access to all the features available in the menus. To open the Main Menu, press the Menu button. The Main Menu looks like the following.
|
|
|
|
|
| Main Menu |
| ||||
Opens Program |
|
|
|
|
|
|
|
|
| ||
|
|
|
|
|
|
|
|
| |||
Guide Screen |
|
| 1 | Program Guide |
| 5 | Locks |
| |||
|
|
| |||||||||
Opens Theme |
|
|
|
|
|
|
|
|
|
| |
2 | Themes |
| 6 | System Setup |
| ||||||
Categories Menu |
|
| |||||||||
|
|
|
|
|
|
|
|
|
|
|
|
Opens Mail Menu |
|
| 3 |
| 7 | Timers |
| ||||
|
|
| |||||||||
|
|
|
|
|
|
|
|
|
|
|
|
Opens Favorite |
|
| 4 | Favorites |
| 8 | VCR Setup |
| |||
|
|
| |||||||||
Lists Menu |
|
|
|
|
|
|
|
| |||
Exit Viewed |
|
|
|
| 0 | Cancel |
|
|
| ||
|
|
|
|
|
| ||||||
Program |
|
|
|
|
|
|
|
| |||
|
|
|
|
|
| Return from this menu |
| ||||
|
|
|
|
|
| ||||||
Press the Menu button to open the Main Menu. | MENU |
| |||||||||
THE SYSTEM SETUP MENU
![]() Name of Menu
Name of Menu
Opens Parental and ![]() System Locks Menu
System Locks Menu
Opens System
Setup Menu
![]() Opens Timers Menu
Opens Timers Menu
![]() Opens VCR Setup Menu
Opens VCR Setup Menu
![]() Description of Highlighted Option
Description of Highlighted Option
The System Setup Menu provides a number of functions that help you install, customize, and get information about your system. You can display the System Setup Menu by pressing the Menu button to display the Main Menu, then selecting the System Setup option. The System Setup Menu is similar to the following.
System Setup Menu
|
|
|
|
|
|
|
|
|
|
|
| Displays New |
Opens Installtion |
|
|
|
|
|
|
|
|
|
|
| Features Sent by |
|
| 1 | Installation |
| 3 | New Features |
|
| Service Center | |||
|
|
|
| |||||||||
Menu |
|
|
|
|
|
|
|
|
| Displays Most | ||
Opens System |
|
| 2 | Diagnostics |
| 4 | Purchase Info |
|
| Recent | ||
|
|
|
| |||||||||
Dlagnostic Tests |
|
|
|
|
|
|
|
|
| Demand Purchases | ||
Menu |
|
|
|
| 5 | Preferences |
|
| Opens Preferences | |||
|
|
|
|
|
|
|
|
| ||||
Exit to Viewed |
|
|
|
|
|
|
|
|
|
|
| Menu |
|
|
|
|
|
|
|
|
|
|
| ||
|
|
|
| 0 | Cancel |
|
|
|
|
| ||
|
|
|
|
|
|
|
| |||||
Program |
|
|
|
|
|
|
|
|
|
| ||
|
|
|
|
|
|
|
|
|
| |||
Return from this menu
Each option on this menu displays another menu or screen. The following list describes how these options work:
Page