Installing and Wiring Your System | 7 |
Manual Clock Setting |
MANUAL CLOCK SETTING
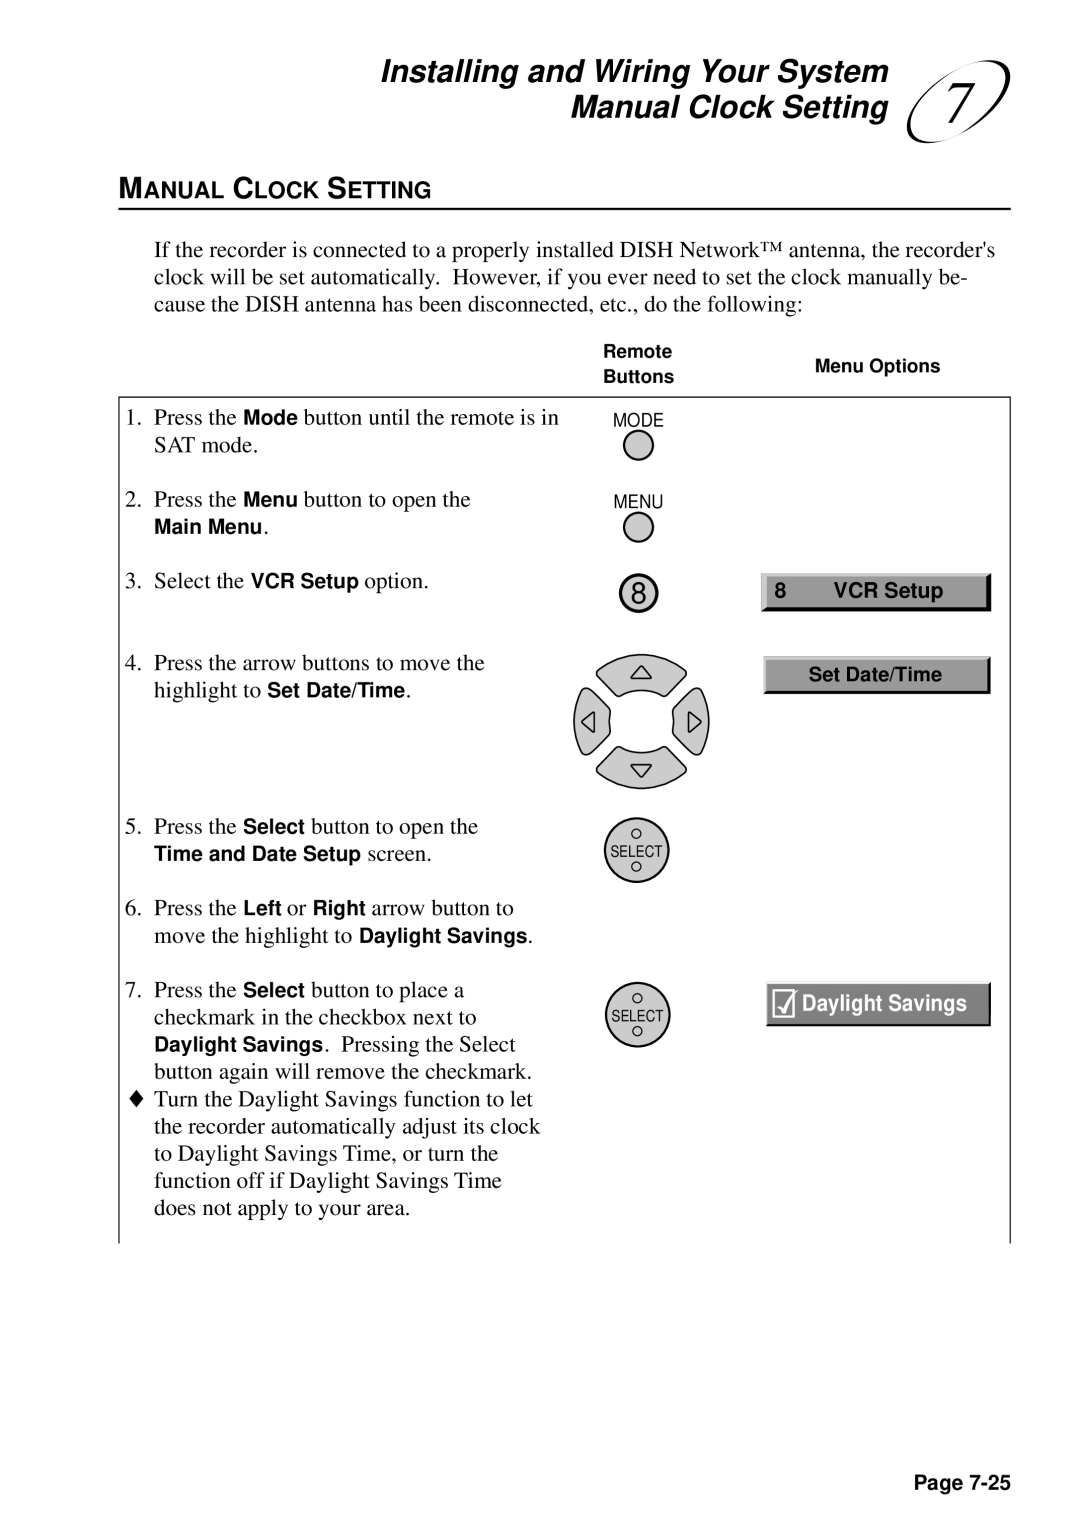
If the recorder is connected to a properly installed DISH Network™ antenna, the recorder's clock will be set automatically. However, if you ever need to set the clock manually be- cause the DISH antenna has been disconnected, etc., do the following:
|
| Remote |
| Menu Options | |
|
| Buttons |
| ||
|
|
|
|
| |
|
|
|
|
|
|
1. | Press the Mode button until the remote is in | MODE |
|
|
|
| SAT mode. |
|
|
|
|
2. | Press the Menu button to open the | MENU |
|
|
|
| Main Menu. |
|
|
|
|
3. | Select the VCR Setup option. | 8 |
|
|
|
8 | VCR Setup |
| |||
|
|
| |||
4. Press the arrow buttons to move the highlight to Set Date/Time.
Set Date/Time
5. | Press the Select button to open the |
|
| Time and Date Setup screen. | SELECT |
6. | Press the Left or Right arrow button to |
|
| move the highlight to Daylight Savings. |
|
7. | Press the Select button to place a | Daylight Savings |
| checkmark in the checkbox next to | |
| SELECT |
Daylight Savings. Pressing the Select button again will remove the checkmark.
♦Turn the Daylight Savings function to let the recorder automatically adjust its clock to Daylight Savings Time, or turn the function off if Daylight Savings Time does not apply to your area.
Page
