Section 6. Replacement Procedures
6.11 Replacing the Label Sensor
The Label Sensor can be removed from the printer to clear label fragments and for service. No critial alignment is required when replacing the sensor.
STEP | PROCEDURE |
1.Switch the printer OFF and disconnect the power cable.
2.Raise the access door and remove (2) screws holding the side cover to the inside frame. Figs.
3.Remove (2) screws holding the side cover to the outside frame. Remove the cover to expose the electronics.
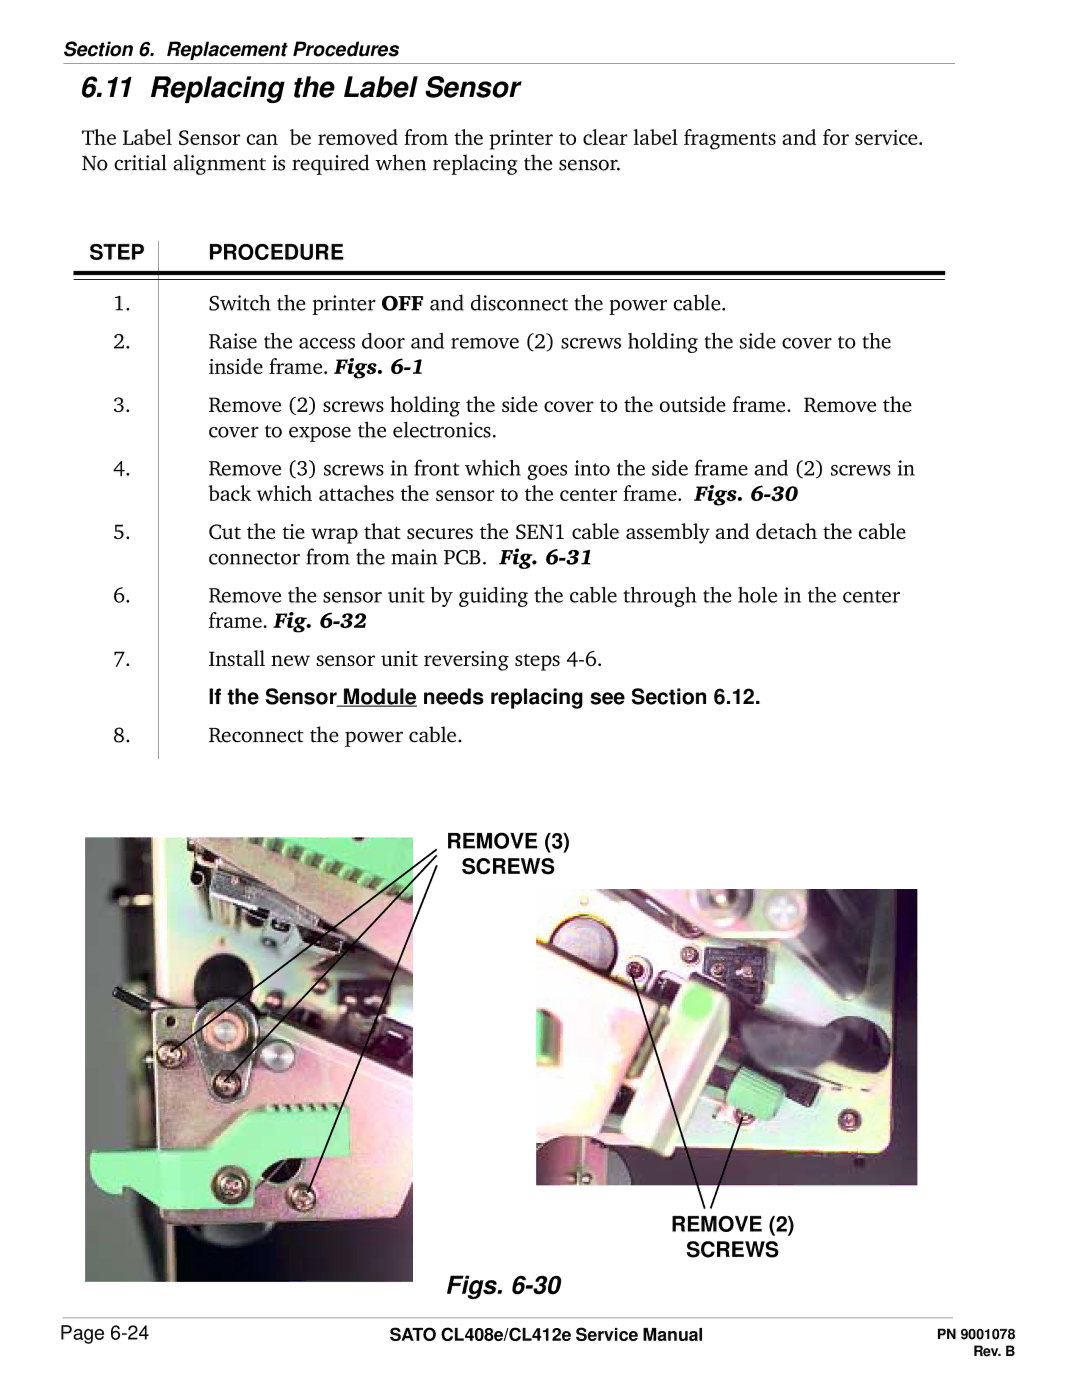
4.Remove (3) screws in front which goes into the side frame and (2) screws in back which attaches the sensor to the center frame. Figs.
5.Cut the tie wrap that secures the SEN1 cable assembly and detach the cable connector from the main PCB. Fig.
6.Remove the sensor unit by guiding the cable through the hole in the center frame. Fig.
7.Install new sensor unit reversing steps
If the Sensor Module needs replacing see Section 6.12.
8.Reconnect the power cable.
REMOVE (3)
SCREWS
REMOVE (2)
SCREWS
Figs. 6-30
Page | SATO CL408e/CL412e Service Manual |