Section 6. Replacement Procedures
6.10 Replacing the Ribbon Motion Sensor
The Ribbon Motion Sensor is easily replaced for service.
STEP | PROCEDURE |
1.Switch the printer OFF and disconnect the power cable.
2.Raise the access door and remove (2) screws holding the side cover to the inside frame. Figs.
3.Remove (2) screws holding the side cover to the outside frame. Remove the cover to expose the electronics.
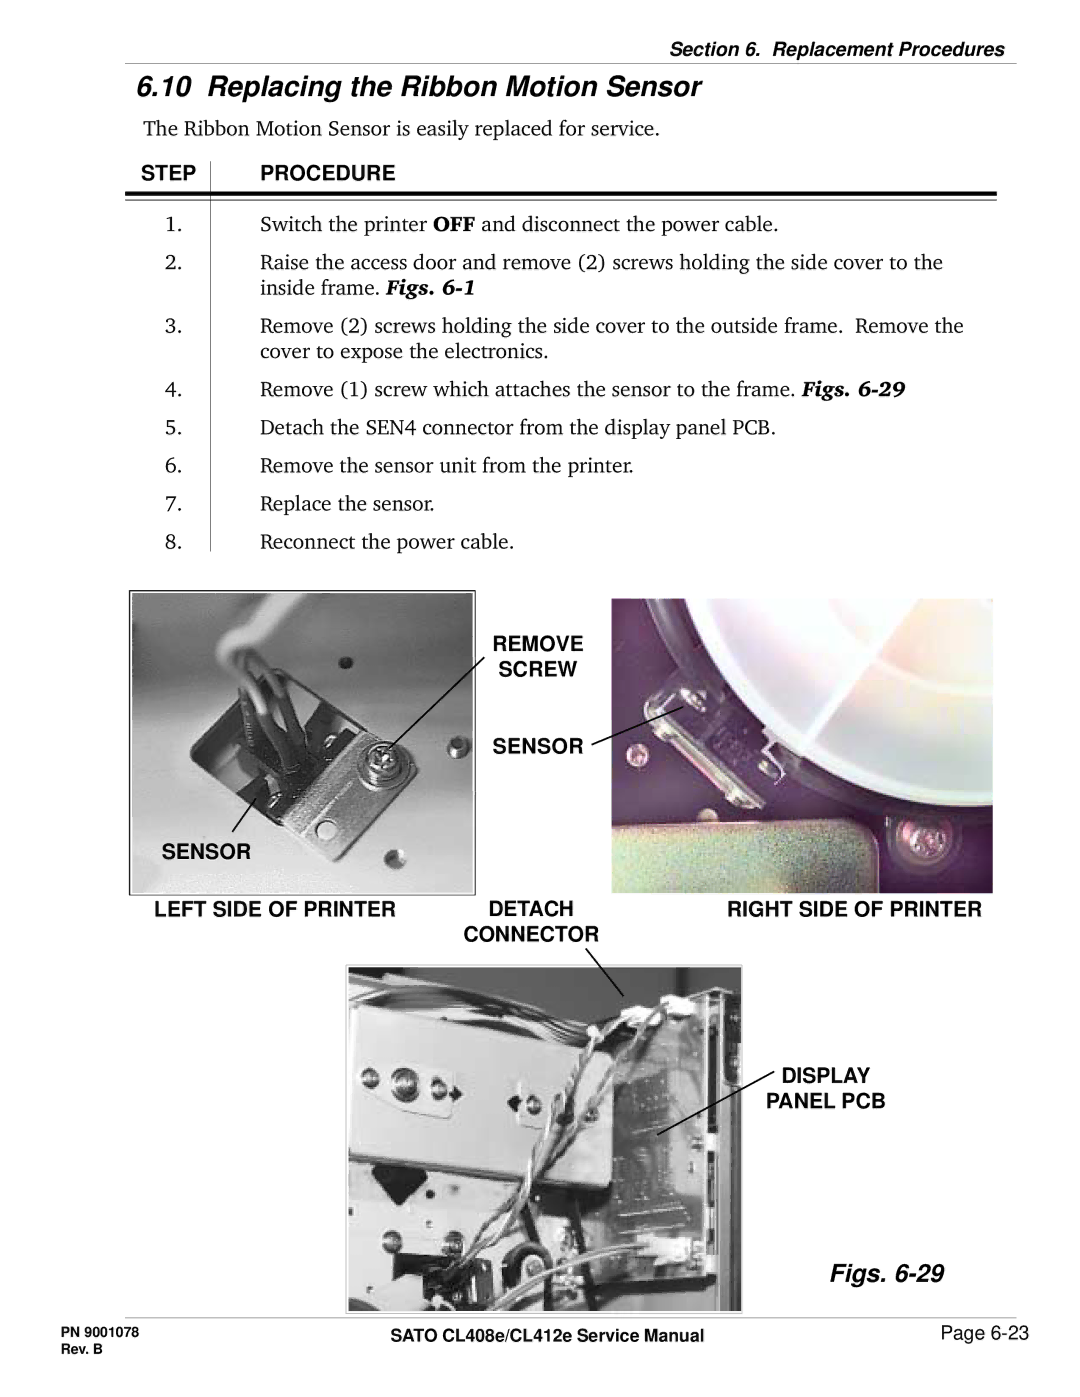
4.Remove (1) screw which attaches the sensor to the frame. Figs.
5.Detach the SEN4 connector from the display panel PCB.
6.Remove the sensor unit from the printer.
7.Replace the sensor.
8.Reconnect the power cable.
REMOVE
SCREW
SENSOR
SENSOR |
|
|
|
|
| DETACH |
|
LEFT SIDE OF PRINTER |
| RIGHT SIDE OF PRINTER | |
| CONNECTOR |
| |
DISPLAY
PANEL PCB
Figs. 6-29
PN 9001078 | SATO CL408e/CL412e Service Manual | Page |
Rev. B |
|
|