Section 2. Configuration
LCD Panel — Maintenance Mode — Factory Mode
This function is used to clear counters and reset the printer's firmware.
This procedure is used after upgrading the flash firmware or installing a new memory module.
STEP | PROCEDURE |
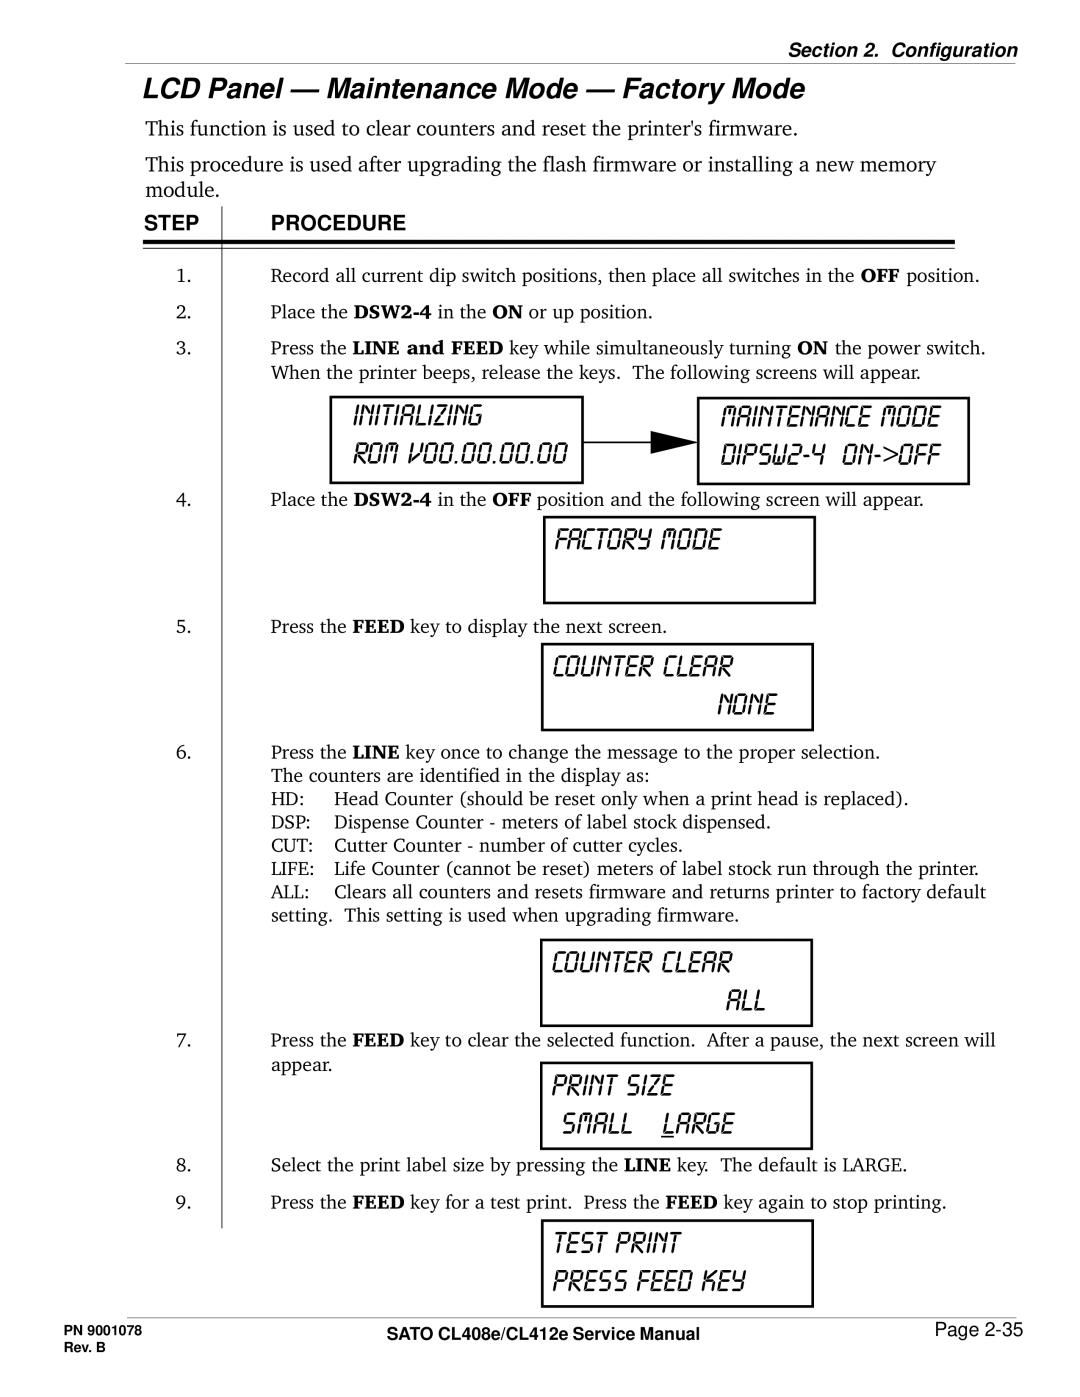
1.Record all current dip switch positions, then place all switches in the OFF position.
2.Place the
3.Press the LINE and FEED key while simultaneously turning ON the power switch. When the printer beeps, release the keys. The following screens will appear.
initializing |
| maintenance mode |
rom v00.00.00.00 |
|
|
| ||
|
|
|
4.Place the
factory mode
5.Press the FEED key to display the next screen.
counter clear none
6.Press the LINE key once to change the message to the proper selection. The counters are identified in the display as:
HD: Head Counter (should be reset only when a print head is replaced).
DSP: Dispense Counter - meters of label stock dispensed.
CUT: Cutter Counter - number of cutter cycles.
LIFE: Life Counter (cannot be reset) meters of label stock run through the printer.
ALL: Clears all counters and resets firmware and returns printer to factory default setting. This setting is used when upgrading firmware.
counter clear all
7.Press the FEED key to clear the selected function. After a pause, the next screen will
appear.
print size small large
8.Select the print label size by pressing the LINE key. The default is LARGE.
9.Press the FEED key for a test print. Press the FEED key again to stop printing.
test print press feed key
PN 9001078 | SATO CL408e/CL412e Service Manual | Page |
Rev. B |
|
|