Commissioning (software)
4.4Creating an axis
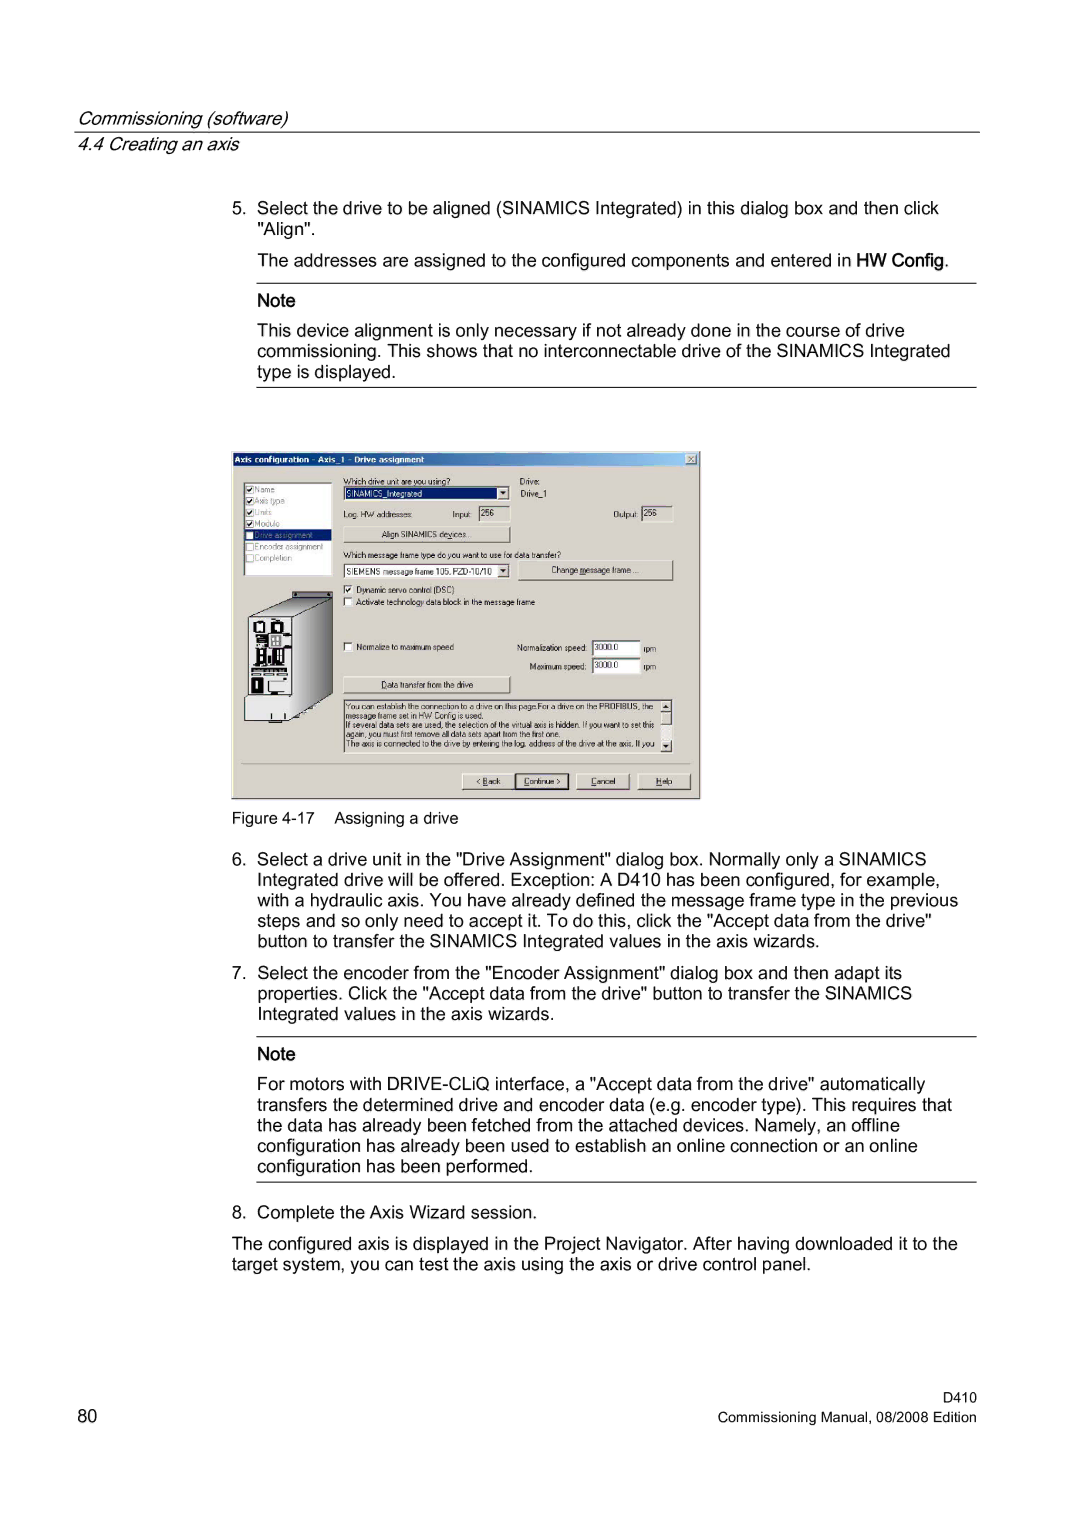
5.Select the drive to be aligned (SINAMICS Integrated) in this dialog box and then click "Align".
The addresses are assigned to the configured components and entered in HW Config.
Note
This device alignment is only necessary if not already done in the course of drive commissioning. This shows that no interconnectable drive of the SINAMICS Integrated type is displayed.
Figure 4-17 Assigning a drive
6.Select a drive unit in the "Drive Assignment" dialog box. Normally only a SINAMICS Integrated drive will be offered. Exception: A D410 has been configured, for example, with a hydraulic axis. You have already defined the message frame type in the previous steps and so only need to accept it. To do this, click the "Accept data from the drive" button to transfer the SINAMICS Integrated values in the axis wizards.
7.Select the encoder from the "Encoder Assignment" dialog box and then adapt its properties. Click the "Accept data from the drive" button to transfer the SINAMICS Integrated values in the axis wizards.
Note
For motors with
8.Complete the Axis Wizard session.
The configured axis is displayed in the Project Navigator. After having downloaded it to the target system, you can test the axis using the axis or drive control panel.
80 | D410 |
Commissioning Manual, 08/2008 Edition |